
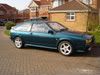
i just bought myself a MK2 Storm in Havanna Brown (84) i believe, paid £600 and its in need of a repair and restore, after doing some research i found some really good advice on looking for rust etc
Alegdly it starts first time and had an engine rebuild before it got sold to my freind and sat on his drive for past 4 years in the great British weather, check the boot at it was extremly damp and signs of rust on wheel arches behind and around body kit. No keys for car so locks need changing,
Bought currently
VW Scirocco Haynes Manual = £17
VW Scirocco Bentley Manual download = £ Free
Singh's Rocco
Forum rules
Section for all vehicle and related projects. Please keep responses pertinent to thread.
Section for all vehicle and related projects. Please keep responses pertinent to thread.
-
go-for-it1

- Posts: 463
- Joined: Mon Apr 06, 2009 10:42 pm
- fill in the right answer: 10
- Location: Blackburn
Re: Singh's Rocco
Where did you get a free download of the Bentley manual from?Delraj wrote: Bought currently
VW Scirocco Haynes Manual = £17
VW Scirocco Bentley Manual download = £ Free
Rob
1990 Mk2 GT2 in Pearlescent green.
2012 BMW 520d M Sport
2013 Golf TDi 140bhp
Member No 1241
-
lewp91

- Posts: 132
- Joined: Tue Mar 29, 2011 5:58 pm
- fill in the right answer: 10
- Location: Warwicksire/Hertfordsire/Essex
- Contact:
Re: Singh's Rocco
i cant link from a file sharing site whilst on the college server but there is a free download somewhere.... its for the mk1 cabby.
-
Delraj
- Posts: 44
- Joined: Mon Feb 13, 2012 8:48 pm
- fill in the right answer: 10
- Location: Huddersfield
Day 1 part 1
My Brother got it off torrents, let us know if someone wants a copy
You do not have the required permissions to view the files attached to this post.
-
Delraj
- Posts: 44
- Joined: Mon Feb 13, 2012 8:48 pm
- fill in the right answer: 10
- Location: Huddersfield
Day 1 part 2
Day 1 part 2
You do not have the required permissions to view the files attached to this post.
-
Delraj
- Posts: 44
- Joined: Mon Feb 13, 2012 8:48 pm
- fill in the right answer: 10
- Location: Huddersfield
Day 1 part 3
Day 1 part 3
You do not have the required permissions to view the files attached to this post.
-
Delraj
- Posts: 44
- Joined: Mon Feb 13, 2012 8:48 pm
- fill in the right answer: 10
- Location: Huddersfield
Day 1 part 4
Day 1 part 3
Thats my first day of work on the car, took the body skirts off and found my wheel arches are rotted pretty badly, i will attempt to cut and weld new arches made by hand, might try creating flared ones or make originals to but the skirts back on. Not sure yet but i am going to strip the car down to the shell so i can do some cleaning and rust repair and cover it in rust protection. I am a novice but i am wanting to test my skills and knowledge and hope to gain alot more in return. luckly for me i bought the car off a close friend who actually owns a car garage and i am allowed to use it to restore my car. Only going to be finding the time to do this at the weekend so its going to be long project so bare with me and follow closely as i will try to update on a weekly basis.
Recap:
Front bumper is off. (that took some effort, certain shows that this car is built like a tank, not like these modern day cars)
Headlights are off.
Front and side body skirts are off. (revealed alot of rust on wheel arches)
Bonnet is off
You do not have the required permissions to view the files attached to this post.
-
MacColl
- Posts: 578
- Joined: Sun Dec 05, 2010 11:47 am
- fill in the right answer: 10
- Location: East Ayrshire, Scotland
Re: Singh's Rocco
Nice, I like the brown metallic with the brown interior, very Retro 
From what I can see the car looks pretty solid. I've got welding to do on my arches/sills and I aim to make as neat a repair as I can by fabrication and welding. I'm keeping standard body kit so it won't be seen. I'm personally not into flaring arches because I reckon it can easily ruin the lines of the car unless of course your going racing
Wheels look interesting like BMW alloys? oh and I am well impressed with those gargantuan axle /monster truck stands
-
Delraj
- Posts: 44
- Joined: Mon Feb 13, 2012 8:48 pm
- fill in the right answer: 10
- Location: Huddersfield
Re: Singh's Rocco
Yh still not sure what iam going to be doing, still on the stripping down phase, the arches definately need repairing. the place i am working on it at is a busy MOT Garage so its hassle to use there car lifters even though they have 3 of them, especially considering i dont have a key for the car and the steering lock is on. I am open to feedback and if anybody knows of any tips and tricks and what to look out for on this particular model of car it would be really appreciated. This project is being video recordered aswell so there will be a fast playback movie at the end i hope.
-
Delraj
- Posts: 44
- Joined: Mon Feb 13, 2012 8:48 pm
- fill in the right answer: 10
- Location: Huddersfield
Day 2 part 1
Beginning of Day 2, its only on 3 axle stands now resting on something more solid other than the wishbones.
Started from the back this time to remove more stuff, so thats the rear lights comming off.
Rear bit of Exhaust snapped off as it was rusted at the exhaust muffler.
Knocking off the exhaust resonator then it falls off.
Trying to prise away exhaust manifold from engine bay. Turned the exhaust manifold pipe around to get it out. Exhaust manifold now easily pulled out Unplug and unbolted horn assembly. Screwing off fuel filter rubber pipe from metal pipe going towards engine. Now the fuel is pouring out of the tank, was not sure how much was in it.
Trying to prise away exhaust manifold from engine bay. Turned the exhaust manifold pipe around to get it out. Exhaust manifold now easily pulled out Unplug and unbolted horn assembly. Screwing off fuel filter rubber pipe from metal pipe going towards engine. Now the fuel is pouring out of the tank, was not sure how much was in it.
You do not have the required permissions to view the files attached to this post.
-
Delraj
- Posts: 44
- Joined: Mon Feb 13, 2012 8:48 pm
- fill in the right answer: 10
- Location: Huddersfield
Day 2 part 2
Attach pipe to petrol tank pipe to syphon off petrol.
Syphon off the petrol, must of had a good 4 litres.
Not a good or focused picture but this is the fuel pump motor, Yellow and Red wire on the left and Brown wire on the right, took this picture for re assembly.
Fuel pump and fuel filter hanging down off car resting on a pipe of some sort, i think its the fuel overflow.
This is the fuel pump and fuel filter comming off together.
Couldnt think of what next to do so i drained the engine oil.
Taking drivers side rear wheel off.
Drivers side rear wheel off.
Taking passenger side rear wheel off.
Passenger side rear wheel off.
You do not have the required permissions to view the files attached to this post.
-
Delraj
- Posts: 44
- Joined: Mon Feb 13, 2012 8:48 pm
- fill in the right answer: 10
- Location: Huddersfield
Re: Singh's Rocco
Front end currently
Passenger side top of wheel arch rust.
Passenger side bottom of wheel arch rust, dont know how i am going to plug this hole.
Passenger side skirt under door, rusty hole which i think is where the body kit skirt is meant ot secure to.
Passenger side back body panel near rear wheel arch.
Passenger side back of rear wheel arch.
Passenger side front of rear wheel arch.
Rear end currently, i quite like this as it is, looks very racey, redirecting exhaust pipes throught the bumper bracket would look awesome.
Fuel filler neck was rusted and out now.
Fuel tank with no fuel filler neck.
You do not have the required permissions to view the files attached to this post.
-
the edmundator
- Posts: 2928
- Joined: Wed Apr 01, 2009 7:34 pm
- fill in the right answer: 10
- Location: BEDFORD
- Contact:
Re: Singh's Rocco
The same way you're going to sort all of that rust out: by cutting back to good metal and welding in new sections.Delraj wrote:dont know how i am going to plug this hole.
There were some rear wheelarch repair panels being made by a chap in Holland (might have been Blueshark), if these are still available they're probably the best option, otherwise you might find some good arches you could cut out of a scrap shell to make repair sections. Look at some of MarkH's resto threads for examples of how to do this on a mk2 (this is probably the best one to start with: http://www.sciroccoregisterforum.co.uk/ ... f=19&t=914).
Register Member 829
--
1980 (1976) Mk1 Junior Cup Replica
1987 MK2 GTX
--
1980 (1976) Mk1 Junior Cup Replica
1987 MK2 GTX
-
Delraj
- Posts: 44
- Joined: Mon Feb 13, 2012 8:48 pm
- fill in the right answer: 10
- Location: Huddersfield
Re: Singh's Rocco
Where the fuel pump and filter was.
Metal Fuel pipes going to engine hanging which are completely rusted and useless.
Exhaust section gone.
The rusted exhaust, see the snapped off Muffler.
clearer picture of where the exhaust was.
Again where Exhaust was and the gearbox linkage.
Void where exhaust went over the top of chassis.
Empty area under boot where the Muffler was.
Backend of the car currently.
Front of the car currently.
You do not have the required permissions to view the files attached to this post.