Page 10 of 11
Re: Eefy's White Scala
Posted: Mon Oct 14, 2013 12:50 pm
by eefy
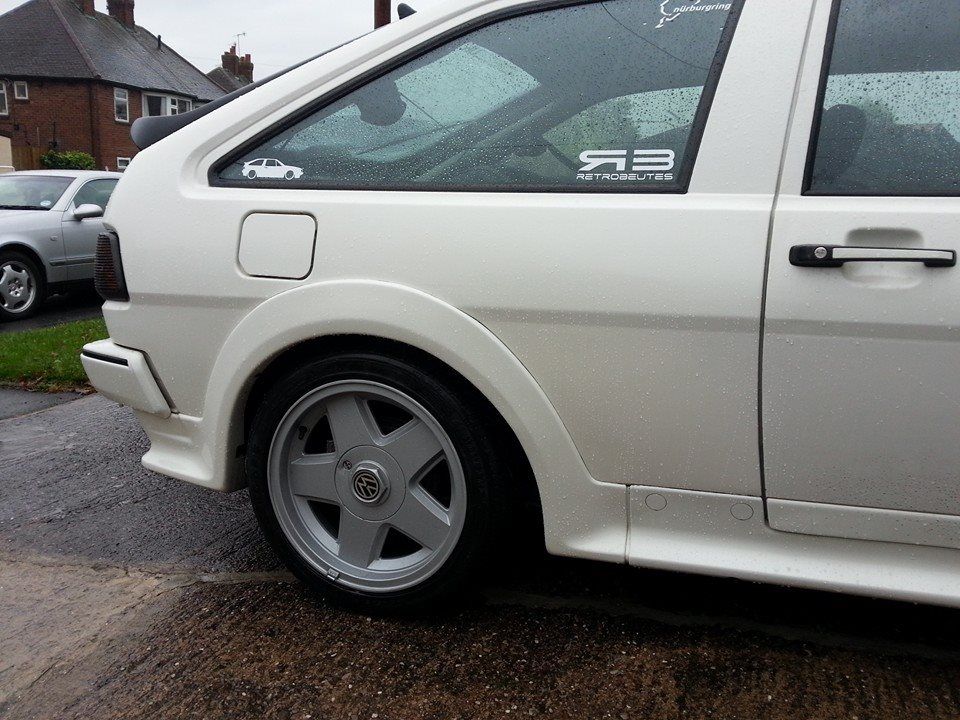
Well the lads (Markh) done good, all finished and picked up last night, heres a few more pics of the work-
Undercoat-
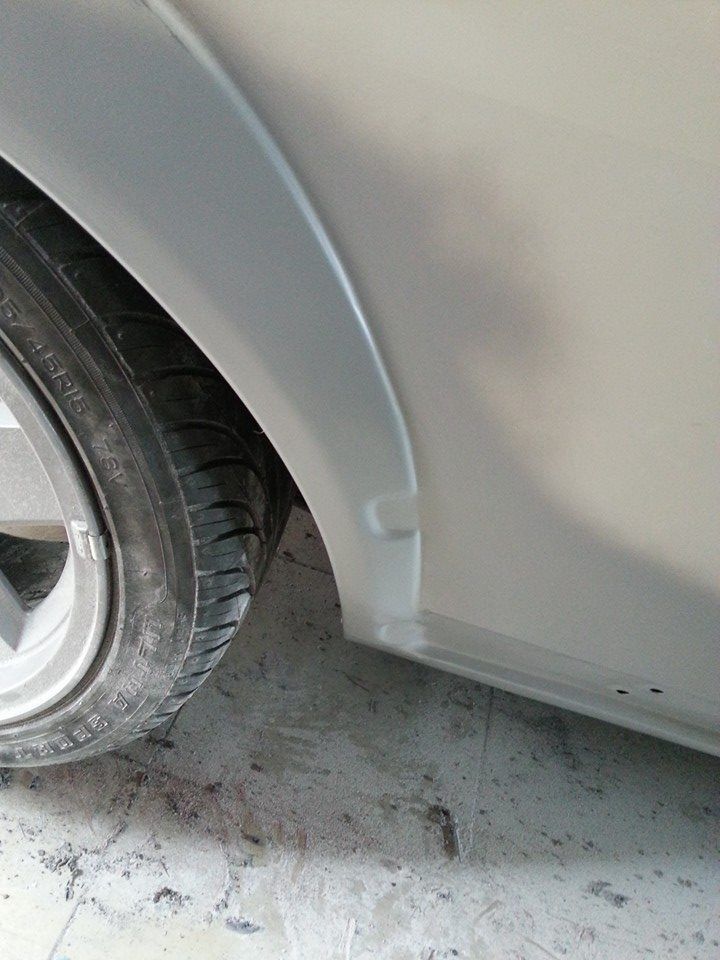
Paint-
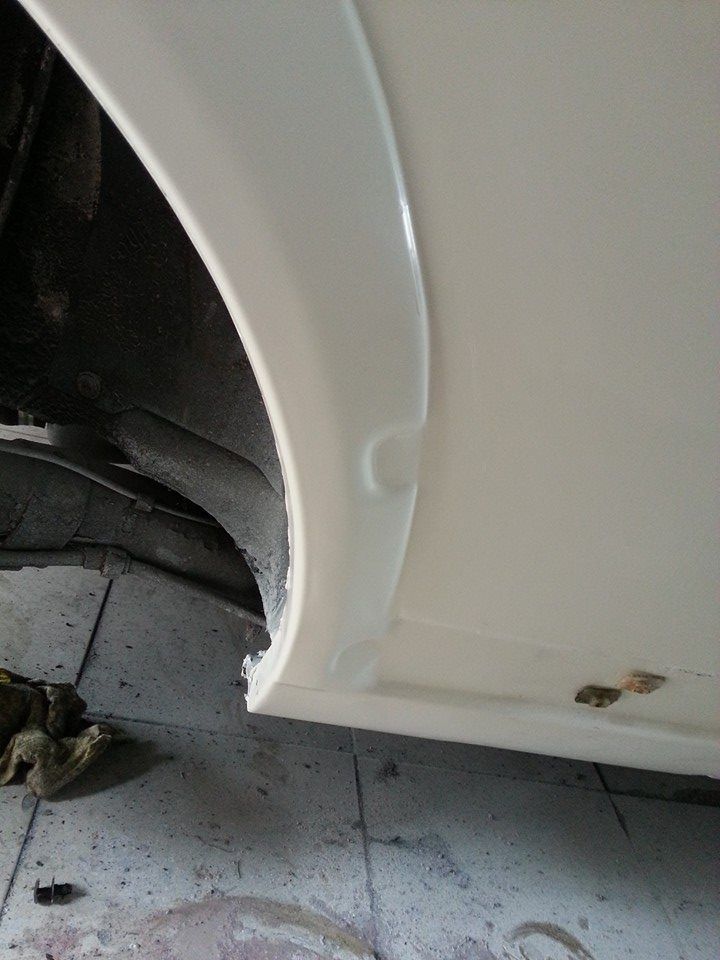
And back together-
Oh and that inner boot repair for the fuel neck bracket-
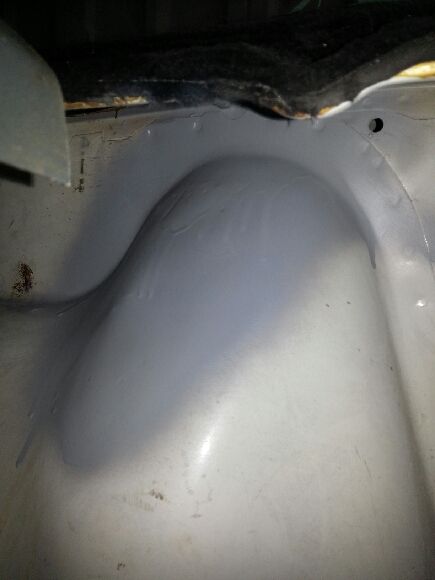
It was top coated and I’ll get a pic of it this weekend :)
Awesome job and I’m very happy with it all, however the new that the rear valance also needs work well hmmm I suppose we don’t drive these things just for the pleasure more the enjoyment of keeping em on the road
Re: Eefy's White Scala
Posted: Mon Oct 14, 2013 2:20 pm
by mark1gls
Looks a great job there, now put some waxoyl or simular on the inside of that wheel arch lip before the salt hits the road in the winter then give the arches a good clean in the spring to keep the rust from coming back.
Re: Eefy's White Scala
Posted: Mon Oct 21, 2013 11:58 am
by MikeH
Tidy!
Re: Eefy's White Scala
Posted: Tue Dec 31, 2013 4:35 pm
by eefy
Re: Eefy's White Scala
Posted: Tue Dec 31, 2013 5:07 pm
by ianaudia4
They look good mate.
Re: Eefy's White Scala
Posted: Mon Jan 27, 2014 8:25 am
by eefy
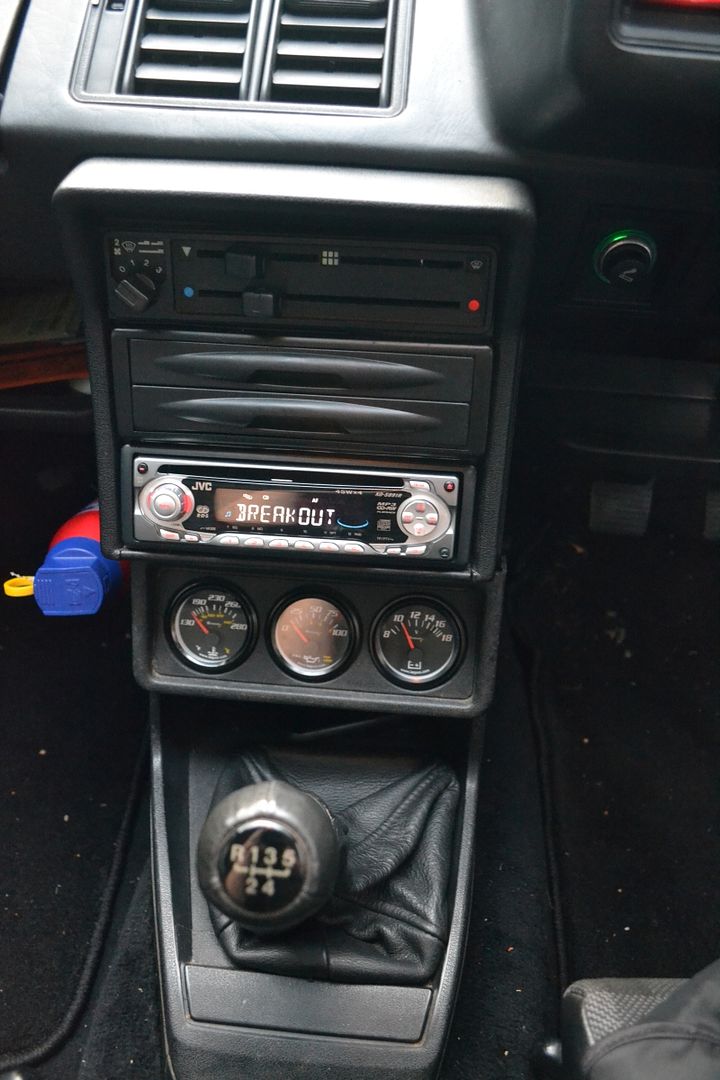
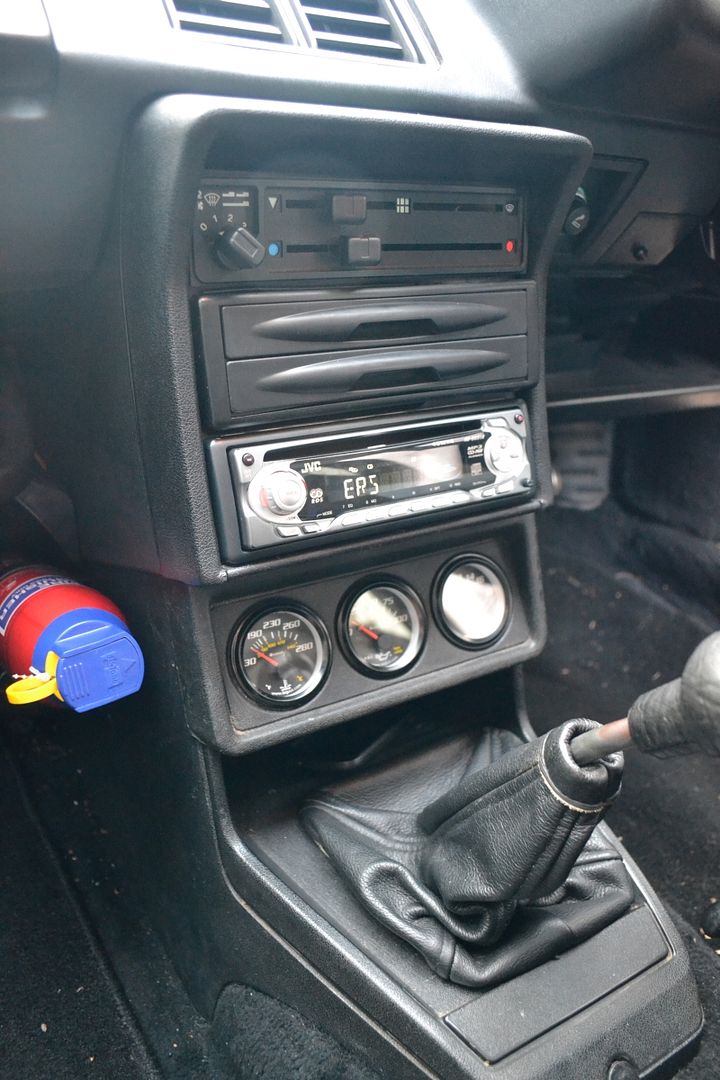
Well over the last few weeks I’ve finally fitted the triple gauge kit, well 2/3rds of em anyway. First off getting the original lower centre console in or out without removing the seats is nearly impossible unless you cut the rear metal brace free, then it required mots of swearing and removal of virtually everything except the top dash!!!!
The voltmeter was a really easy fit, take out the fuse box connect to one of the free blade connectors on the right hand “negative” side of the box and then earth it to the round earthing block job done ;)
The next job though was much more difficult, the oil pressure gauge. I had already bought an adaptor so that I could I could retain the oil pressure warning buzzer but this was quiet big. So much so, and after several brews and “test fits” meant I had to swap round the oil temperature and pressure sensors on the engine to give me enough room to fit them. Even then it require the top of the dizzy being remove and copper washer spacers to ensure the second side connector screw thread ended up facing to the front to the front of the car so it could be used.
This all in it was tome to drill through the bulkhead, this had to be on the driver’s side as it offered more room, I carefully measure “with eye” to the passenger side of the other capillary pipe and drilled through, looked in the engine bay and for the life of me I couldn’t find the hole. Then I saw it right through the wiring loom!!!!!! A brew to calm down later I went out to see the damage, removing the outer black rap to reveal the wires, thankfully I’d only shaved a few of the wires, none were broken so I taped them up and alls working for now. Hooking up the pressure gauge was straight forward then, the only thing I need to do is get it out abit more to bleed the air out of it but all seems to be working.
Now I did say I only got 2/3rds working, the temperature gauge came pre-assembled with the sender already attached, and the addition of a fitting kit. Unfortunately the screw threads for both the oil and water temperature sensors are only 10mm, the screw thread on the sensor was over 13mm. currently its not connected so I’ll be on the lookout for a replacement. It’s a shame as the kit I got was really good value for about £55, still we live and learn. Oh and the lights are a yellow, they were hooked up to the light that originally lit up the ashtray ;)
All just needs a cleanup and some back to black
Re: Eefy's White Scala
Posted: Fri Jan 31, 2014 2:06 pm
by jond
Great work there any chance of some piccys of where you connected the voltmeter to the fuse box i am thinking of fitting one in mine bought a digital one off fleabay 2 wires red black just unsure where to fit the positive (red) thanks
Re: Eefy's White Scala
Posted: Fri Jan 31, 2014 3:19 pm
by eefy
knew i should have taken some!!!!!
To be honest its straight forward when you see it, remove fuse box (undo the single screw to the front right, then just lift the whole box out by lifting it up and over were it sits), to the right of the box you'll see 2 round metal things about an inch in diameter then have spade connections all around their diameter, there should be some empty one. This it the earth.
For the live you'll need to look at the bottom of the fuse box, the live feed comes in on the left (red side) and earths for a better term on the right side (brown). When you see it you'll know what I mean. On the far right brown side toward the back of the fuse box on the bottom there are a few spare spade connectors. These are switch live and only come on with the ignition, the ones on the left, red side are permanent live. Simply attach a wire to the spade connector on the right, browm, bottom side of the fuse box. Thats it, literally took me 15mins to hook it up, including cutting down the wires and adding the connectors to both sides :)
I'll see if the fuse box will come out easily with the lower dash parts in, is so I'll try and get a pic this weekend.
Re: Eefy's White Scala
Posted: Mon Mar 03, 2014 8:47 am
by eefy
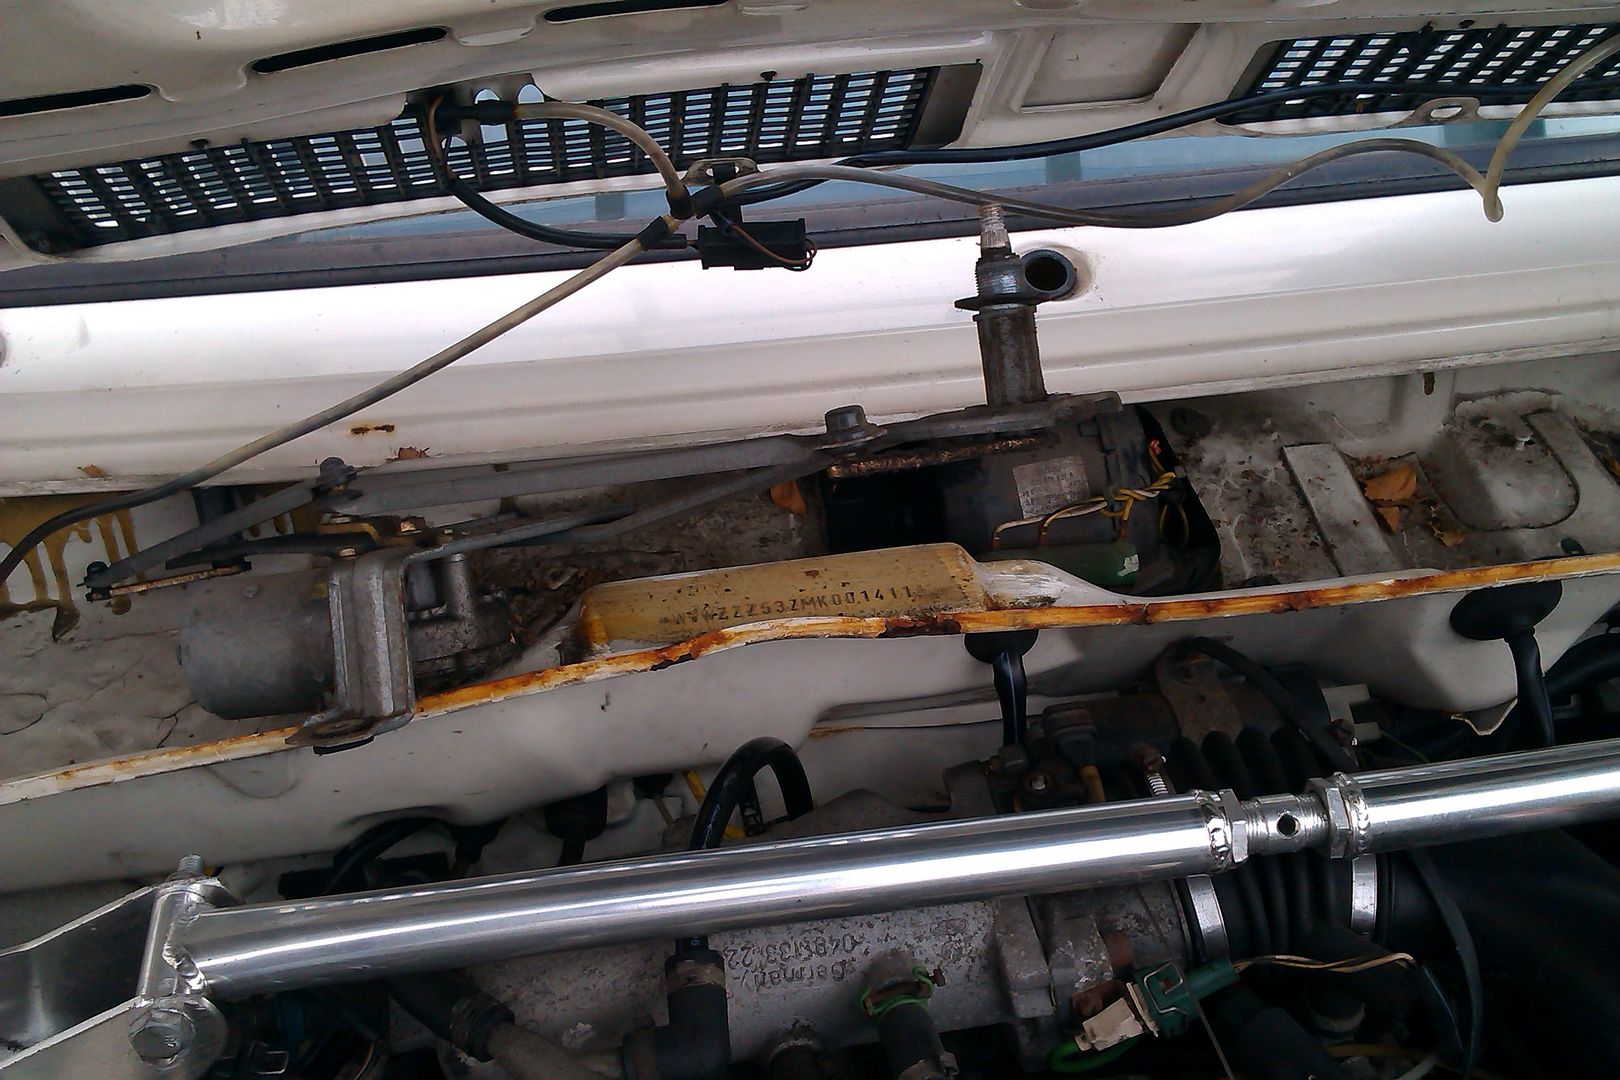
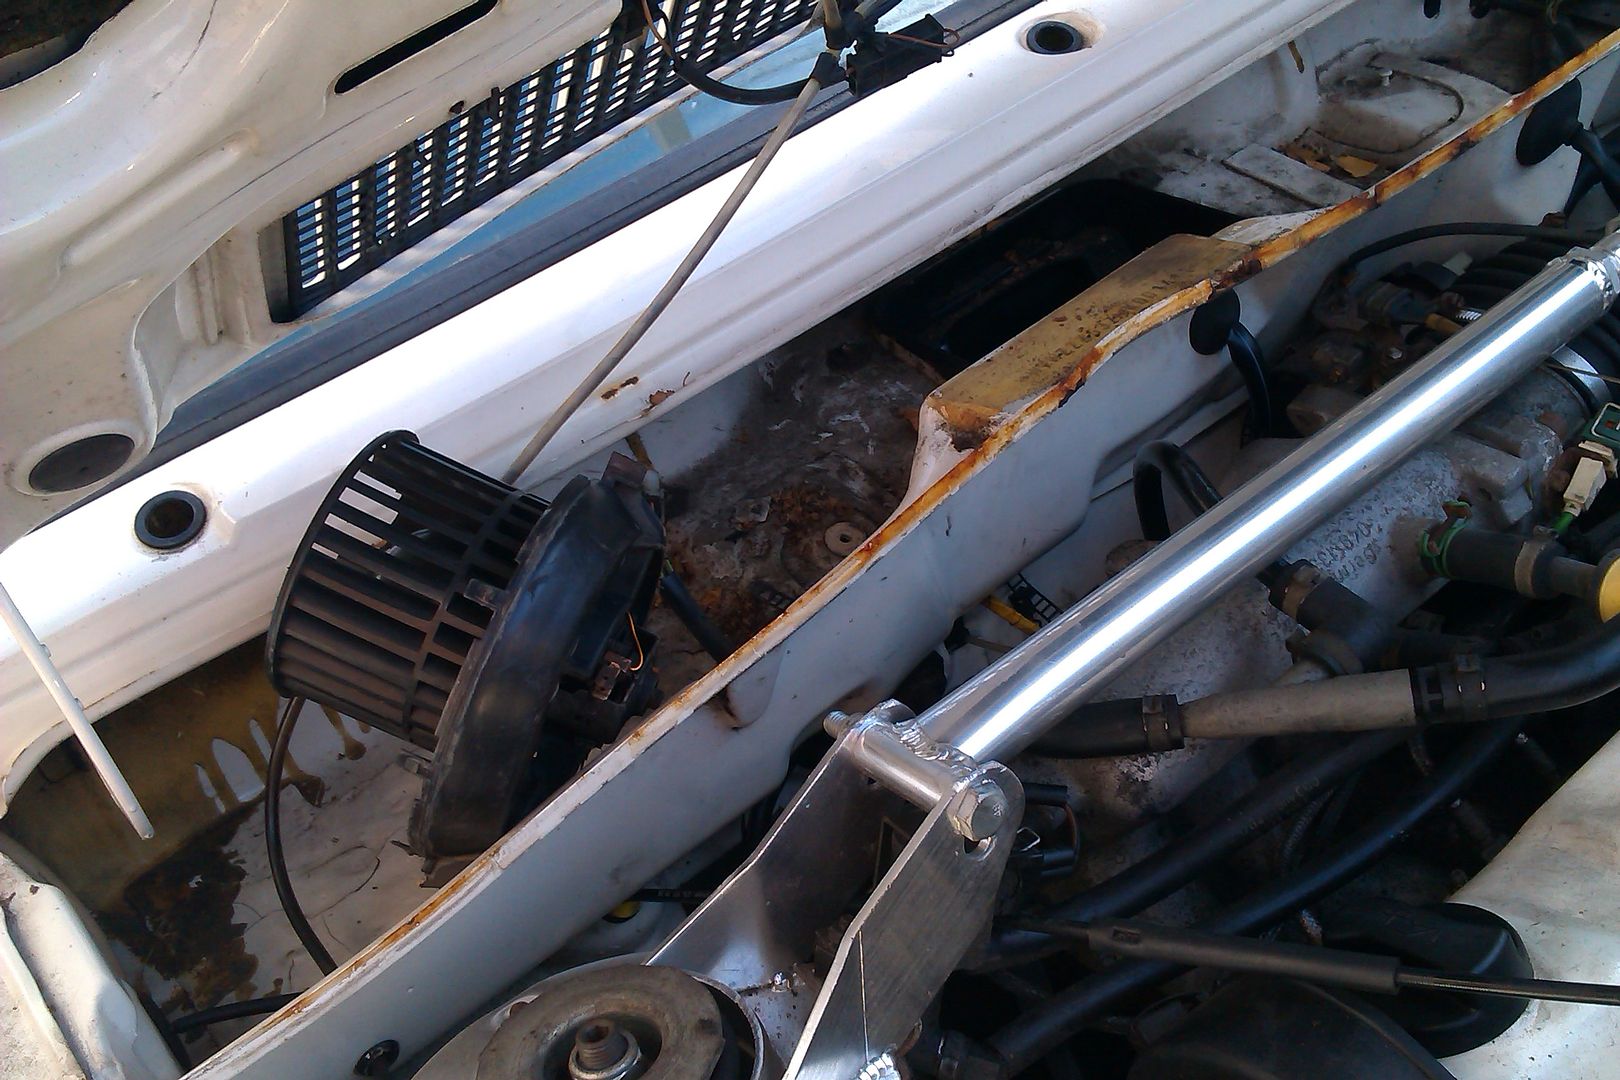
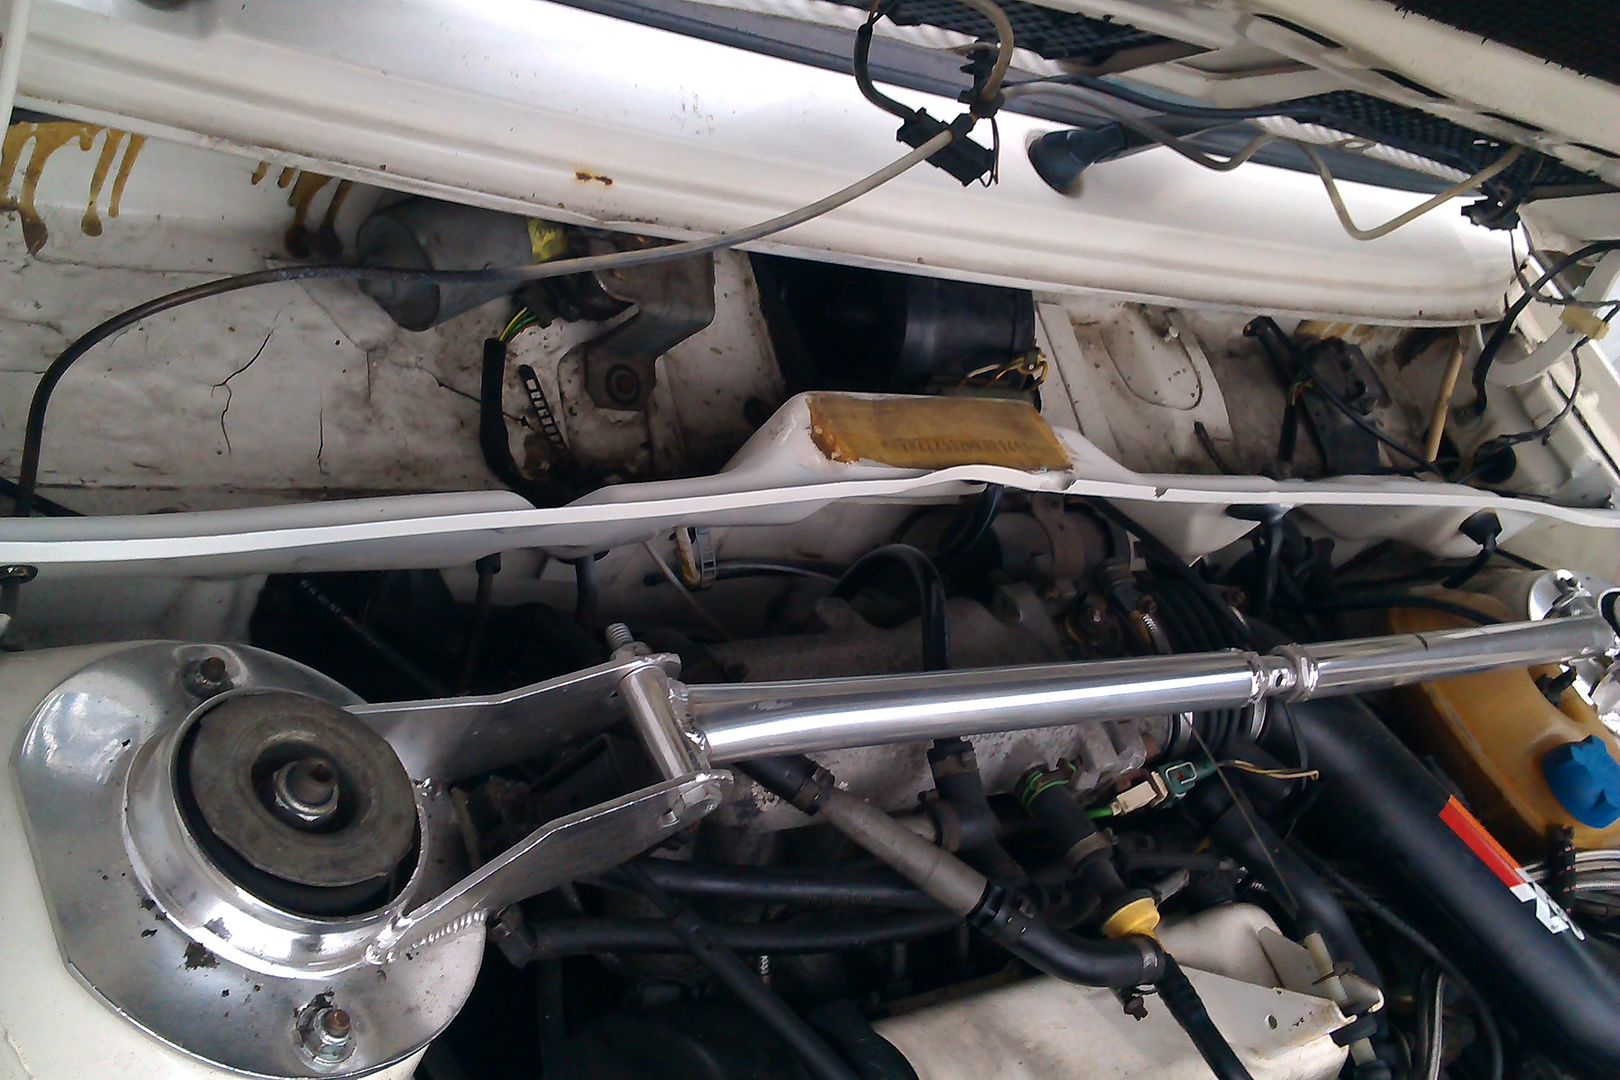
After buying a new blower motor of ebay a few weeks ago it was time to fit it, and thanks to some advice of Old Mac Rocco and Scumpyone though I’d show how I did it. Now for those who will need to do this the Haynes manual would have you strip out the centre console, empty out the coolant before removing the heater module before removing the motor from above. This is a faff and to be honest not needed so heres how to do it the easy way.
First off the blower motor is located below the very delicate raintray (take you time removing this VW made it so flimsy and brittle it can crack very easily) this is what you’ll see-
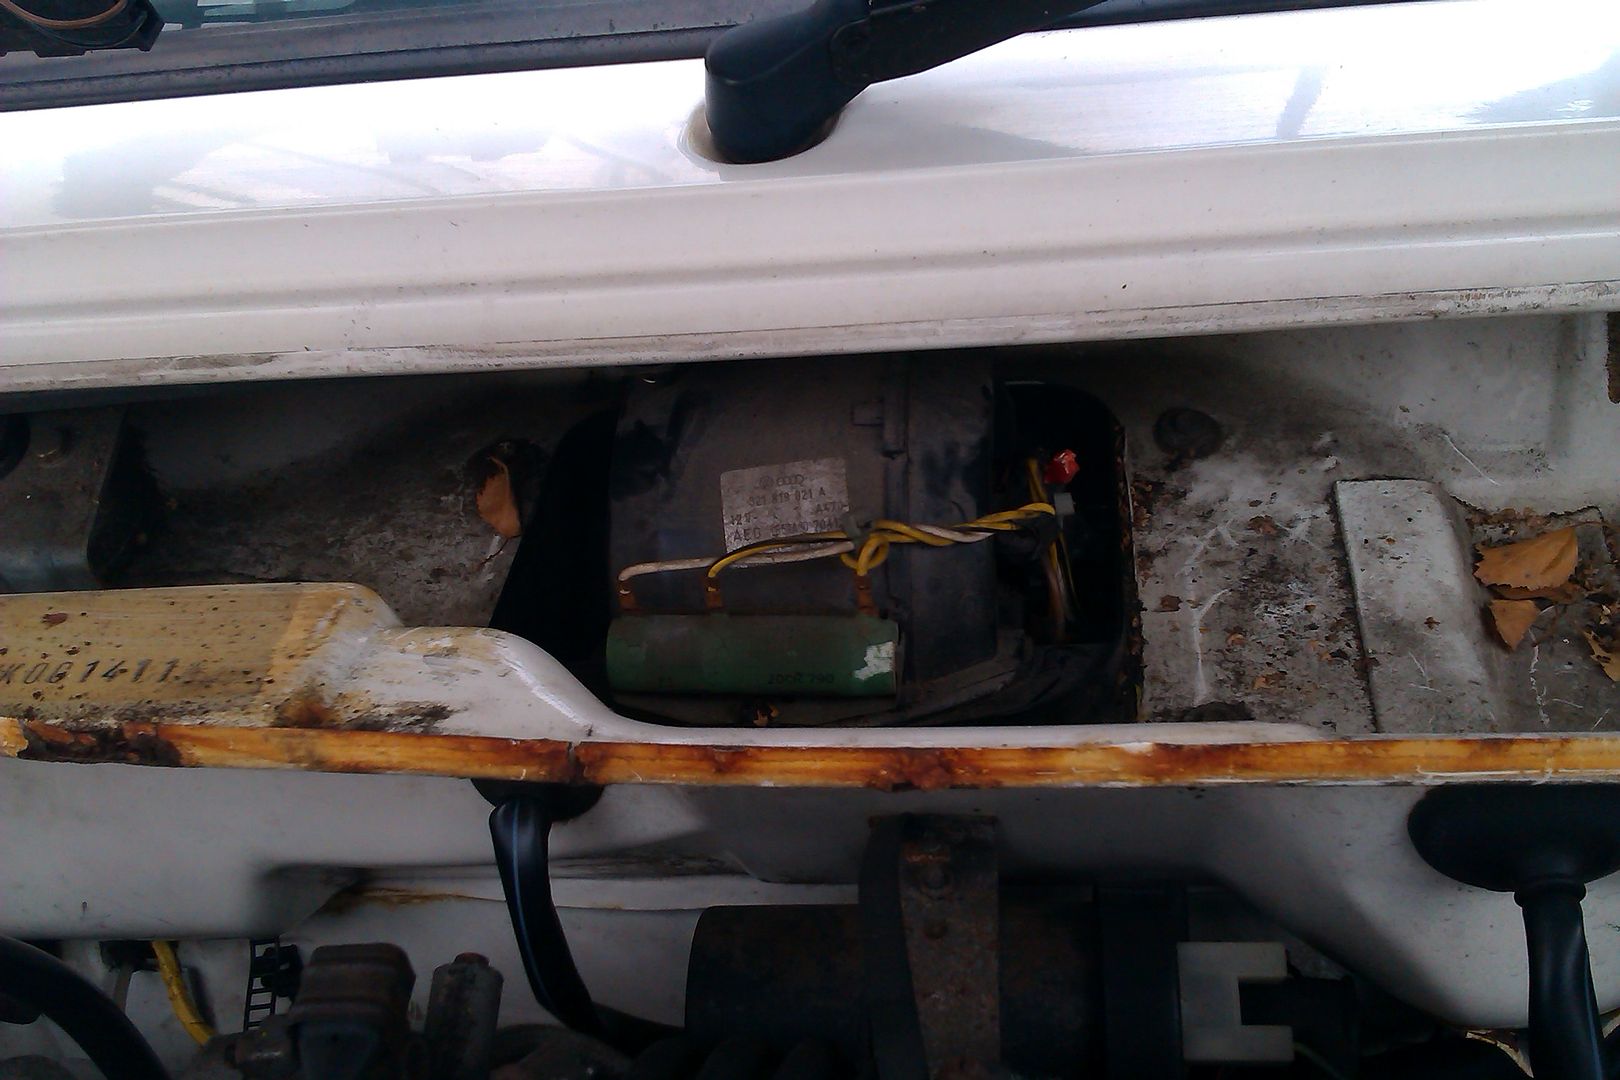
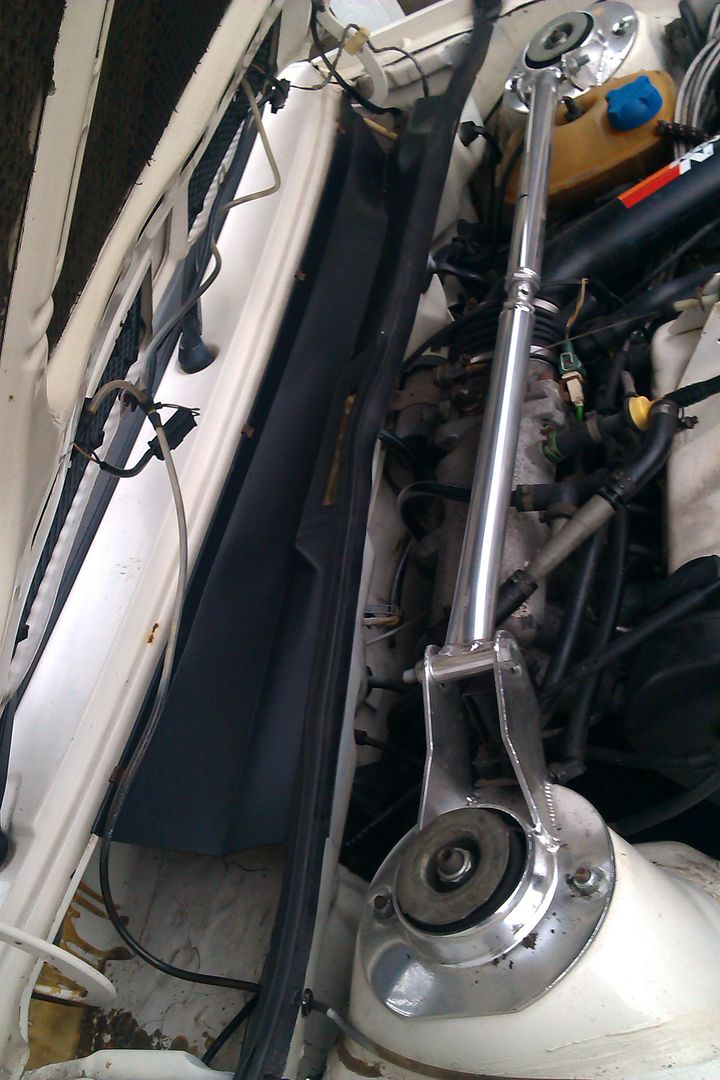
To get it out you’ll need to remove the wiper motor/mechanism located on the drivers side completely-
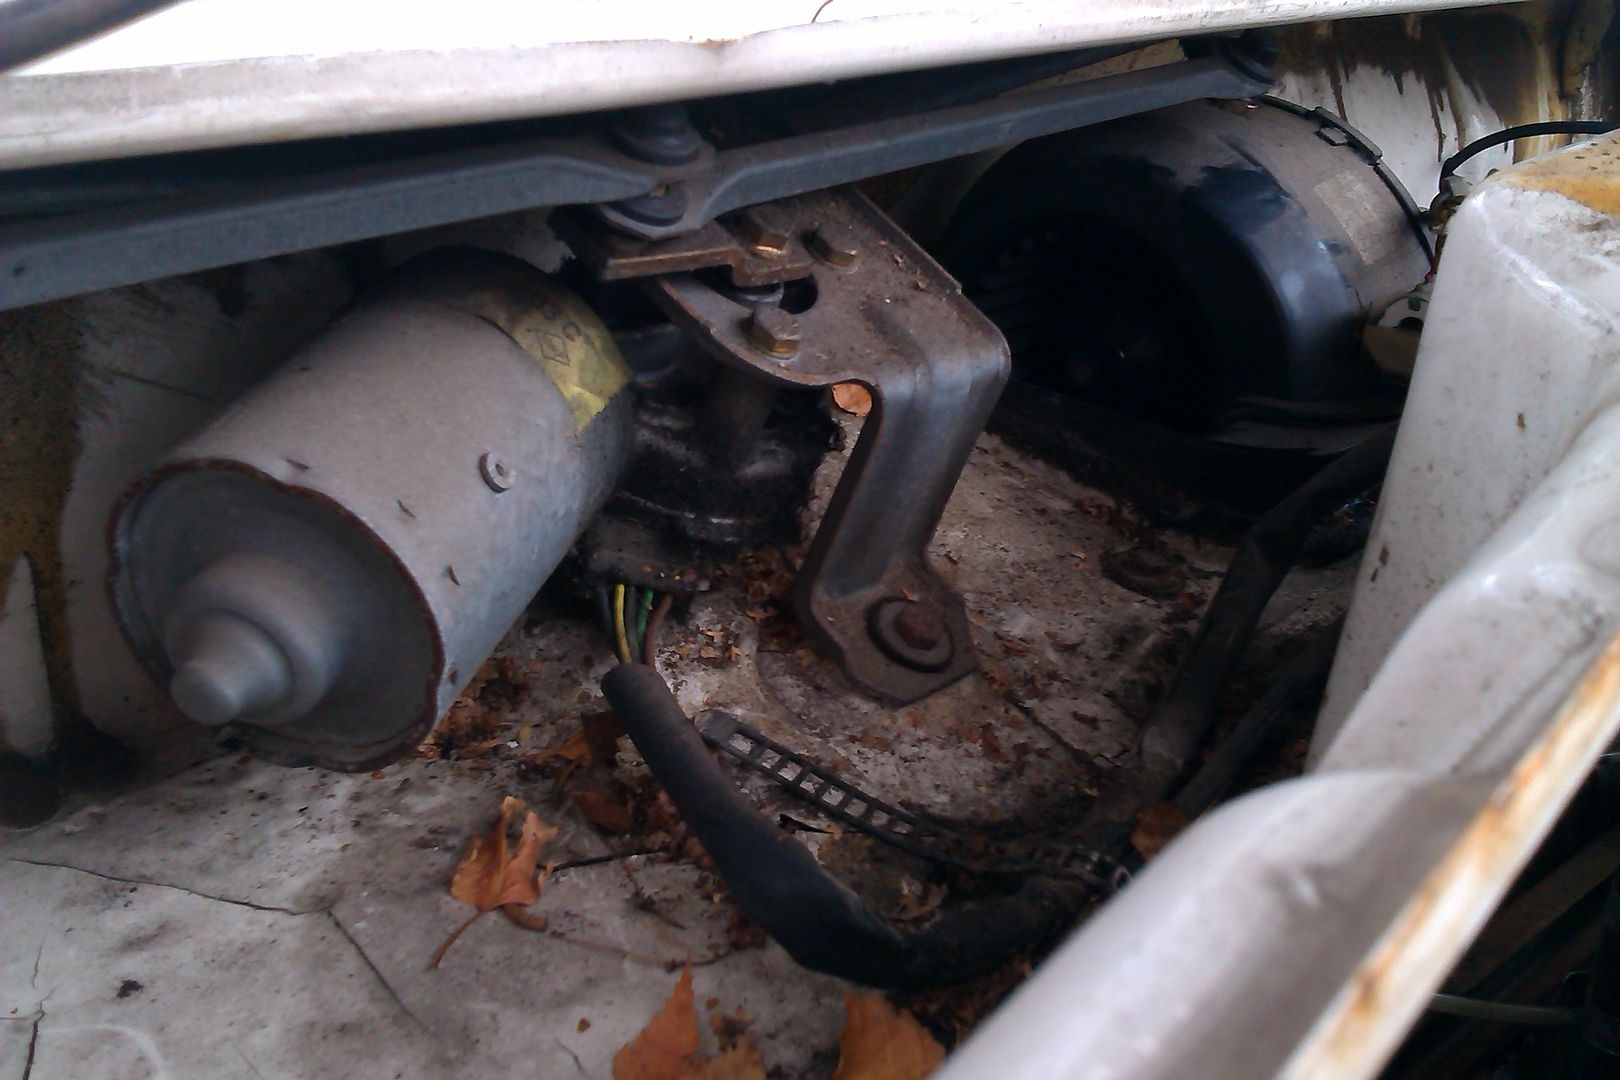
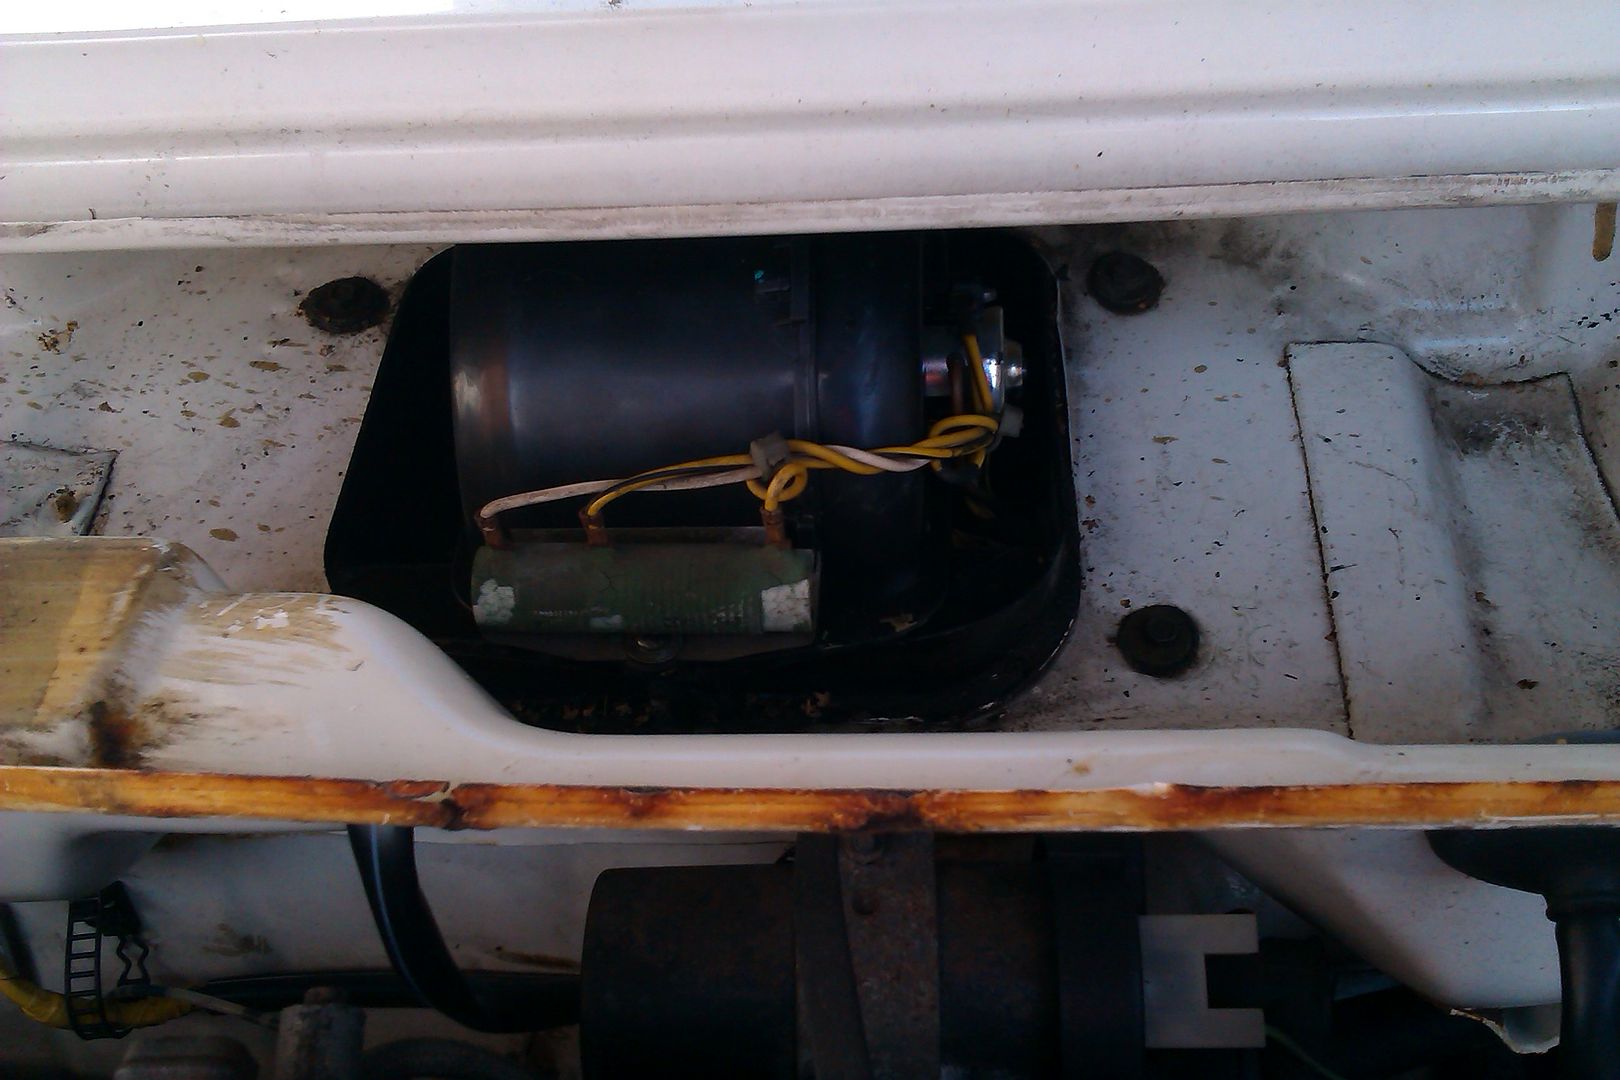
The you’ll need to remove the resistor pack that on the front of the blower motor assemble, this is just held in place by some tangs on the metal bracket and disconnect the 2 wires (obviously disconnect the battery first)-
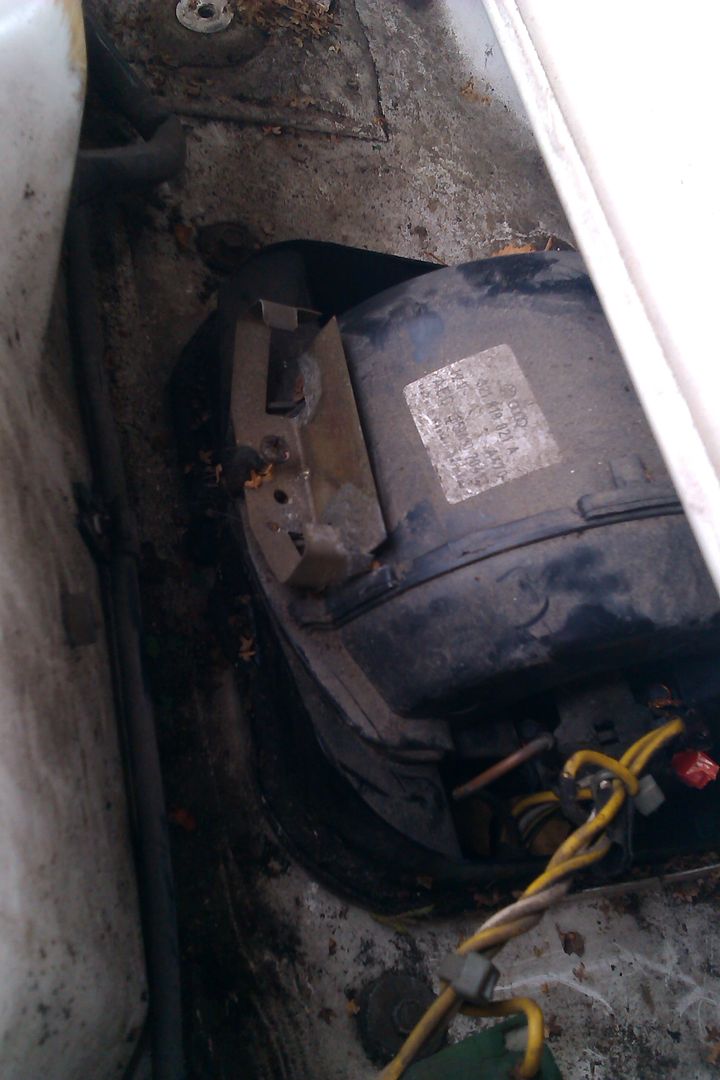
The screw that holds the bracket in is also the only screw that holds the blower motor in place to simply remove it and the blower will be free to move.
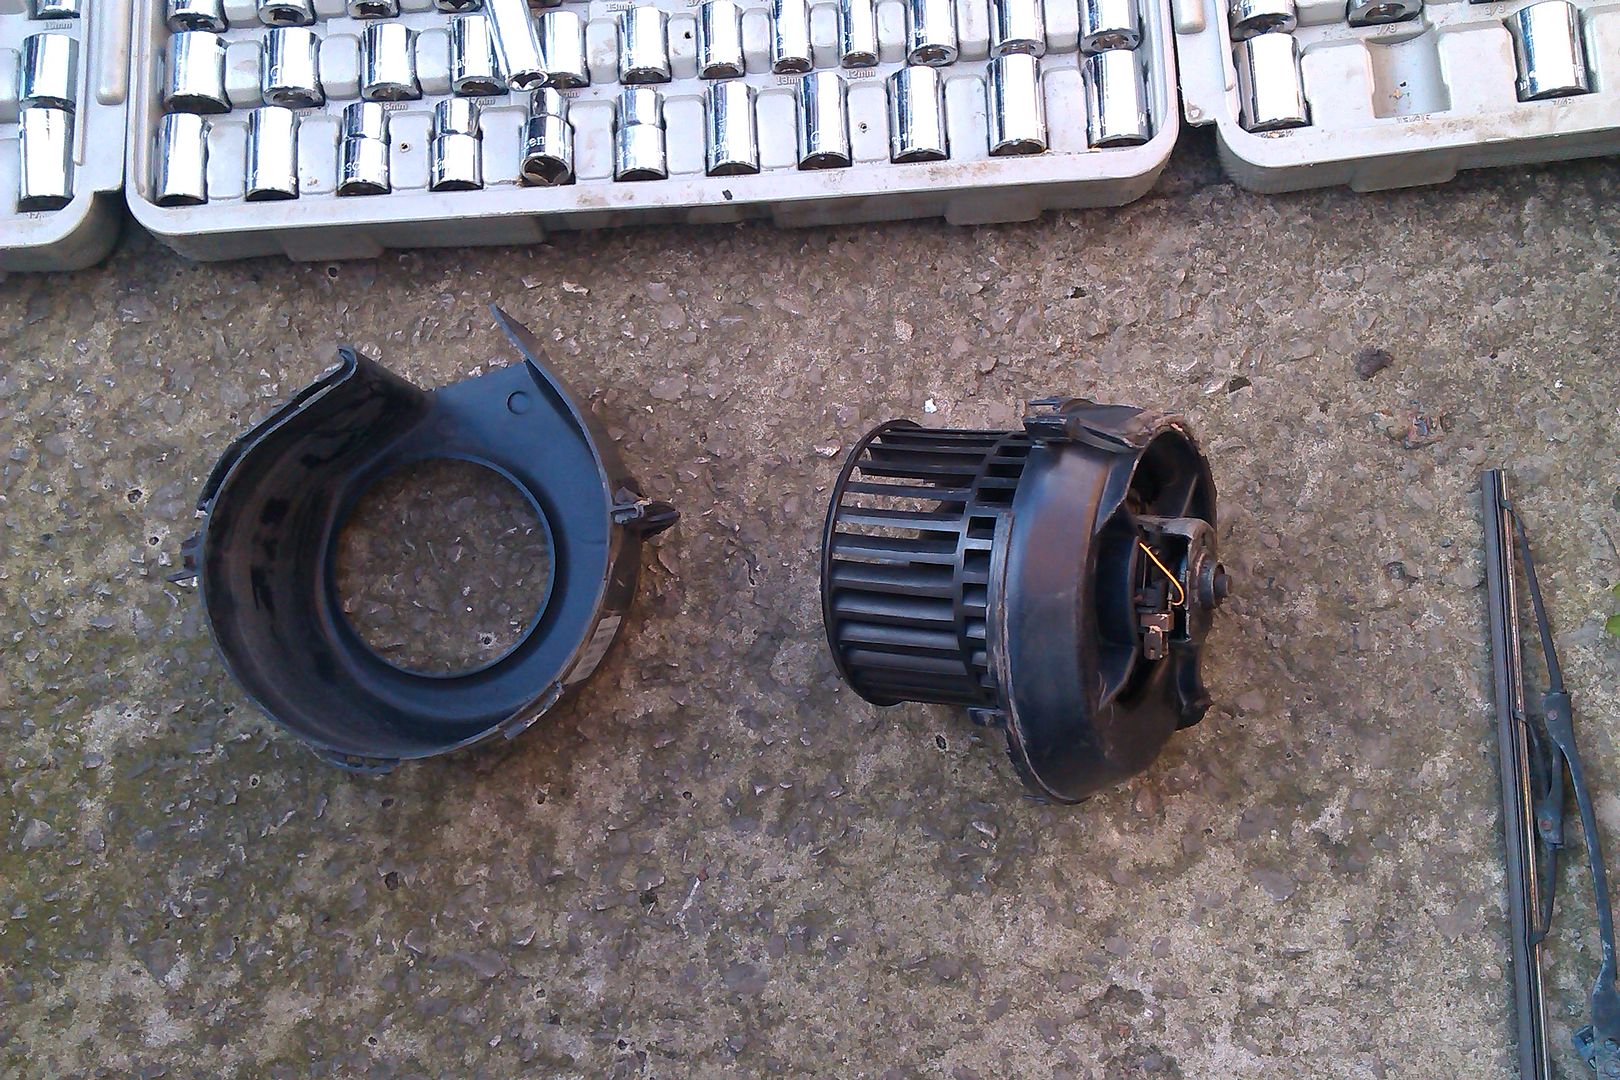
Now comes the fun bit, to get it out you’ll need to split the casing into 2 parts, there are about 5 clips all the way round as well as some rubber holders to the back. The picture below is the new one to give you an idea-
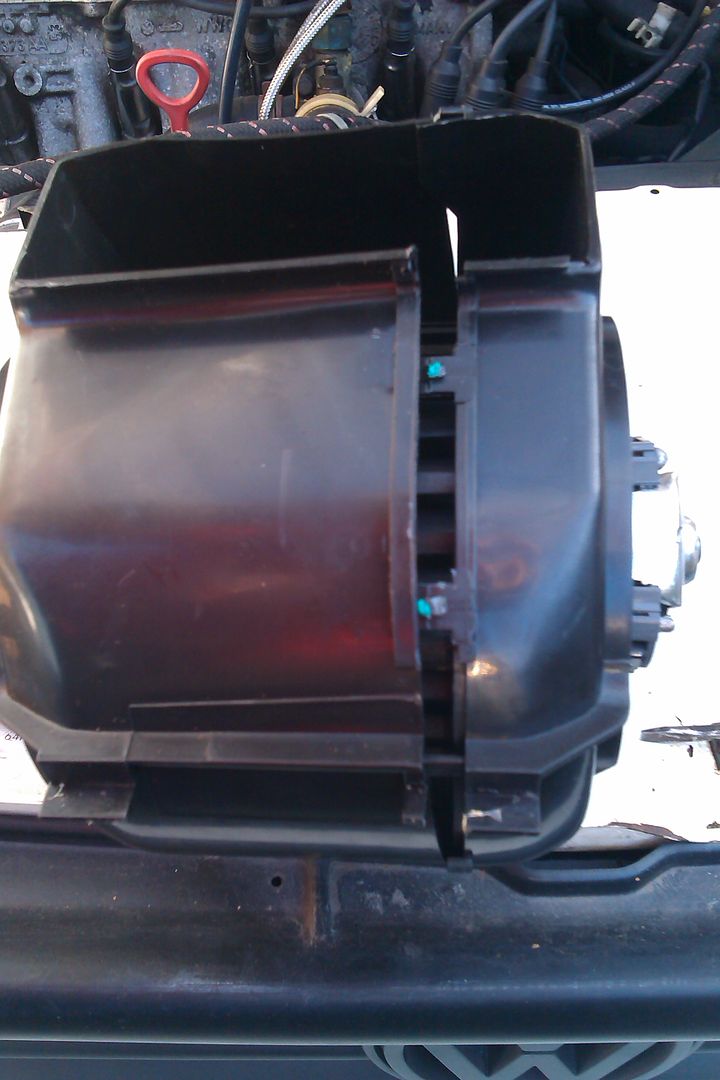
Once its split it two and with some jiggling you should be able to withdraw it from the drivers side, hence why the wiper motor was completely removed-
As that say, refitting is the opposite of removal, but saying that I took a lot more car in splitting the new one in halve than ripping out the old one!!!!!
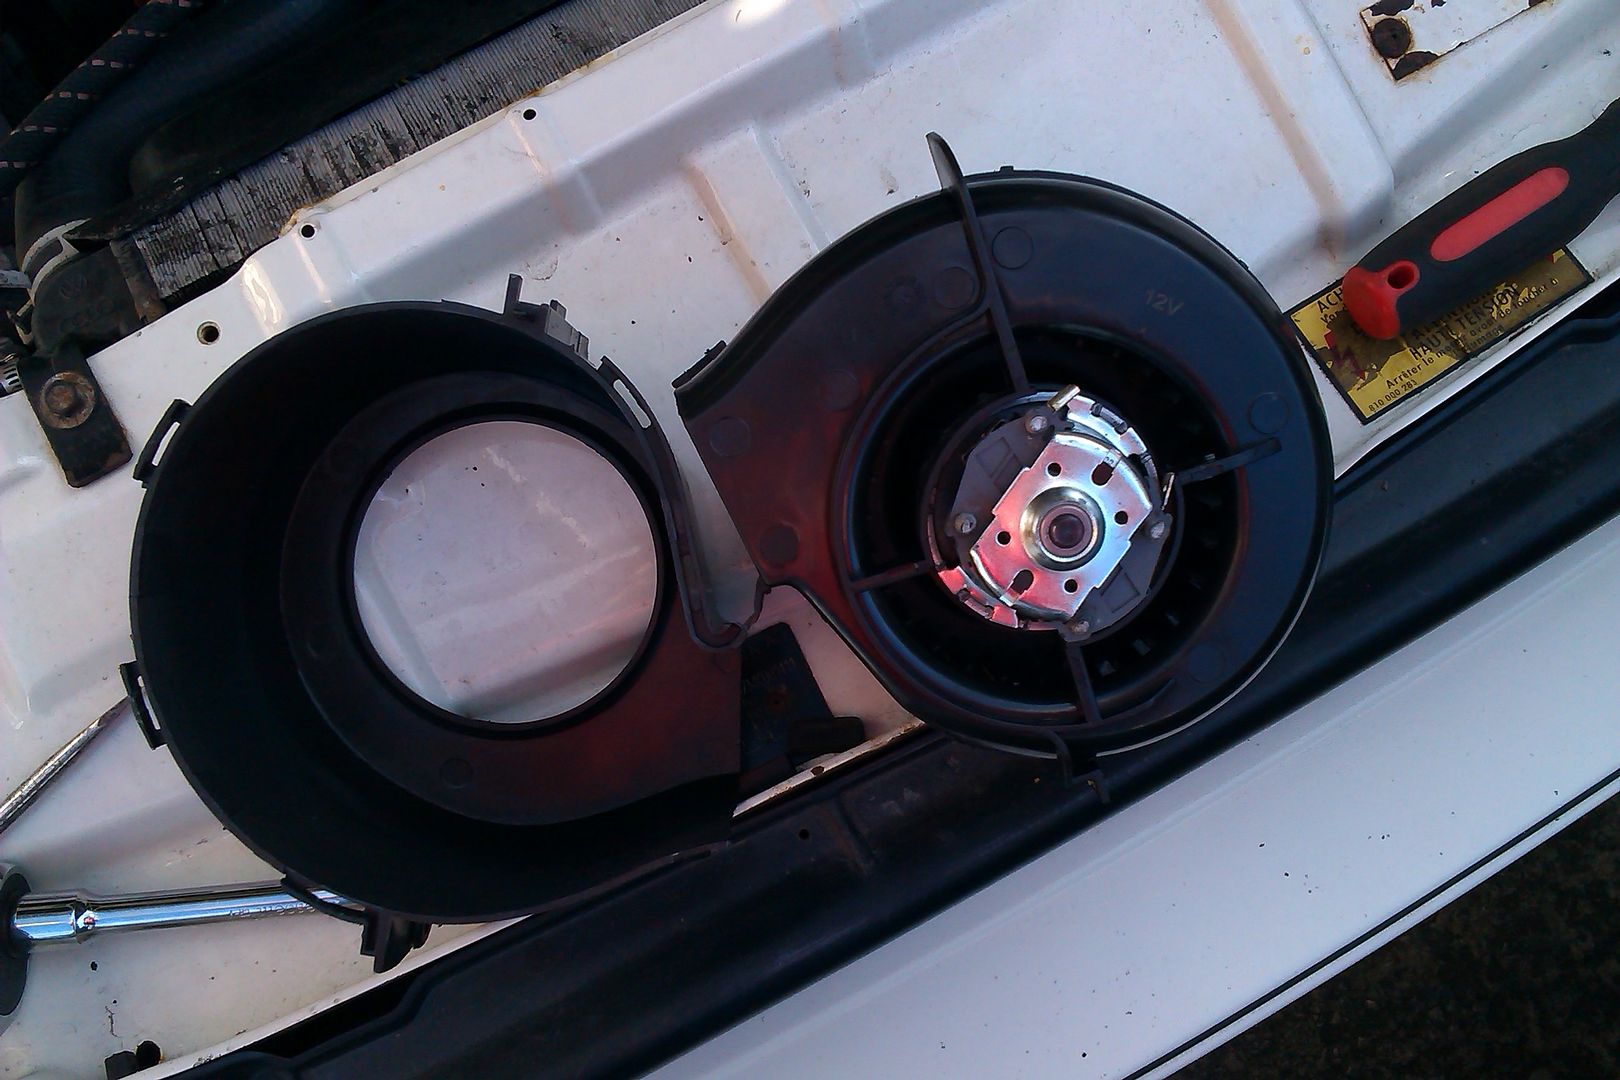
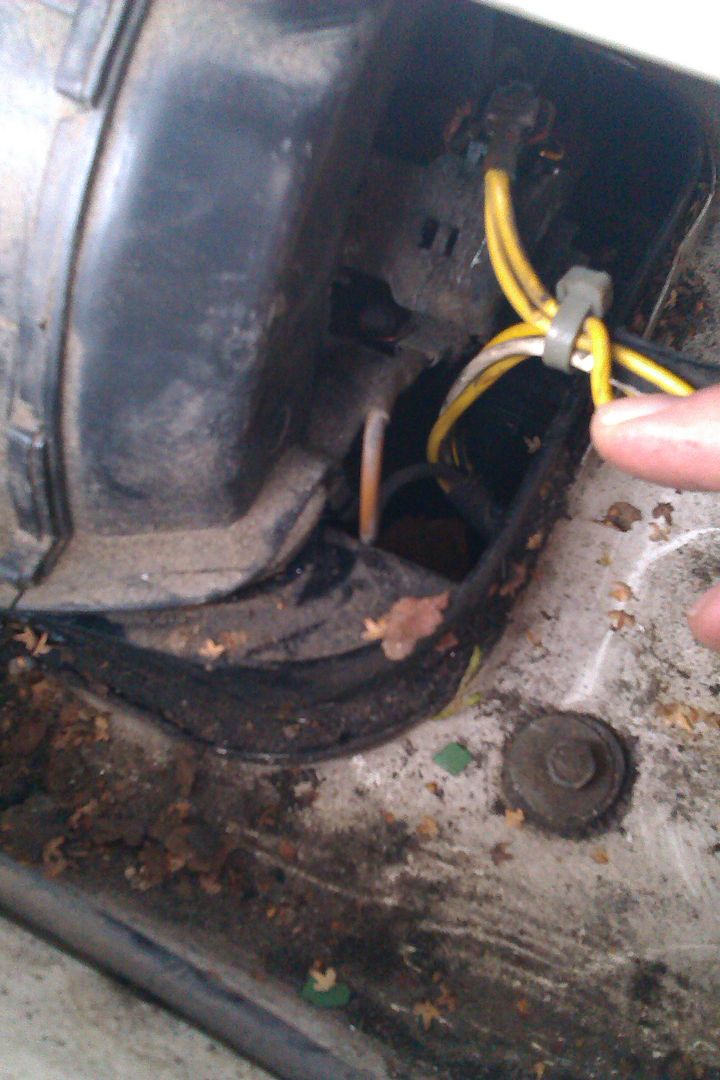
Also one thing to not is that once the new motor is in place and put back together make sure its “hooked” into the heater module at the back. If it’s not you won’t be able to refit the wiper mechanism.
Re: Eefy's White Scala
Posted: Mon Mar 03, 2014 8:48 am
by eefy
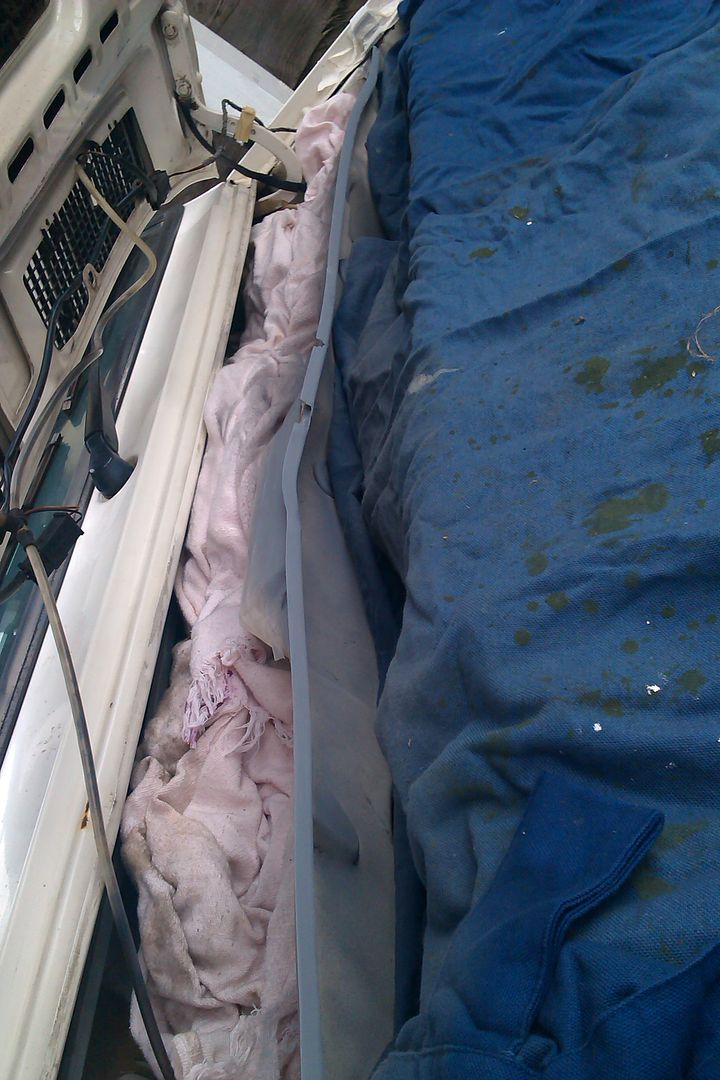
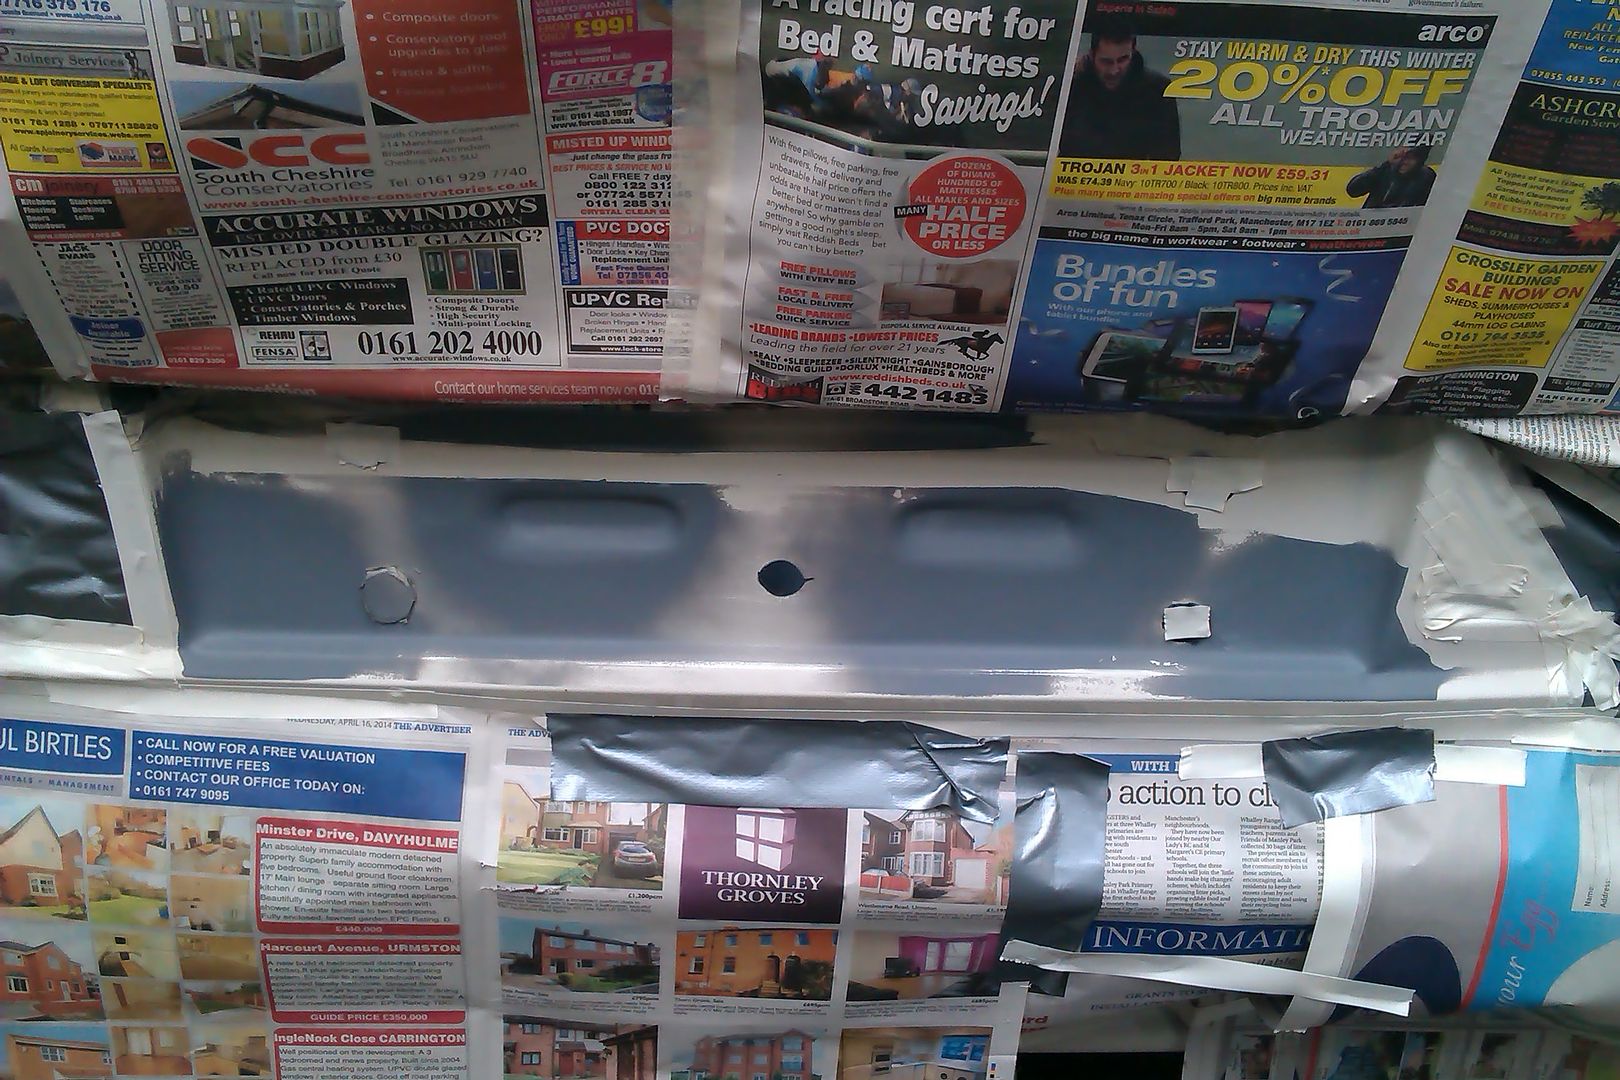
As you may have seen on the pictures the leading edge that was under the rubber seal/raintray wasn’t in the best of condition-

So I used the excuse to give it a clean up and a spot of paint, so it was out with the sander before some rust treatment and then 2 coats of etch primer-
Before a few coats of white-
To be honest in hindsight (with some over spray to sort out) I wish I’d just got some white Hammerite to coat it but we live and learn.
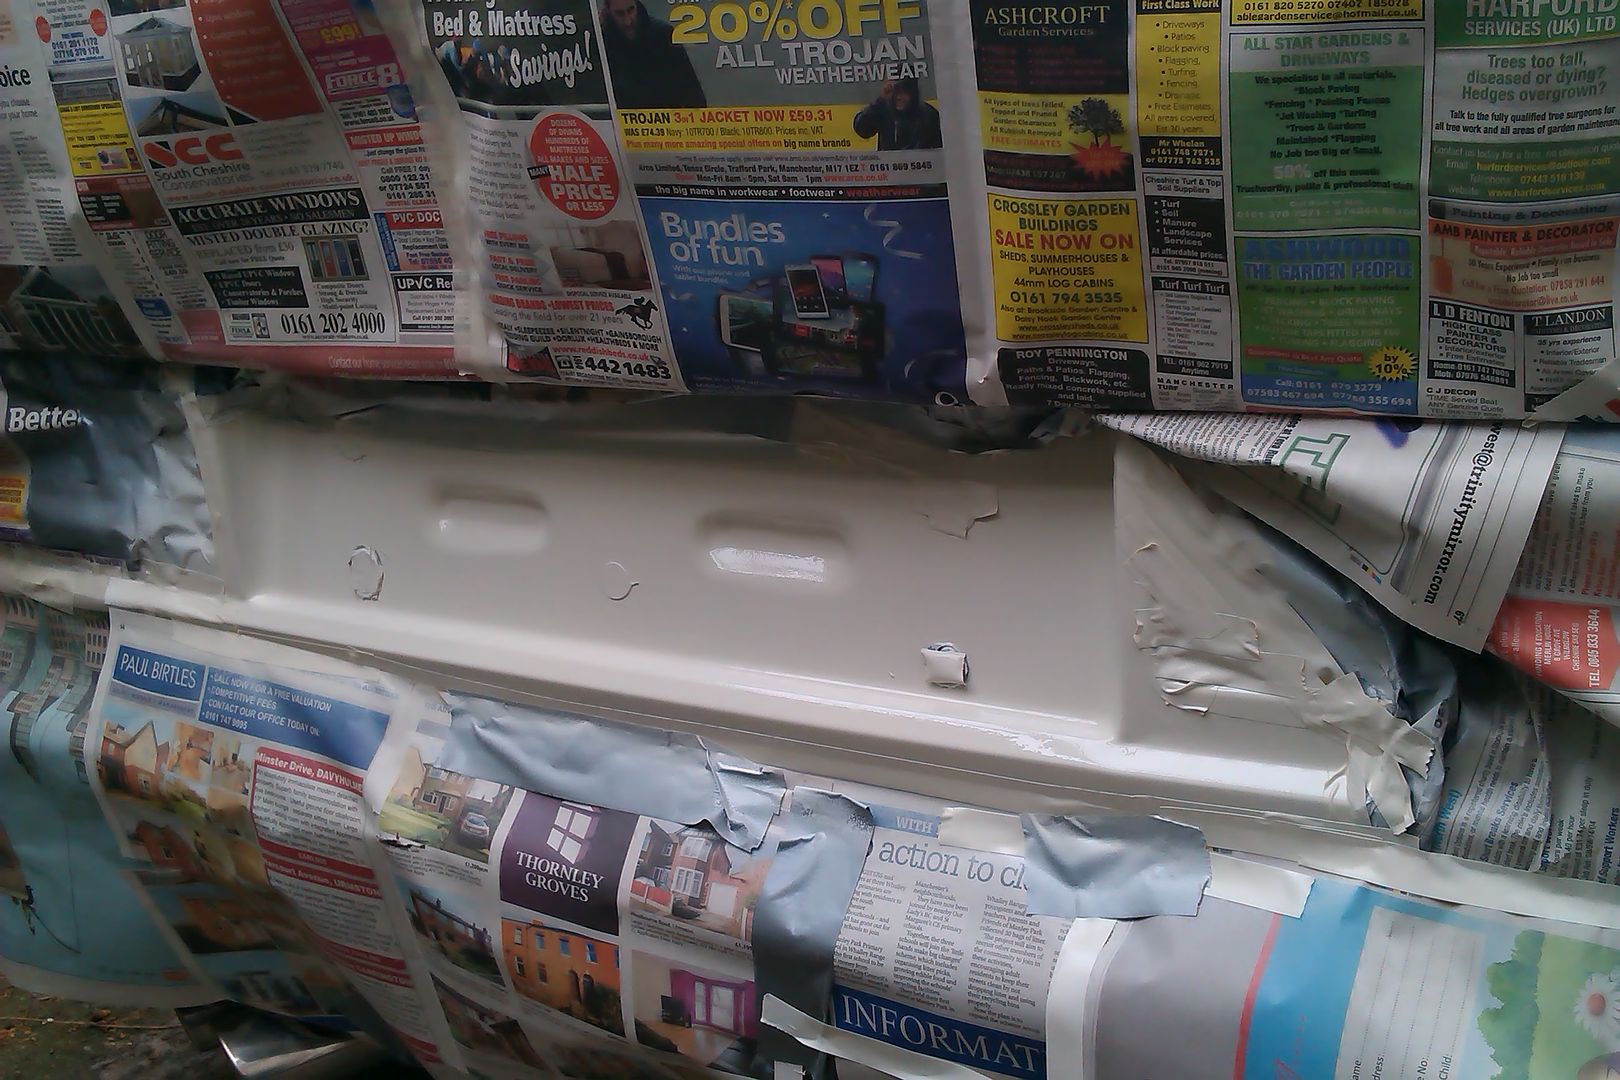
Next, thanks to Joost, it was time to fit my new raintray, the old one was cracked all over the place-
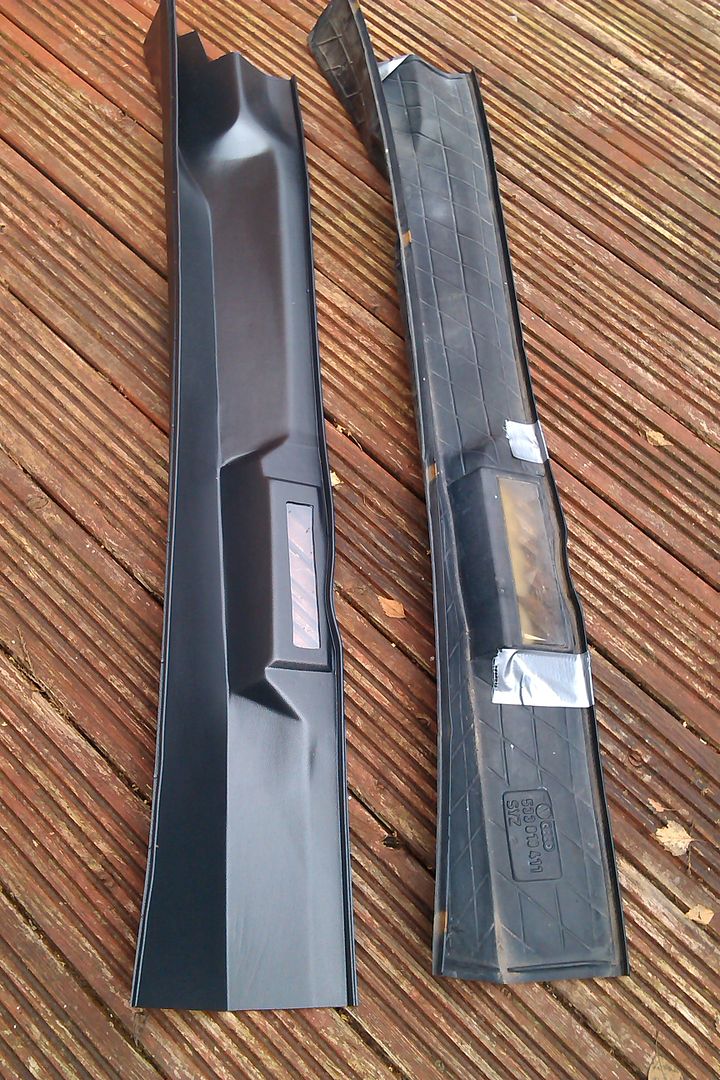
As you can see it’s a lot thicker and more robust than the original-
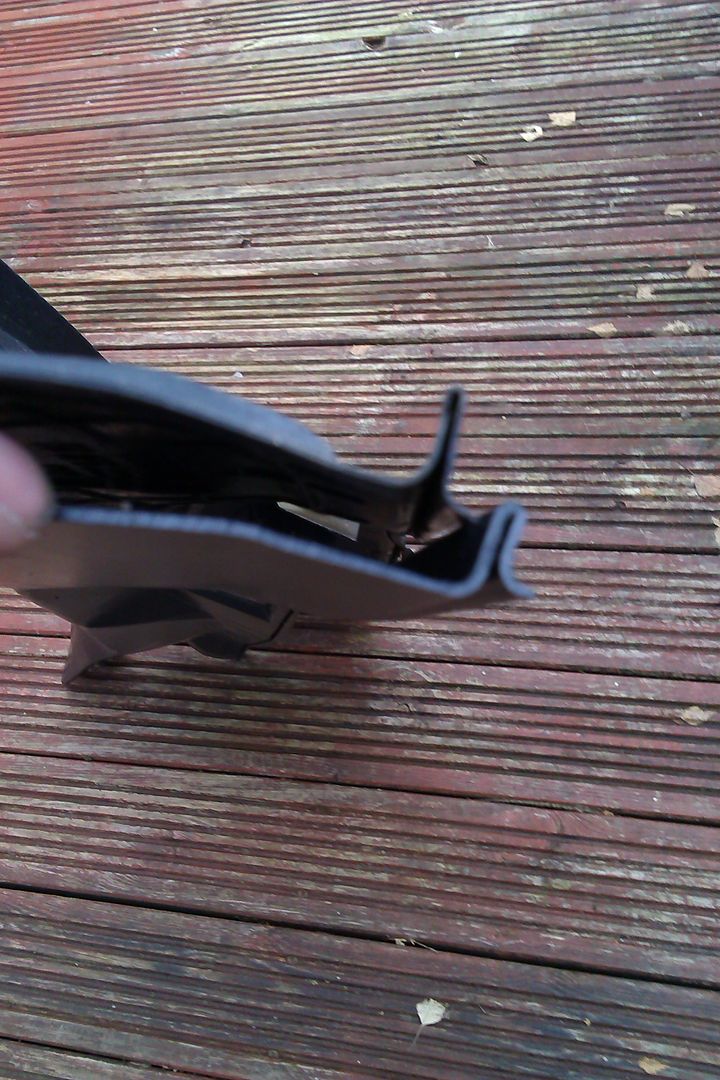
Fitting needed some patience, due to the thickness of the plastic it needed some persuasion to go on, as did the front rubber seal (with the help of some washing up liquid) but it looks much better-
Re: Eefy's White Scala
Posted: Tue May 06, 2014 12:46 pm
by eefy
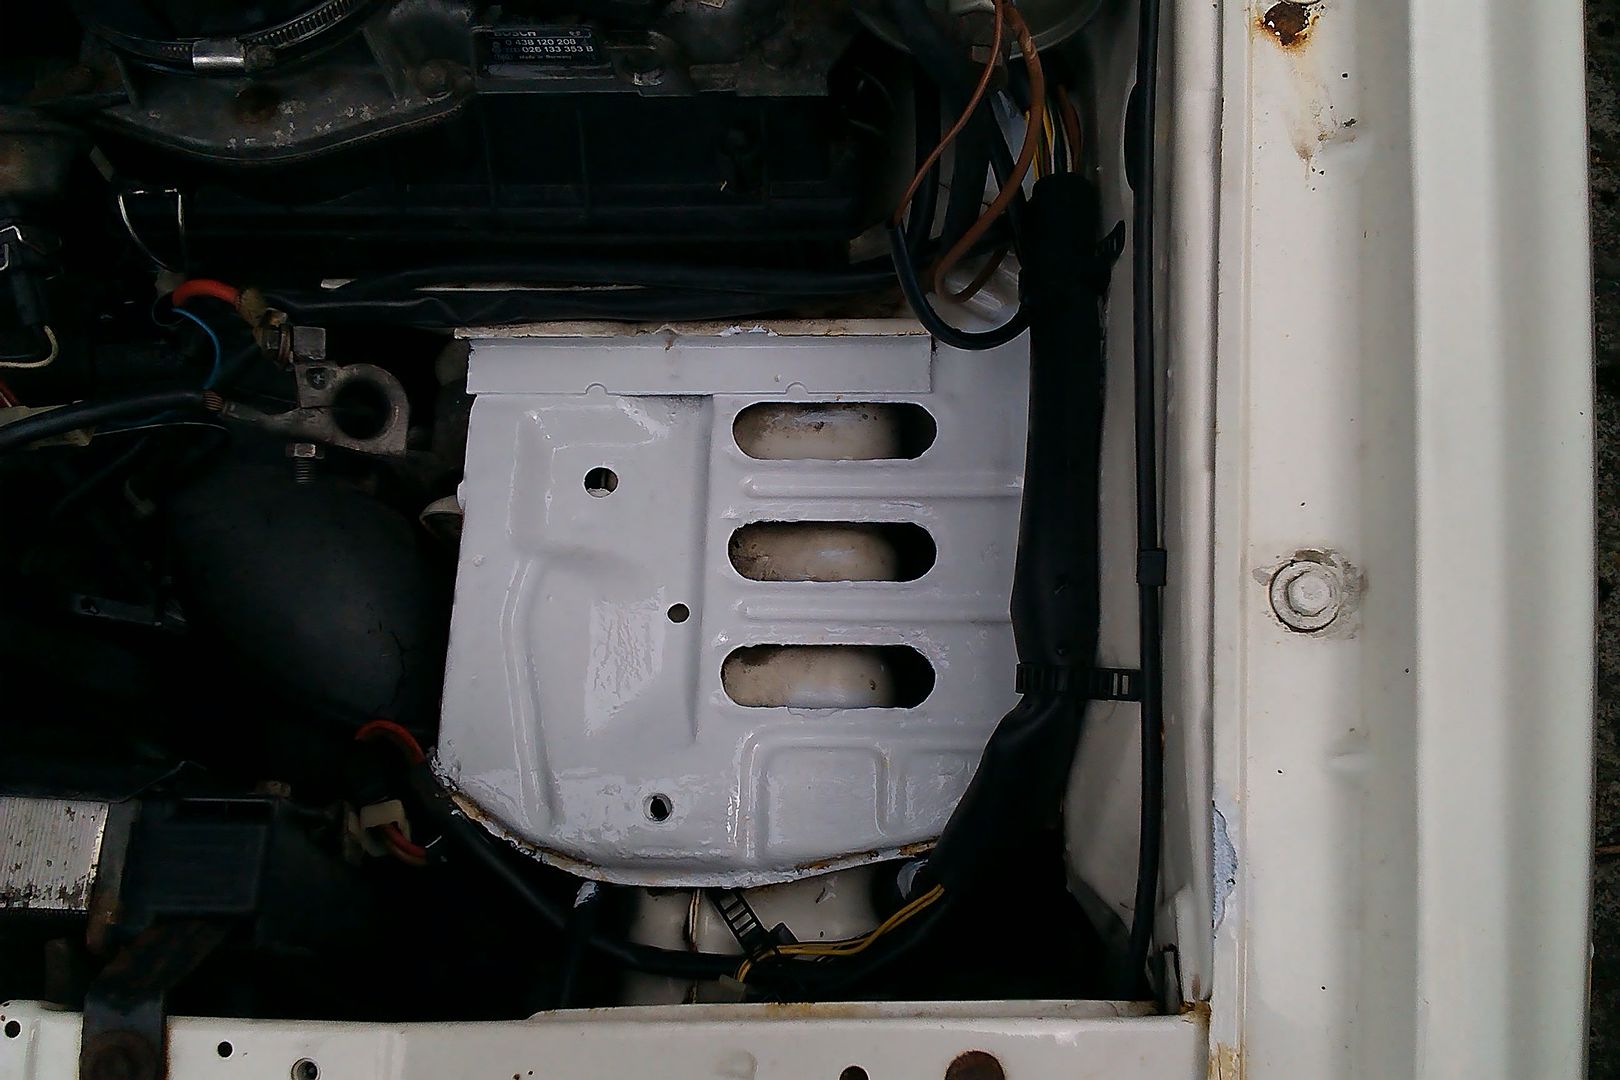
Over the last few weeks I’ve got a few niggly jobs sorted on the my rocco, the first was a degrease and clean of the engine bay (let’s just say it still needs more work), next was treating some rust on the battery tray-
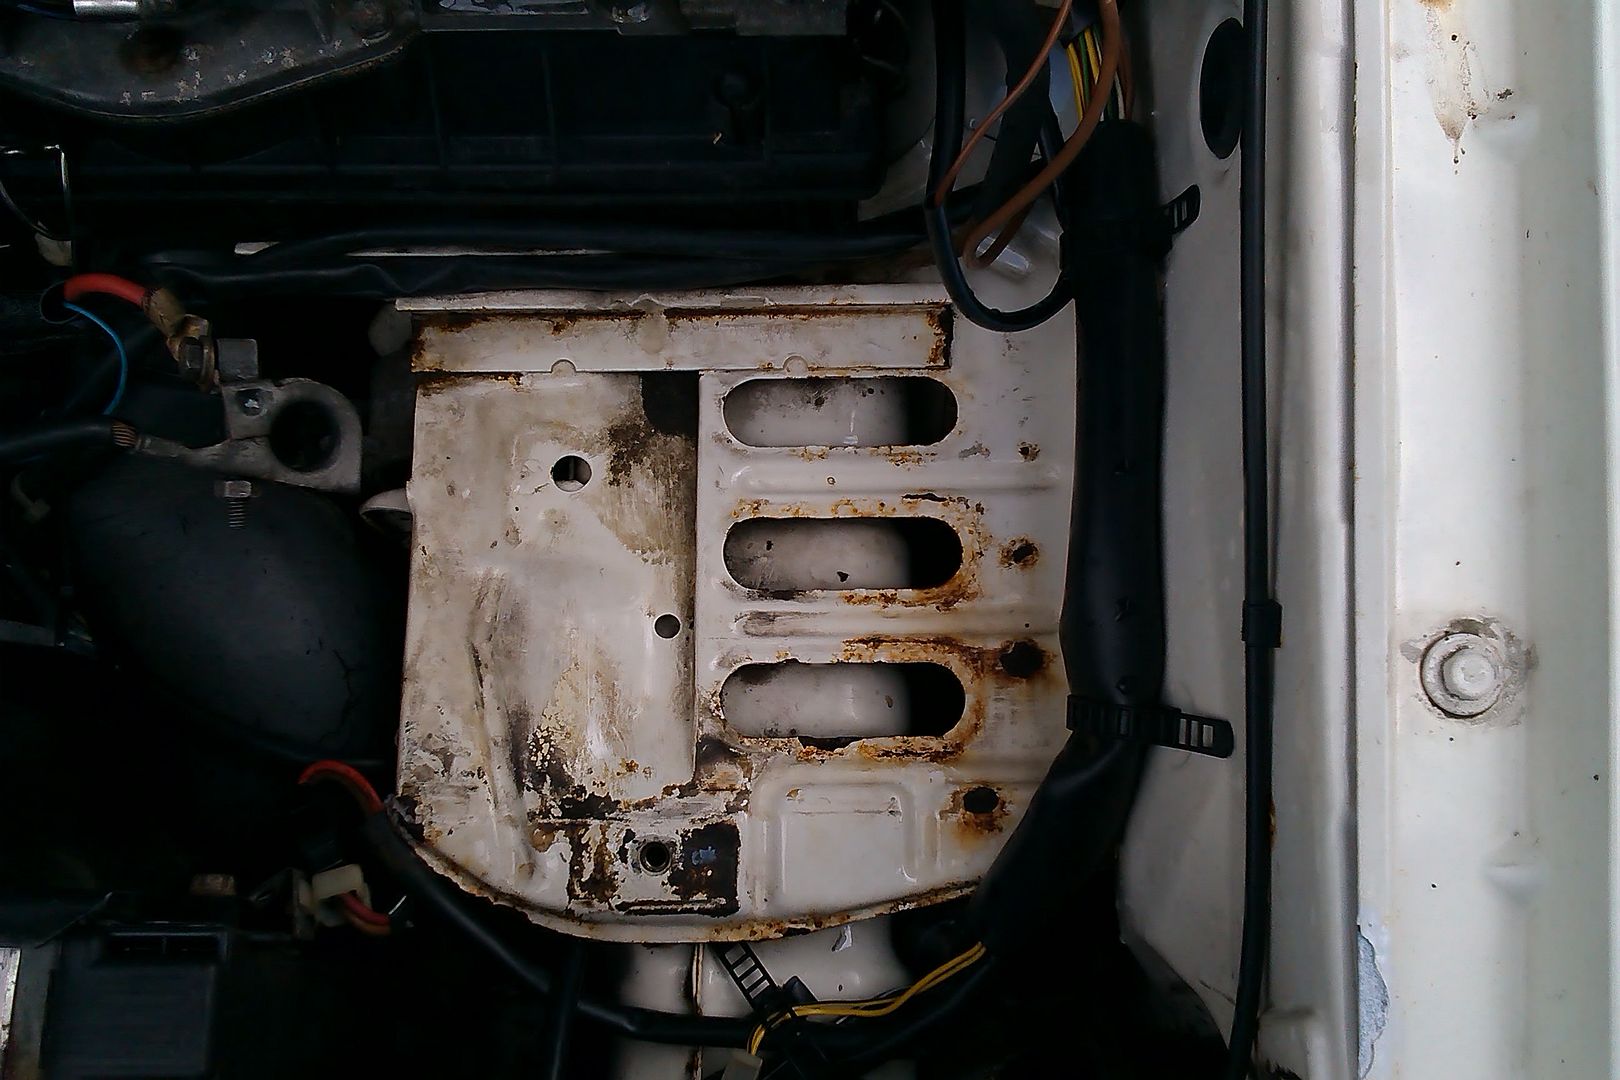
Some white, as it turns out very white, Hammerite was liberally used in 2 coats for added protection.
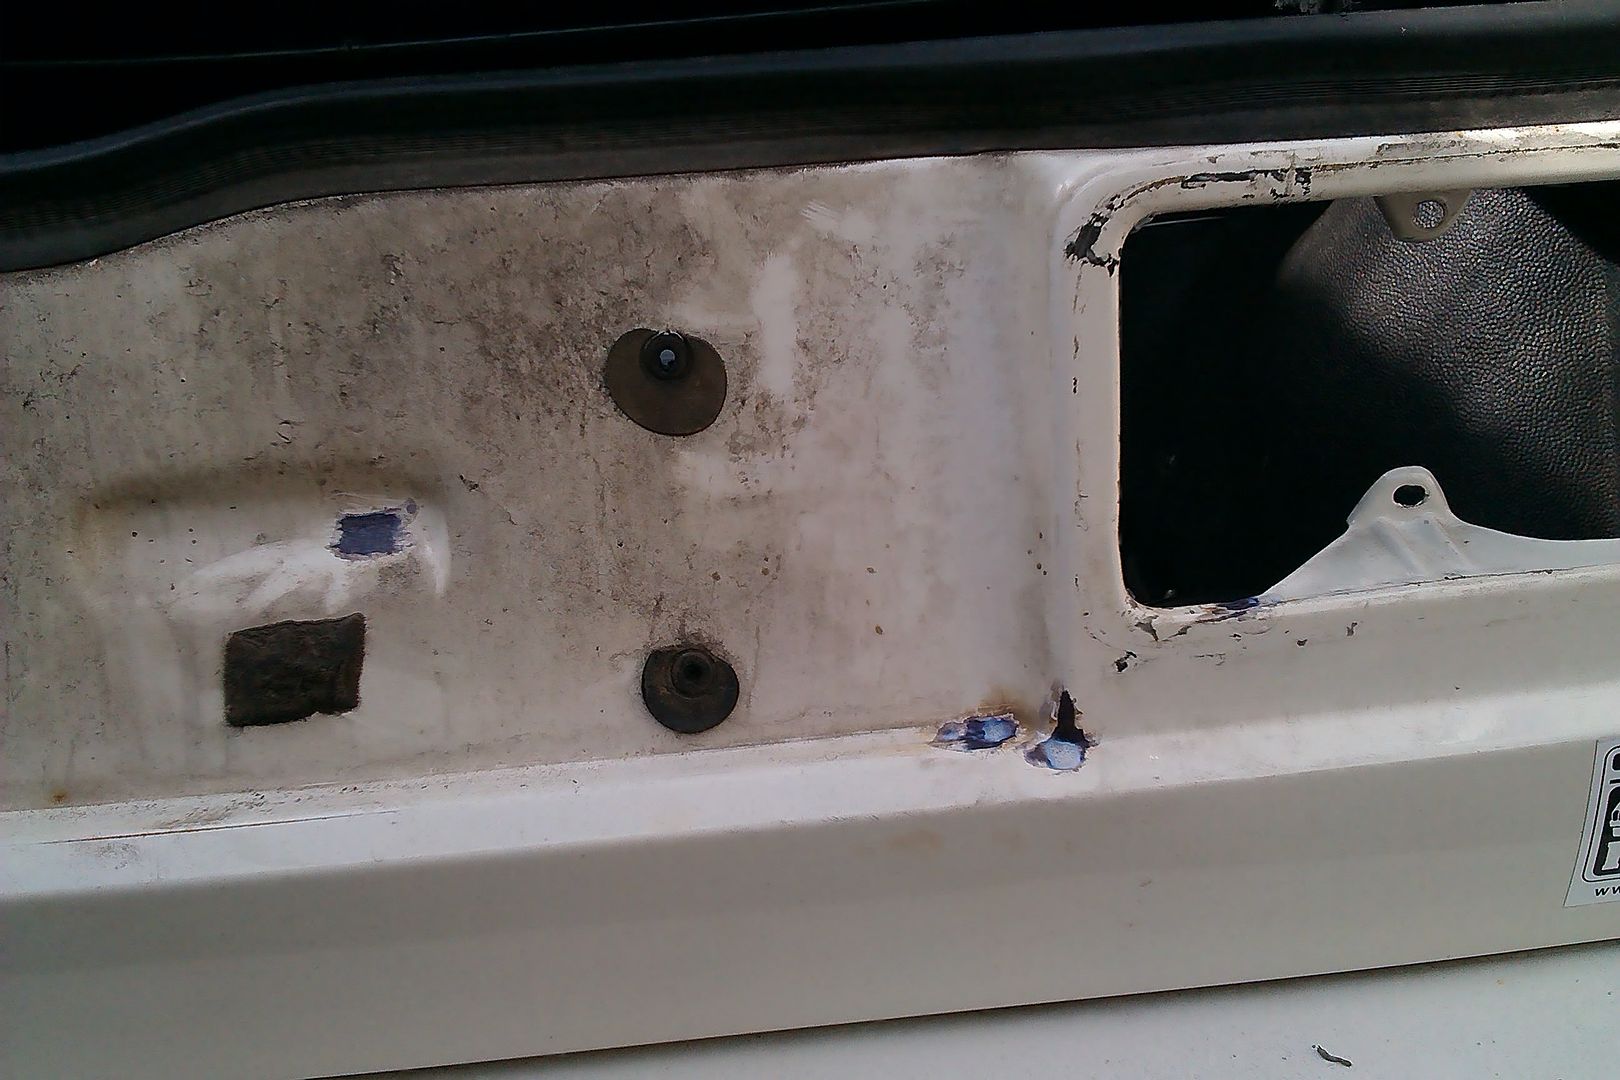
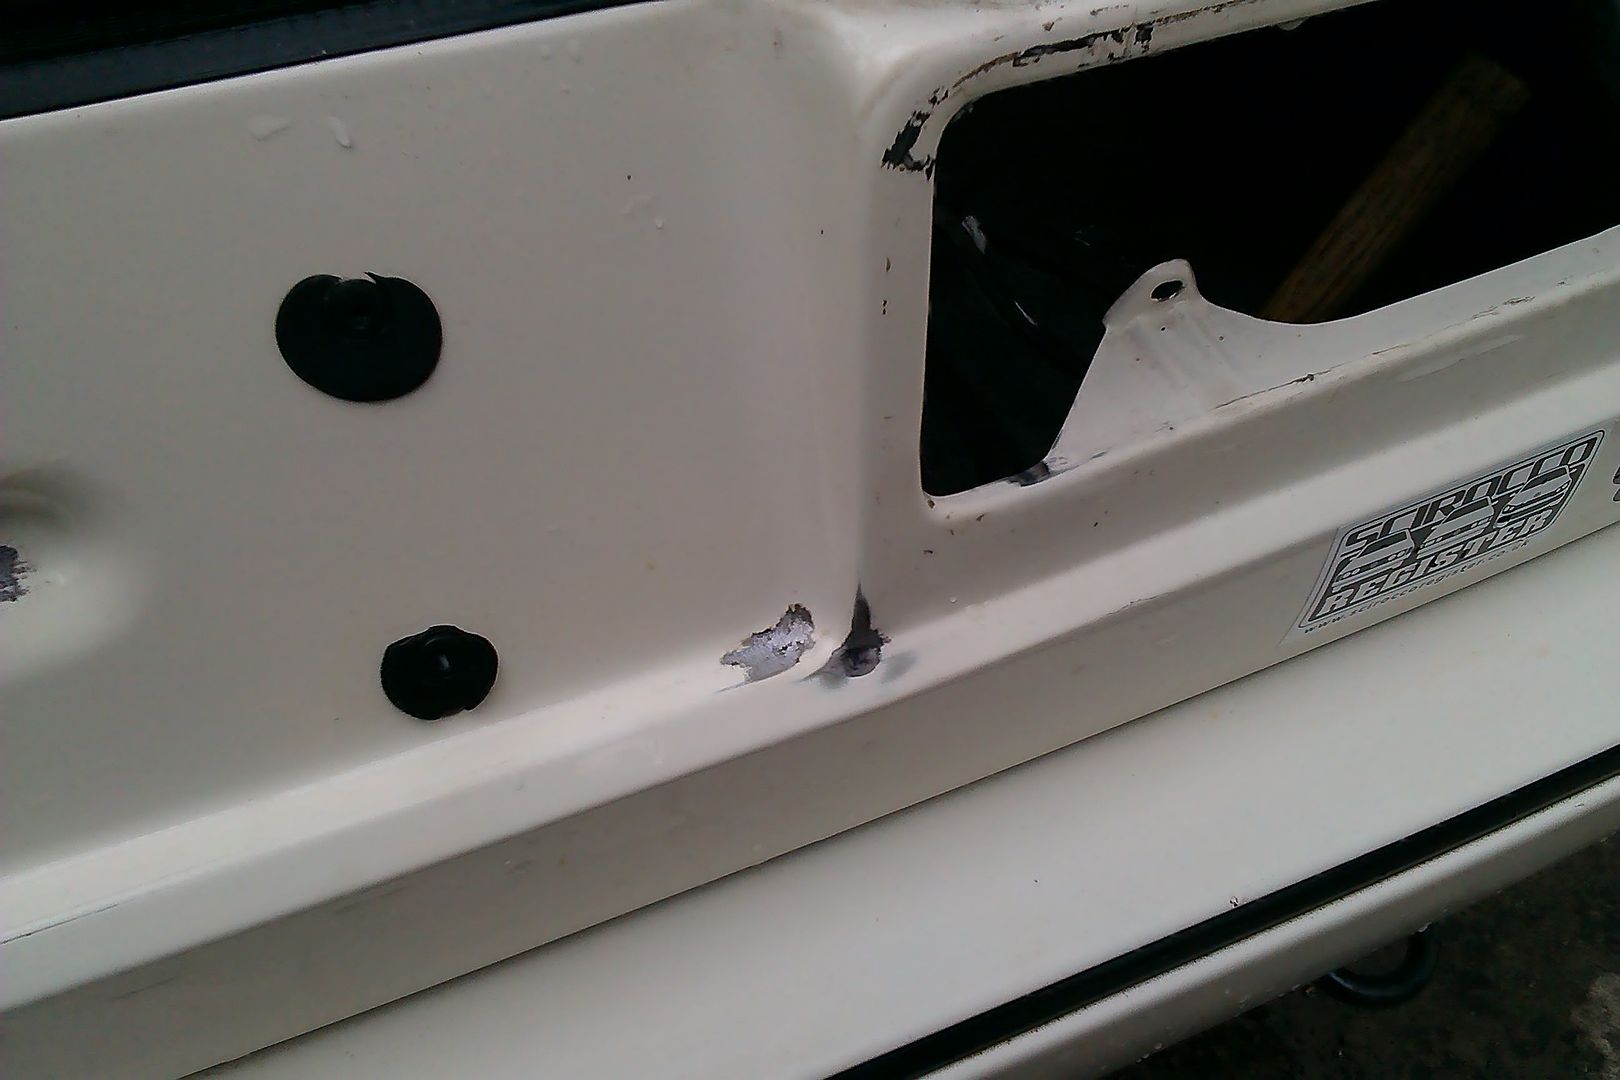
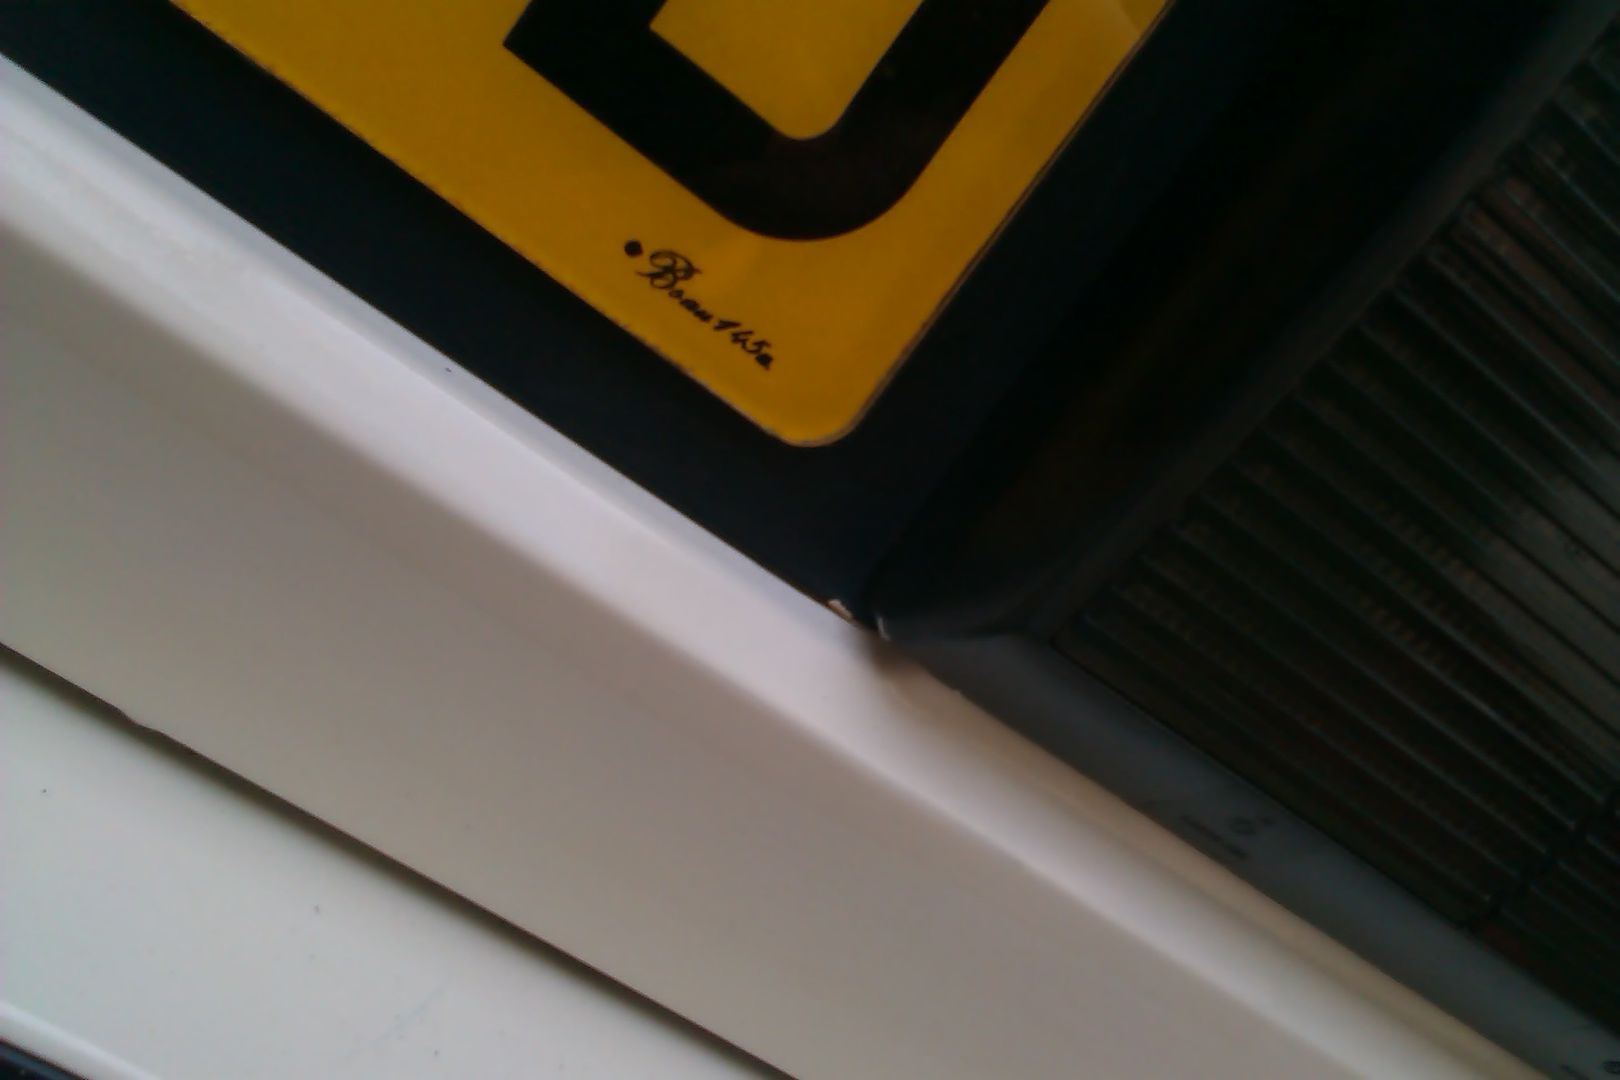
But the main niggle was the 2 rust spots on the inner lower corner of the rear lights caused by the numberplate panel vibrating-
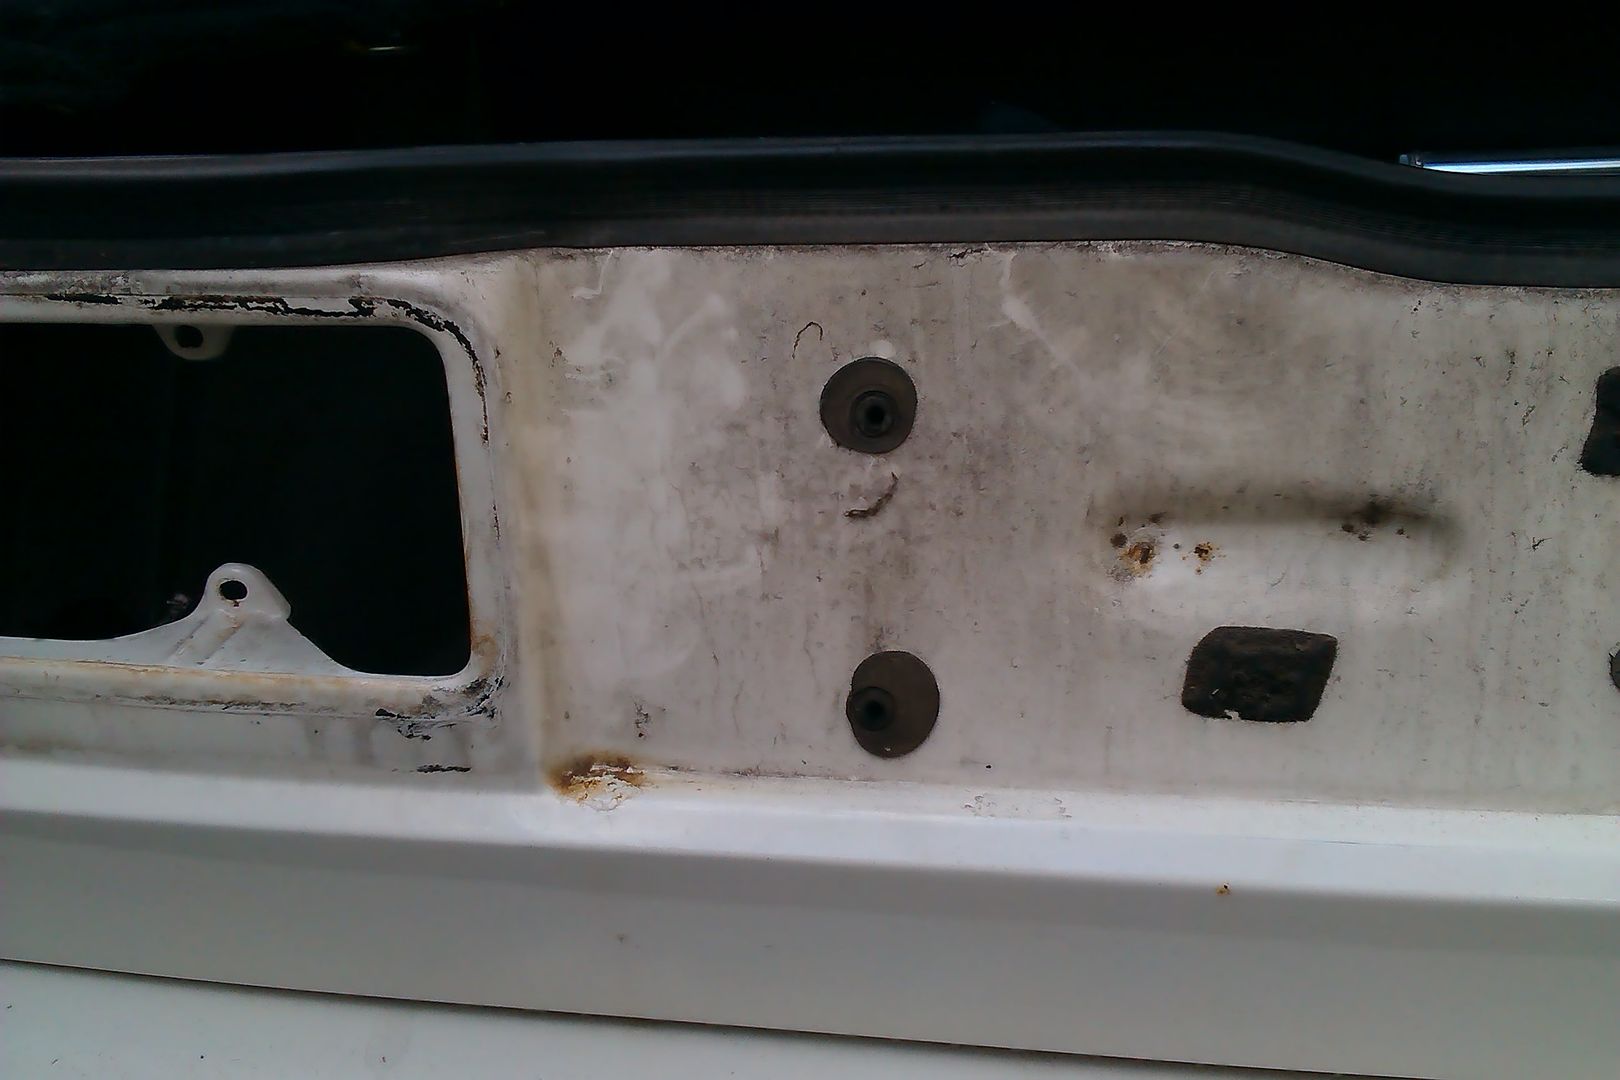
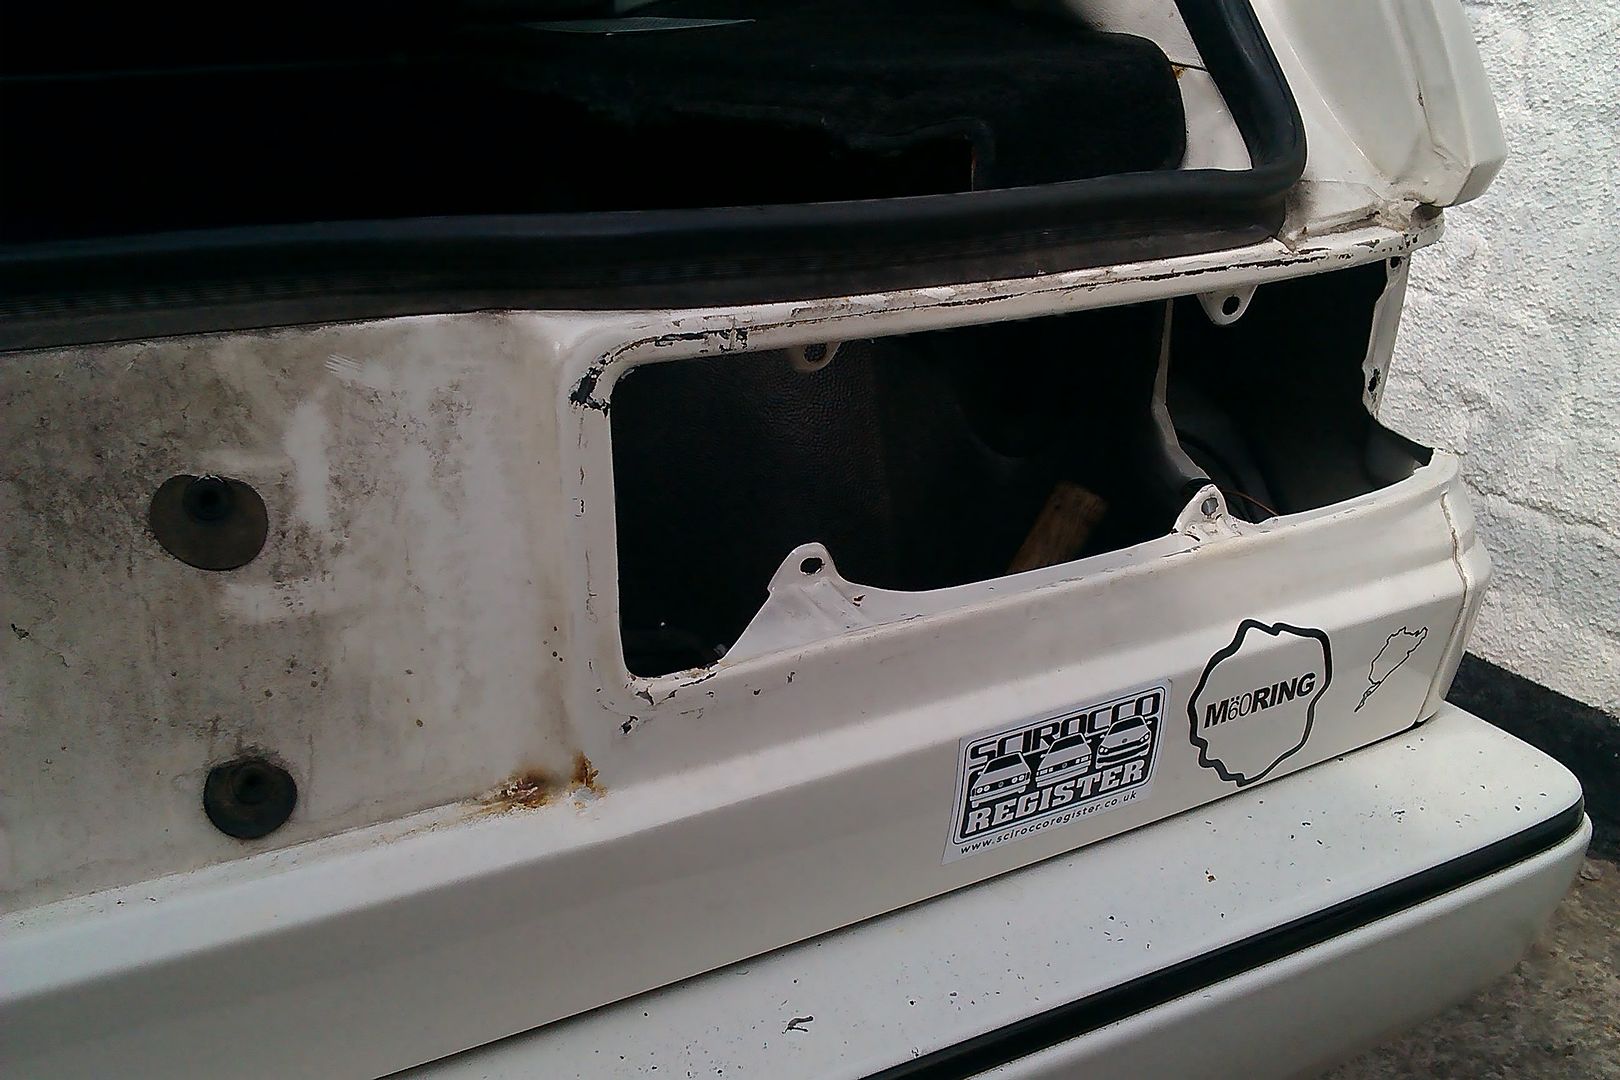
First job was using my Dremel thingy to grind back the rust and paint, there were a fre more spots noticed as well-
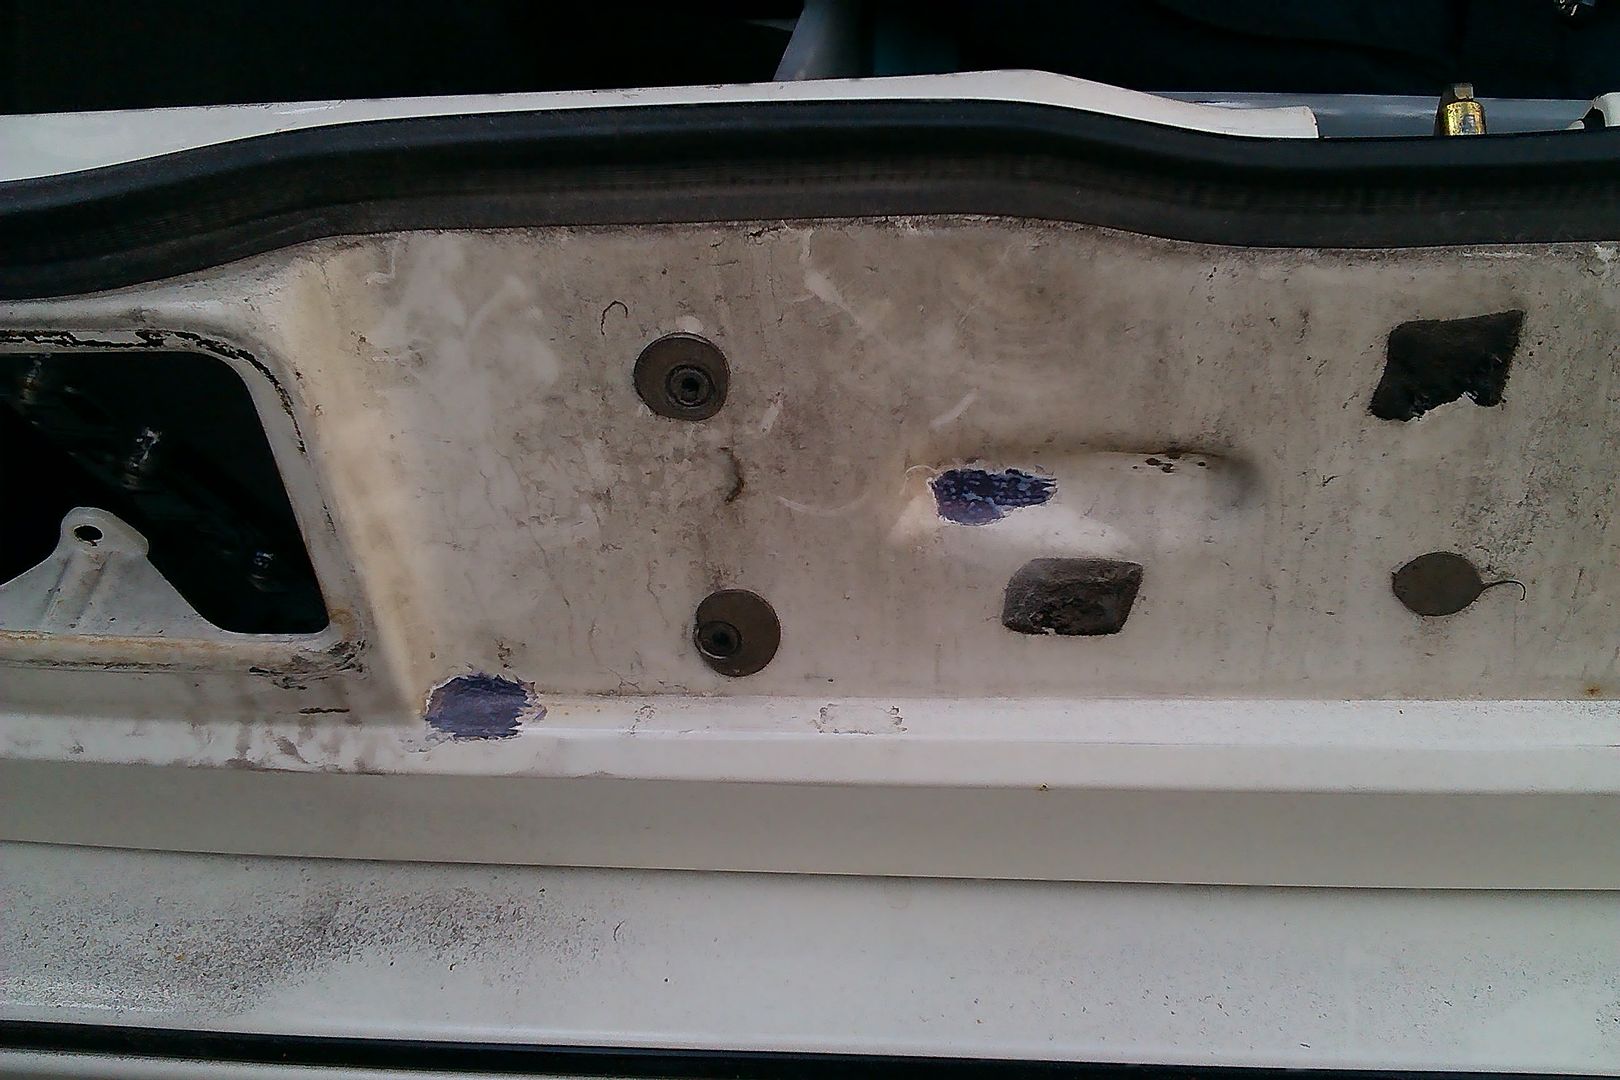
Then it was rust treatment
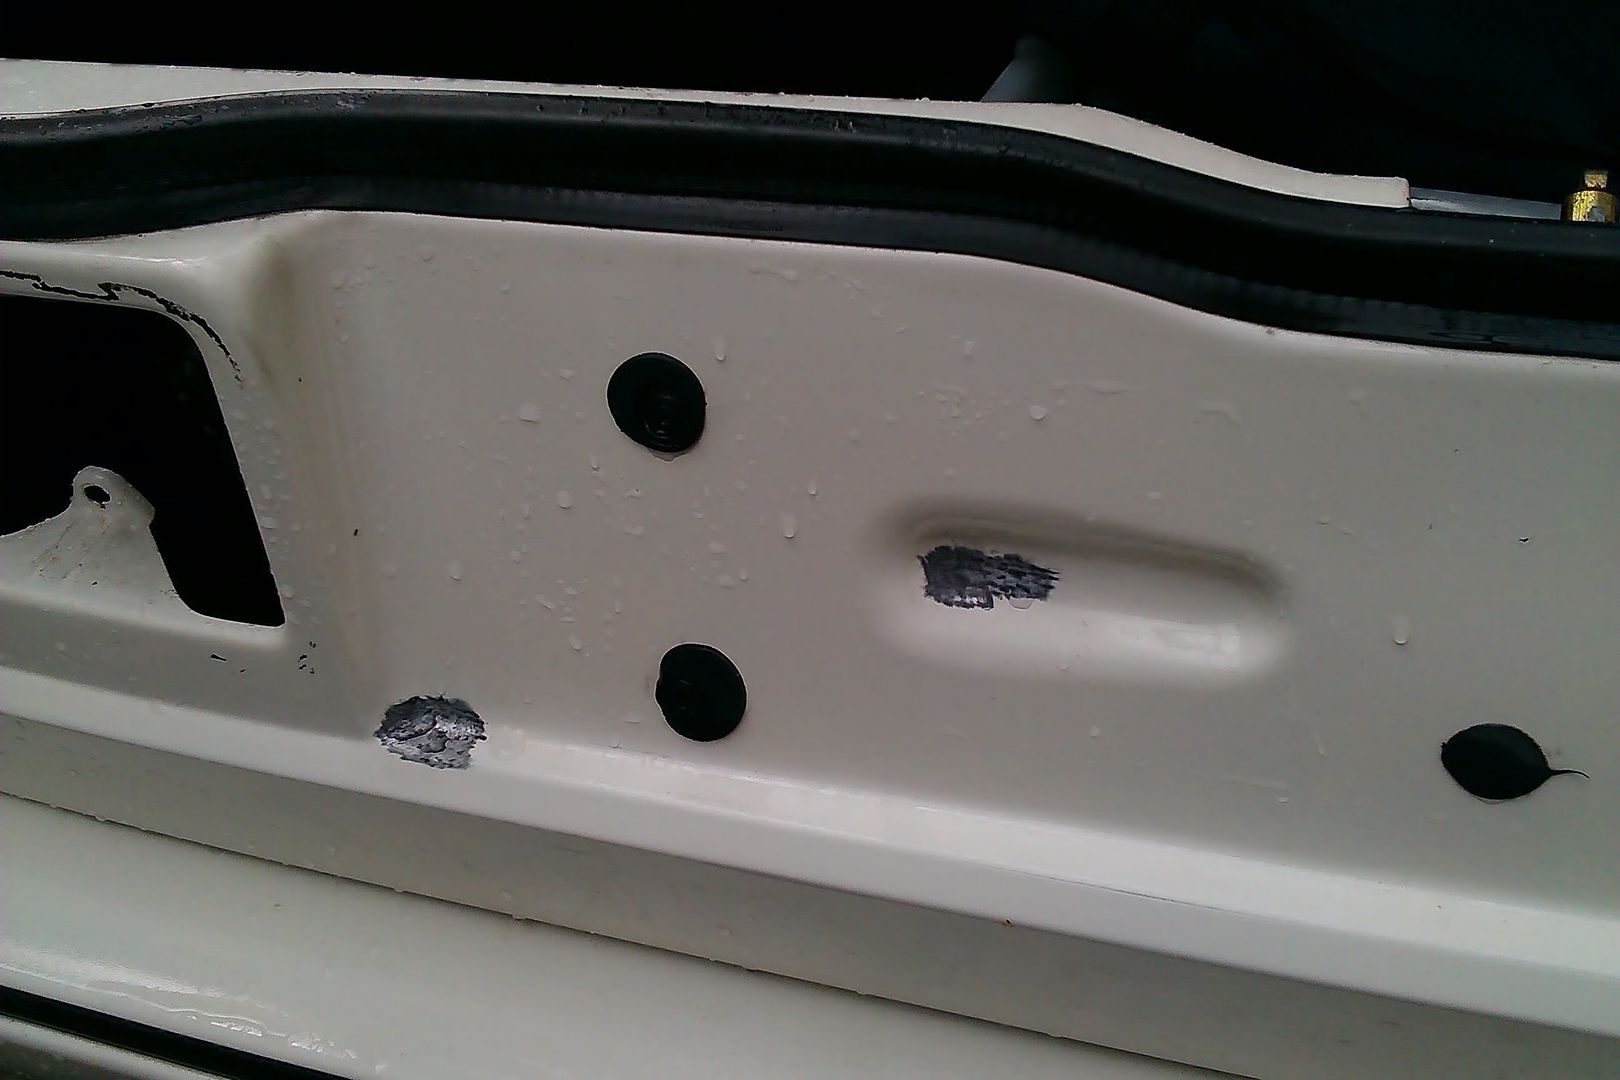
Before etch primer
And a several top coats
All that was left was to wet and dry the “edge” of the paint and t-cut
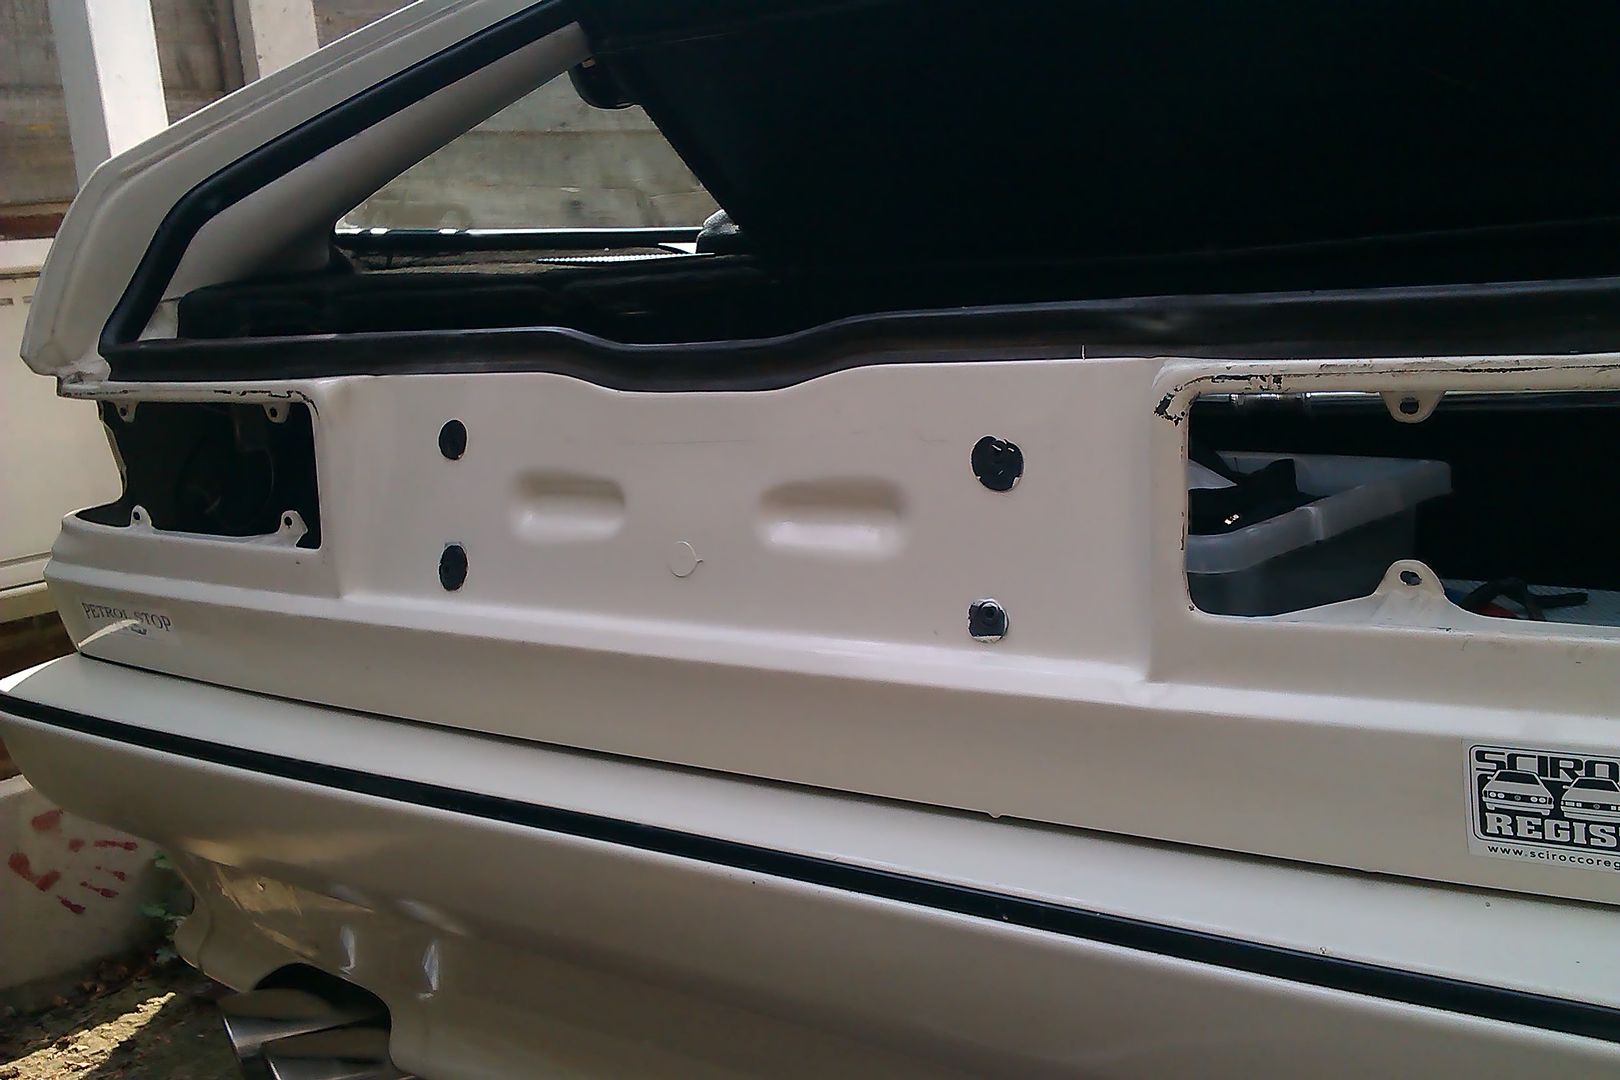
When I removed the rear lights I had the added issue of one being sealed in (it had leaked in the past) so when I finally prised it from the body it ripped the black seal from the lighting unit :(
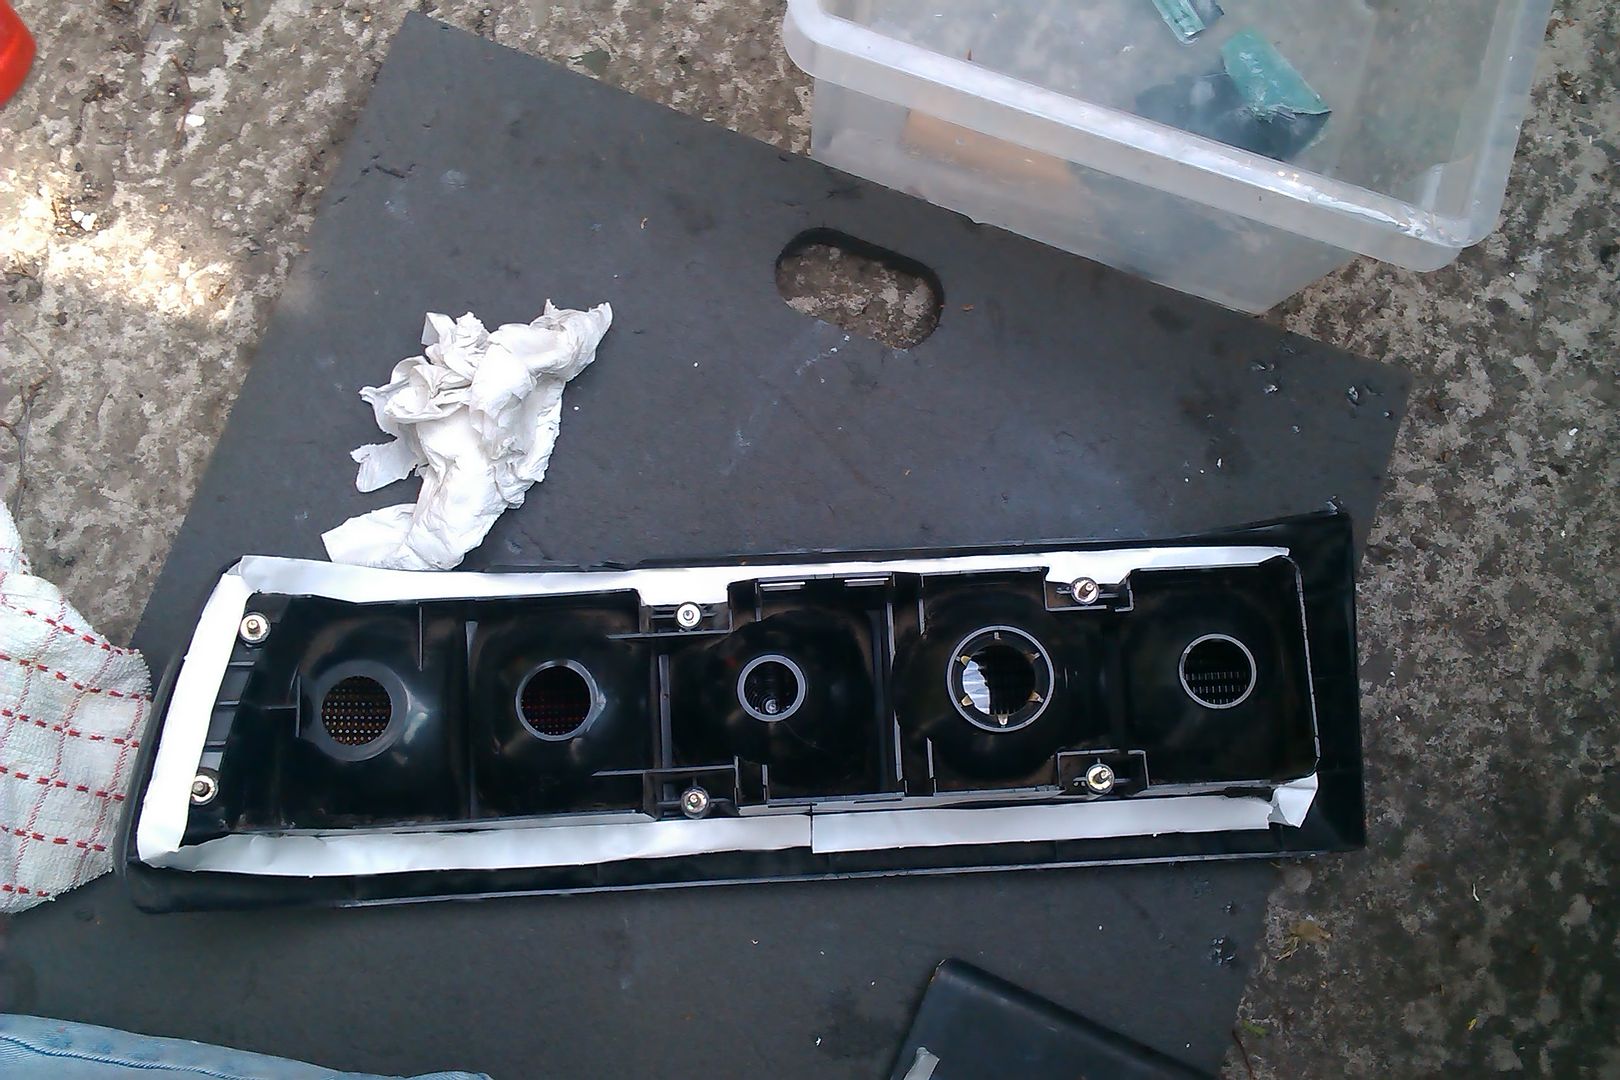
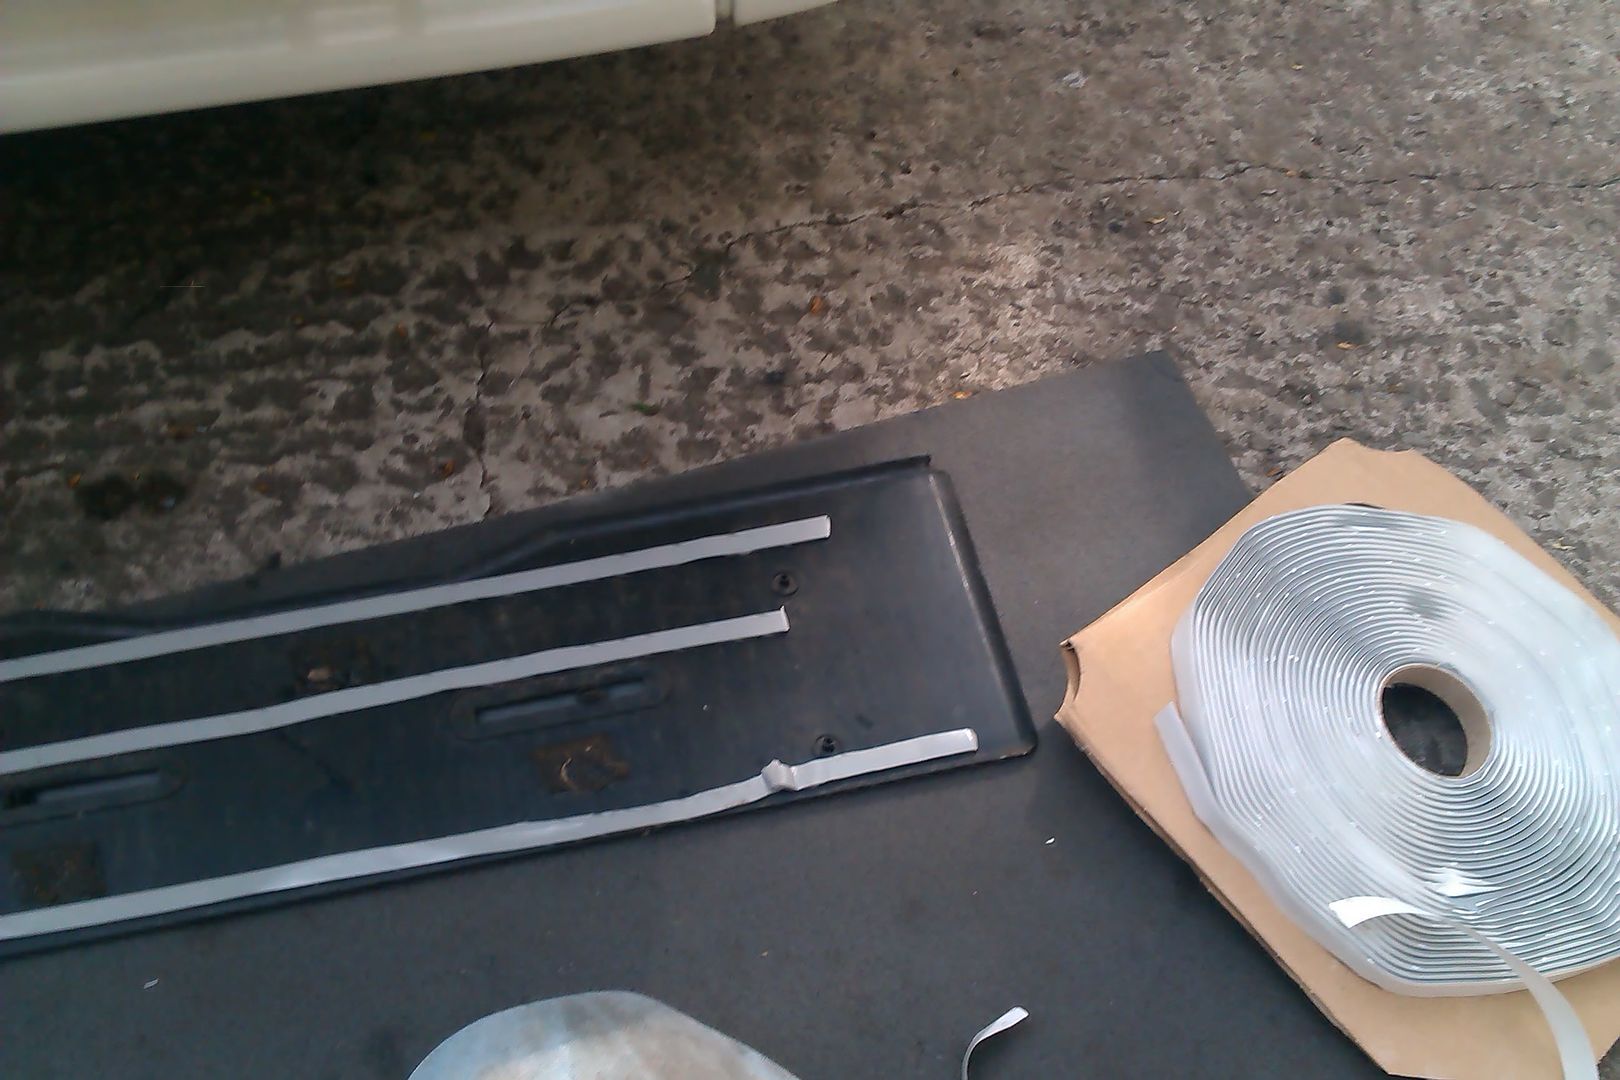
Thankfully I still had lots of seal to this was added as well as to the numberplate panel making sure to ass some to the corners to stop them vibrating
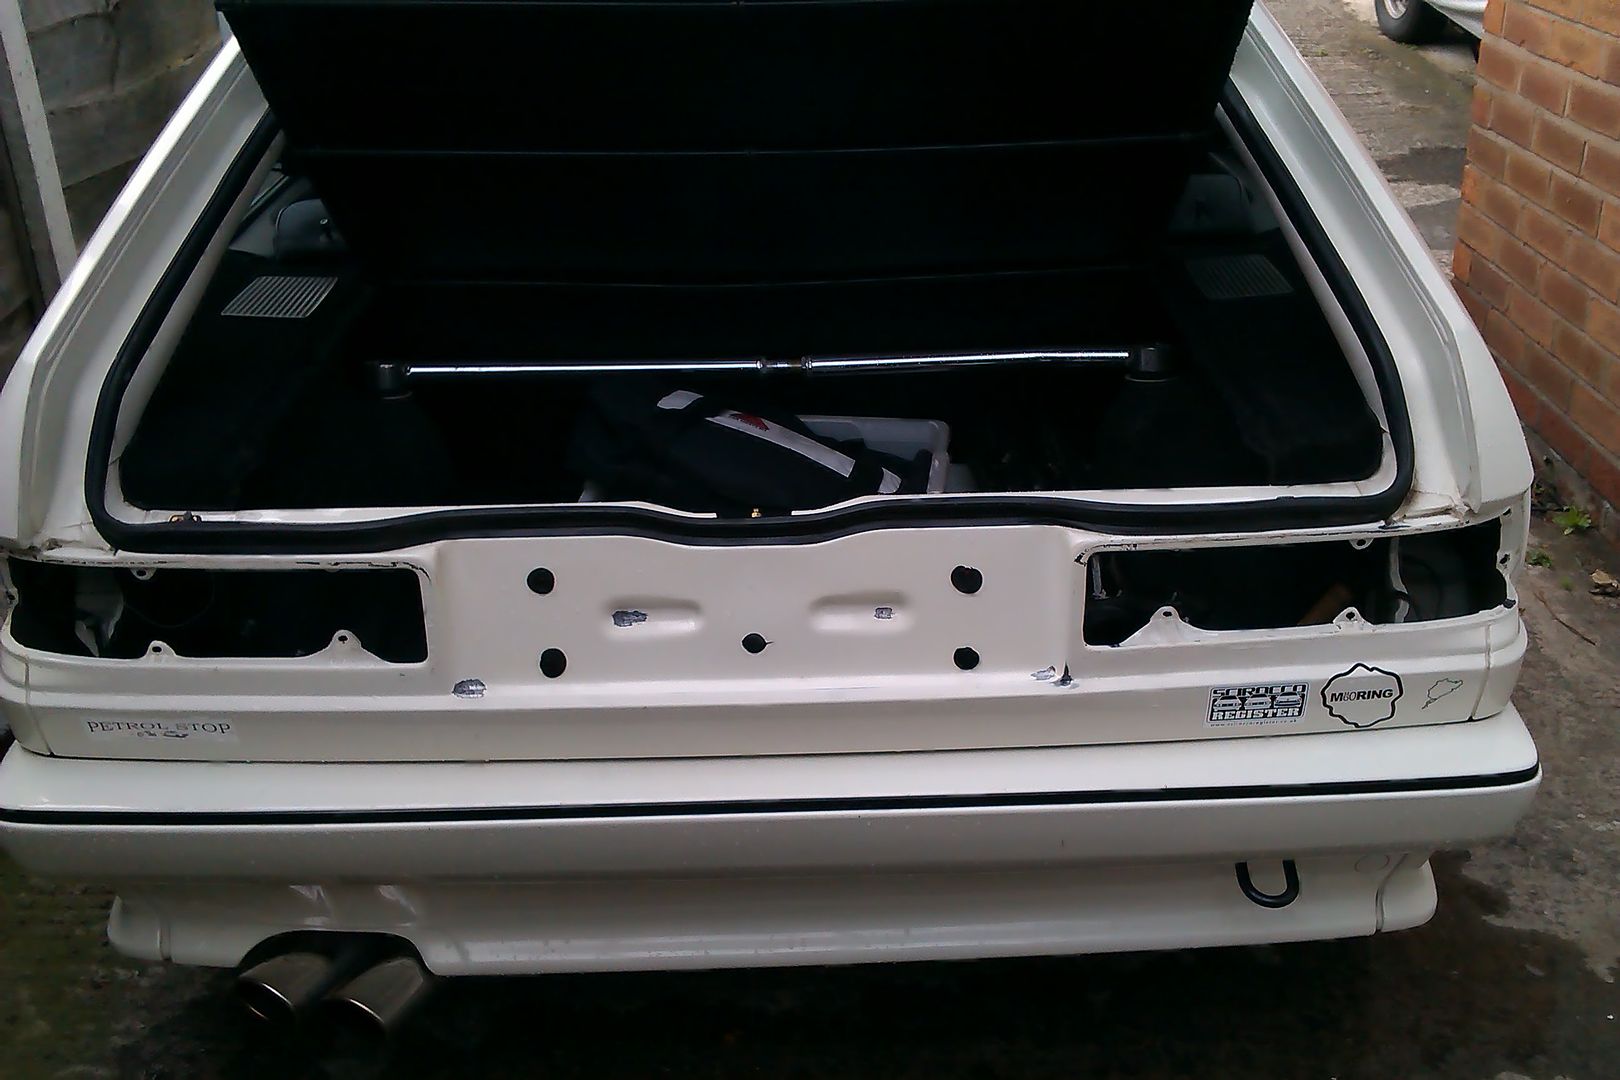
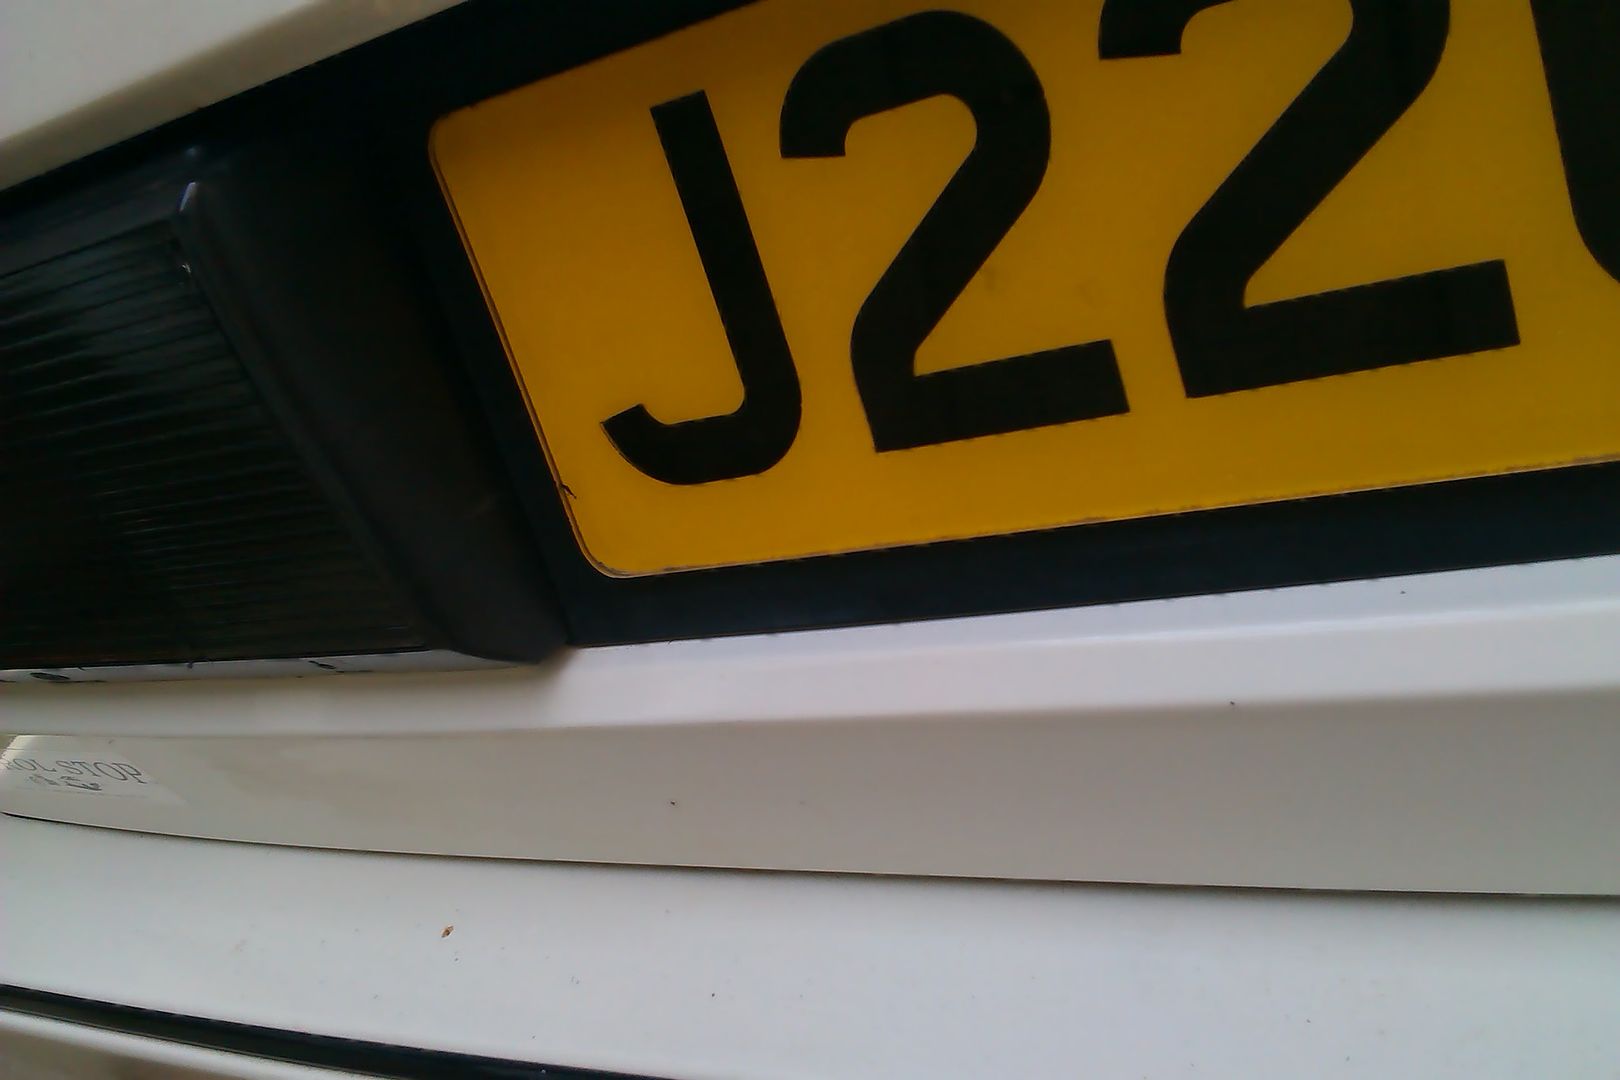
And finally it was all back together.
Next job is the front valance, not making it look pretty just stopping the rust and protecting it probably with stonchip and hammerite
Re: Eefy's White Scala
Posted: Tue May 06, 2014 10:33 pm
by isaidthephil
Excellent work sir :) I wish I had put an order in for one of them rain trays now :s Any idea if too many were ordered?
Re: Eefy's White Scala
Posted: Wed May 07, 2014 1:47 pm
by eefy
Re: Eefy's White Scala
Posted: Wed May 07, 2014 7:44 pm
by isaidthephil
Got one put aside for me=) Nothing I hate more than a shitty falling apart skuttle tray
Re: Eefy's White Scala
Posted: Fri May 30, 2014 1:49 pm
by isaidthephil
Skuttle tray ordered :) bish bash bosh.


