
Project RED GTX
Forum rules
Section for all vehicle and related projects. Please keep responses pertinent to thread.
Section for all vehicle and related projects. Please keep responses pertinent to thread.
-
Mikeyb
- Posts: 29
- Joined: Fri Apr 02, 2010 8:58 pm
- fill in the right answer: 10
- Location: Bradford/Leeds. West Yorkshire
Re: Project RED GTX
What a beautiful car! I've just read the whole thread and I'm well impressed, Hat's off Sir!
GTX Baby!
-
markh
- Posts: 718
- Joined: Wed Apr 01, 2009 2:14 pm
- fill in the right answer: 15
- Location: Newcastle, Staffordshire.
Re: Project RED GTX
Mikeyb wrote:What a beautiful car! I've just read the whole thread and I'm well impressed, Hat's off Sir!
Cheers for that fella !
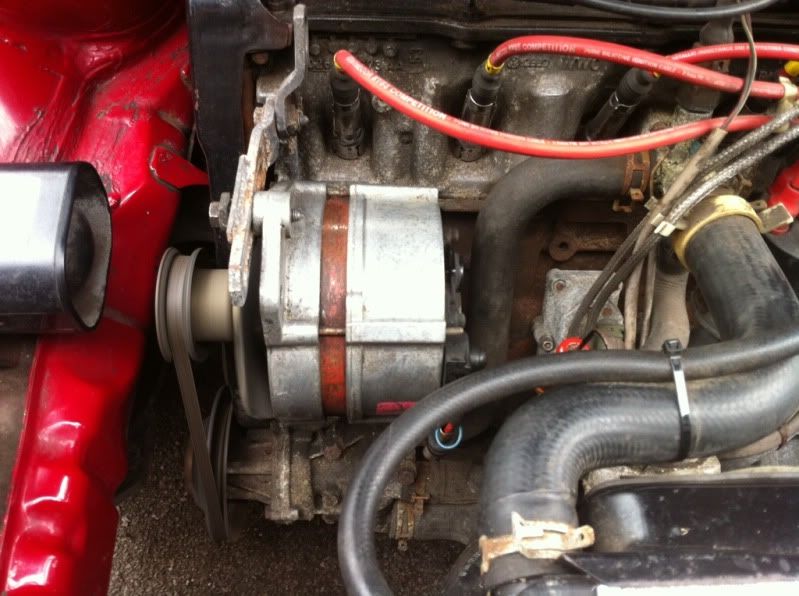
Only a minor update today, i decided to fit a 90amp alternator, no real reason other than i had one spare.
Then spent a couple of hours giving the whole car a thorough clean, i almost got round to giving it a polish but just couldnt be arsed in the end.
Don't ask me....it was like that when i got here !

-
markh
- Posts: 718
- Joined: Wed Apr 01, 2009 2:14 pm
- fill in the right answer: 15
- Location: Newcastle, Staffordshire.
Re: Project RED GTX
After finding out last week that the local upholstery company that said they could repair my seat bolster had closed down, i decided to look on ebay for a interior to salvage some covers from. I found a full set of seats from a mk2 16v Goof in Leek, so really close to me, won it for the princely sum of £10 and went to collect it this afternoon.  .
.
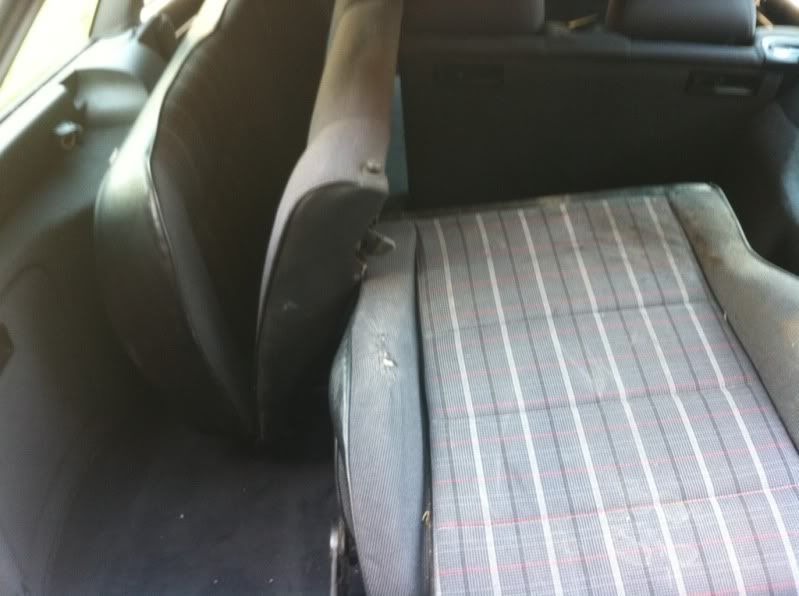
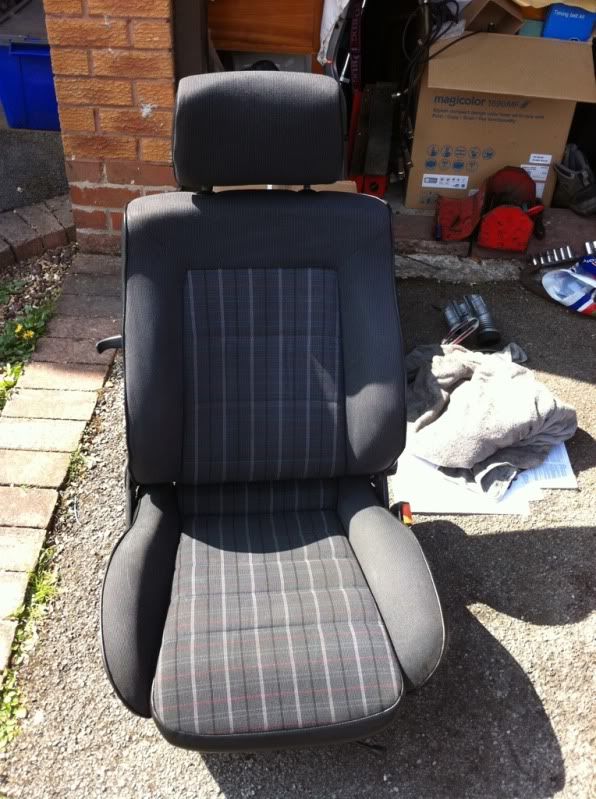
The drivers seat is knackered and obviously the rear bench is no use to me but its the passenger seat i was really after and its in perfect condition.
Ok, it needs a good clean but thats not an issue. Im hoping to get the covers and foam bolsters swapped over with my drivers seat tomorrow. Then thats one of the major issues with the car sorted.
Don't ask me....it was like that when i got here !
-
markh
- Posts: 718
- Joined: Wed Apr 01, 2009 2:14 pm
- fill in the right answer: 15
- Location: Newcastle, Staffordshire.
Re: Project RED GTX
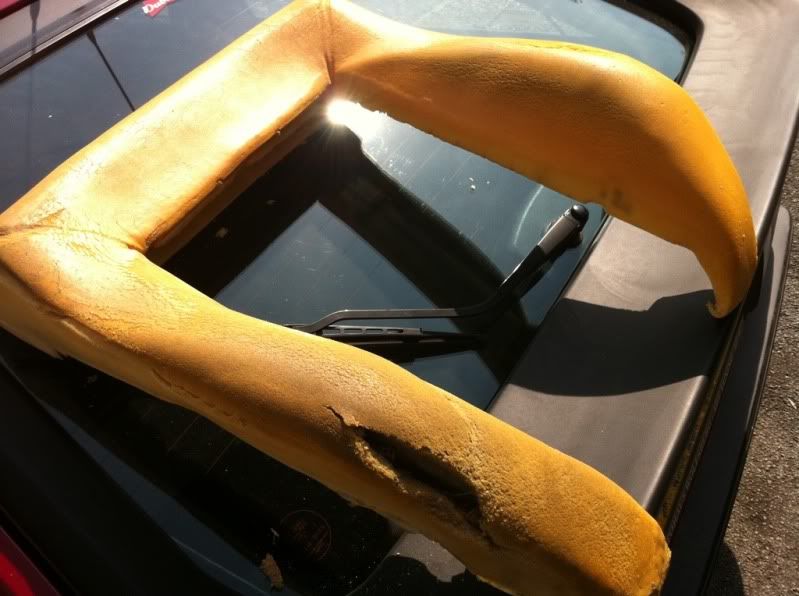
Perfect weather today for working outdoors  First off, remove my tired drivers seat.
I stripped it down and took out the knackered bolster foam.
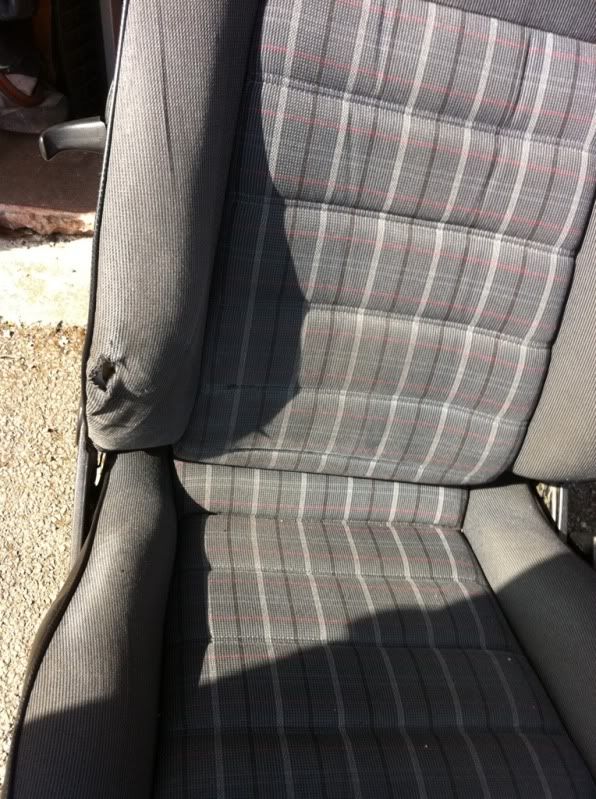
The bits from the MK2 Goof seats are slightly different than the Rocco ones, but this is actually a benefit as there arent so many of those annoying little wire bars and wire clips to undo and reattach. I fitted the Golf upper bolster to the Rocco upper seat frame.
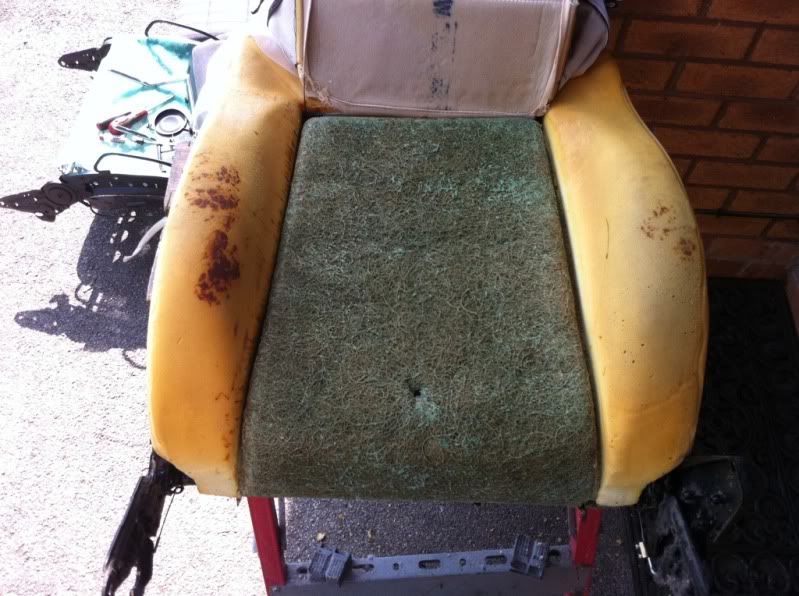
There are more springs in the seat backs of the Golf seats, so i took the original, longer Rocco ones out and replaced them with the tighter and more plentiful Golf ones, this has resulted in a much comfier upper seat. I refitted the replacement cover, headrest and lift handle, gave it a damn good scrub with upholstery cleaner, then left it in the sun to dry while i cracked on with changing the lower worn bolster foam.

Now the lower bolster material isnt worn, but i could feel that the foam bolster had deteriorated, so i decided id keep the original covers and just change the foam. So out comes the knackered foam.
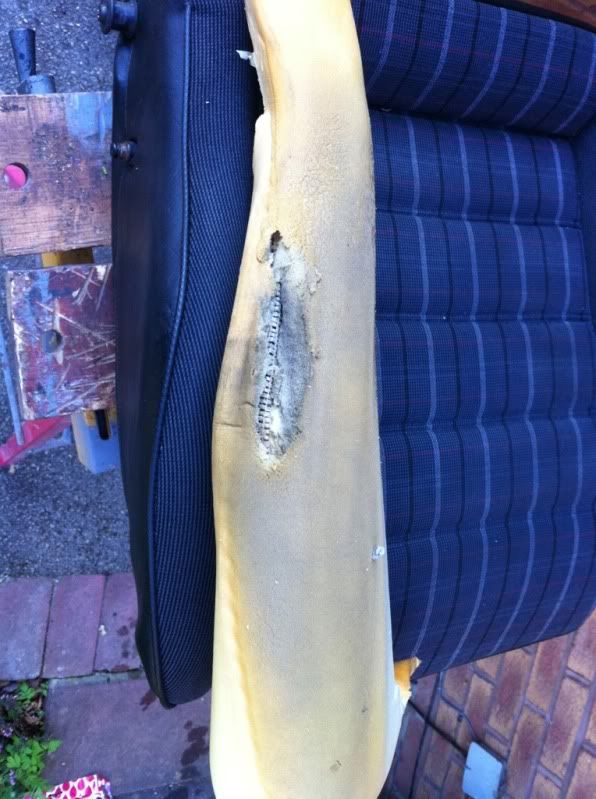
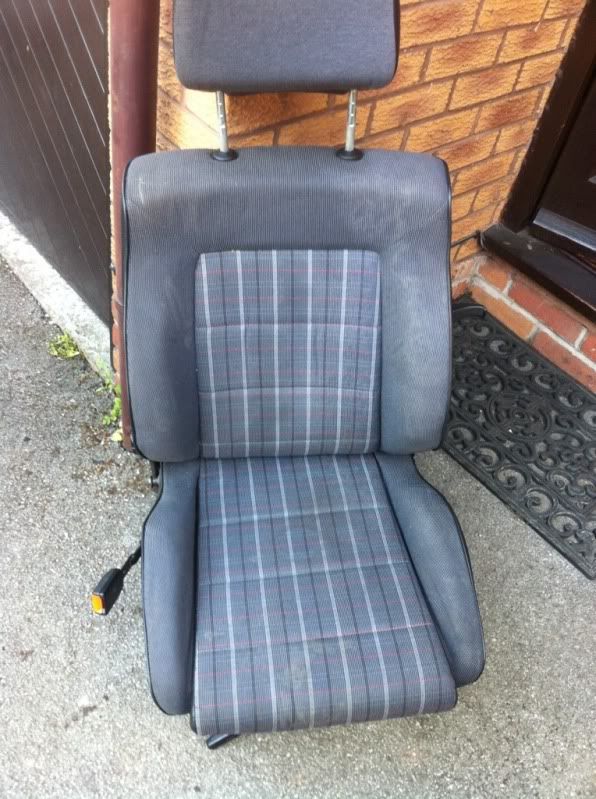
The Golf seat base foam is a one piece affair as opposed the the two separate bolsters in the Rocco seats, so i just cut out the side i needed and tucked it into place and refitted the cover. The finished article.
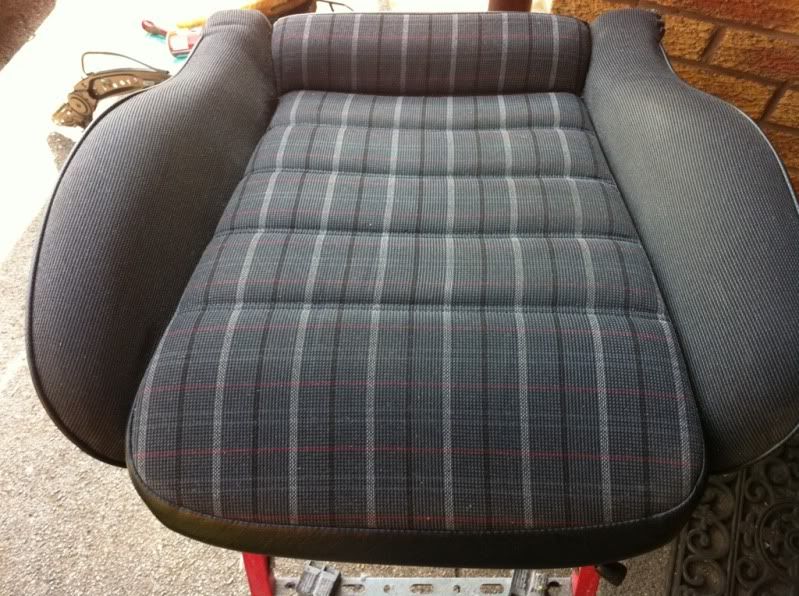
Not a brilliant picture but this is the finished seat.
And refitted in the car. Im really pleased with the outcome and it means it wont have to keep hoovering bits of foam out off the carpet !
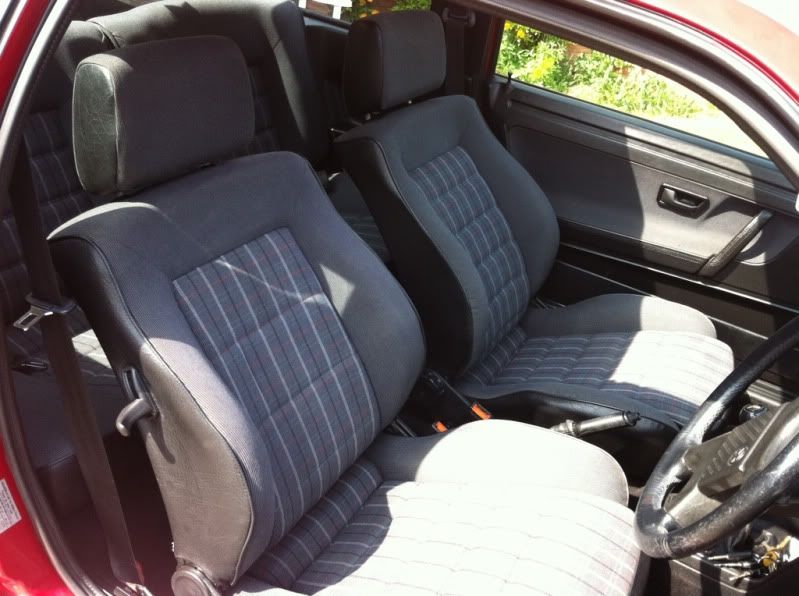
Im sure the Rocco purists out there will notice the one slight difference....
I also changed the coolant level sensor as it had sprung a leak. I had originally thought it was the seal that was shot, but it turns out the body of the sensor itself was cracked and allowing water to seep out. The new one arrived in the post today.
I stripped it down and took out the knackered bolster foam.
The bits from the MK2 Goof seats are slightly different than the Rocco ones, but this is actually a benefit as there arent so many of those annoying little wire bars and wire clips to undo and reattach. I fitted the Golf upper bolster to the Rocco upper seat frame.
There are more springs in the seat backs of the Golf seats, so i took the original, longer Rocco ones out and replaced them with the tighter and more plentiful Golf ones, this has resulted in a much comfier upper seat. I refitted the replacement cover, headrest and lift handle, gave it a damn good scrub with upholstery cleaner, then left it in the sun to dry while i cracked on with changing the lower worn bolster foam.
Now the lower bolster material isnt worn, but i could feel that the foam bolster had deteriorated, so i decided id keep the original covers and just change the foam. So out comes the knackered foam.
The Golf seat base foam is a one piece affair as opposed the the two separate bolsters in the Rocco seats, so i just cut out the side i needed and tucked it into place and refitted the cover. The finished article.
Not a brilliant picture but this is the finished seat.
And refitted in the car. Im really pleased with the outcome and it means it wont have to keep hoovering bits of foam out off the carpet !
Im sure the Rocco purists out there will notice the one slight difference....
I also changed the coolant level sensor as it had sprung a leak. I had originally thought it was the seal that was shot, but it turns out the body of the sensor itself was cracked and allowing water to seep out. The new one arrived in the post today.
Don't ask me....it was like that when i got here !
-
brass007
- Posts: 34
- Joined: Wed Apr 01, 2009 8:42 pm
- fill in the right answer: 10
- Location: Hixon, near a train crash site!
Re: Project RED GTX
Tut Tut
your lacking ripples in your drivers back seat....
apart from that
your lacking ripples in your drivers back seat....
apart from that

Royalrocket A.K.A Ferocio owned by an 8 year old! With RAG and Dr Dub Storm for company!!!
-
markh
- Posts: 718
- Joined: Wed Apr 01, 2009 2:14 pm
- fill in the right answer: 15
- Location: Newcastle, Staffordshire.
Re: Project RED GTX
brass007 wrote:Tut Tut
your lacking ripples in your drivers back seat....
apart from that
Yup, one less on the Goof seat back.
Don't ask me....it was like that when i got here !

-
markh
- Posts: 718
- Joined: Wed Apr 01, 2009 2:14 pm
- fill in the right answer: 15
- Location: Newcastle, Staffordshire.
Re: Project RED GTX
It was from Volksbits via EBay Stu, just do a search for Golf coolant level sensor. It was about £8 posted. The electrical connection is very slightly different from the original but the plug still fits.stu.gtx wrote:Hi Mark,
Where did you get the coolant sensor from - dealer?
Don't ask me....it was like that when i got here !
-
markh
- Posts: 718
- Joined: Wed Apr 01, 2009 2:14 pm
- fill in the right answer: 15
- Location: Newcastle, Staffordshire.
Re: Project RED GTX
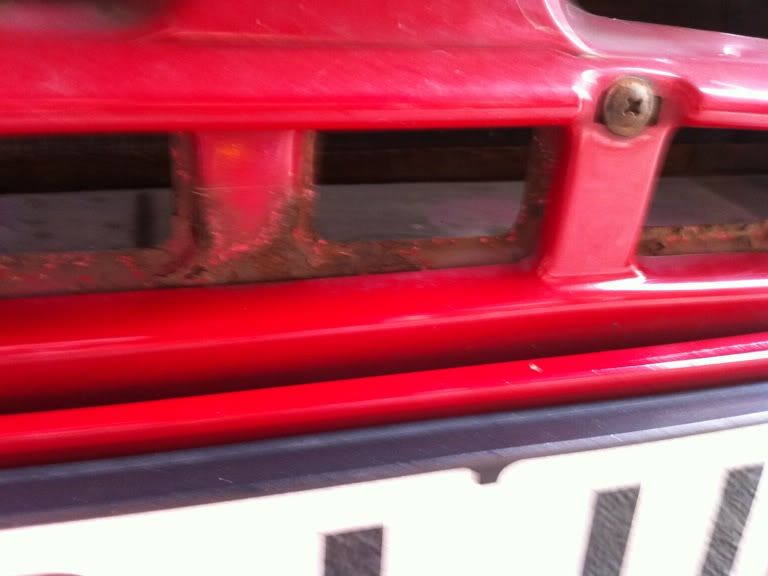
Well its nearly National Meet time,so i thought it was time to get some of the long overdue jobs sorted out. One thing that annoys me on the GTX ( although its been an issue on most of the Roccos i've owned) is the rust visble through the front body kit skirt. This is what i mean.
So, off comes the front bumper and front skirt is lowered out of the way.
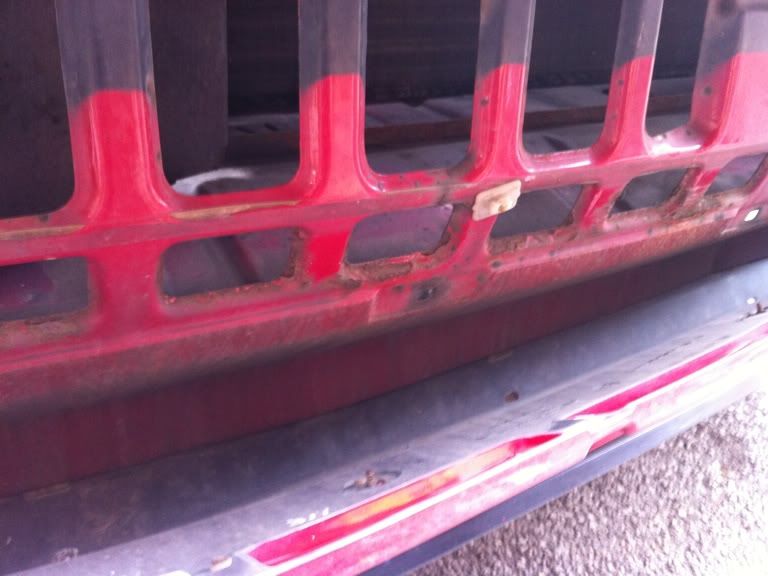
Then the rust is cleaned off, treated and spray painted satin black.
Then i get to try out an idea i've had for some time ( it may have been done before, though i dont recall seeing it recently) which involves fitting wire grill mesh underneath the front skirt. I had a piece of aluminium mesh, which i had intended to spray black but it turns out to be too small. I had a walk to my regular car parts shop and ended up buying a huge sheet of red coloured aluminium mesh, it was way too big but was the last one he had in stock and he gave me a good discount on it. My intention was still to spray it black before fitting it but when i cut the piece i wanted and tried it for size on the car, i decided i liked how it looked and left it red.
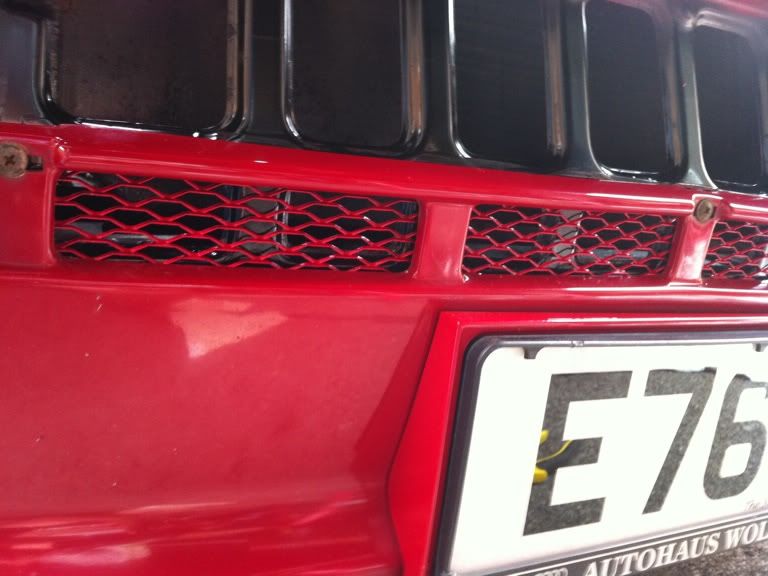
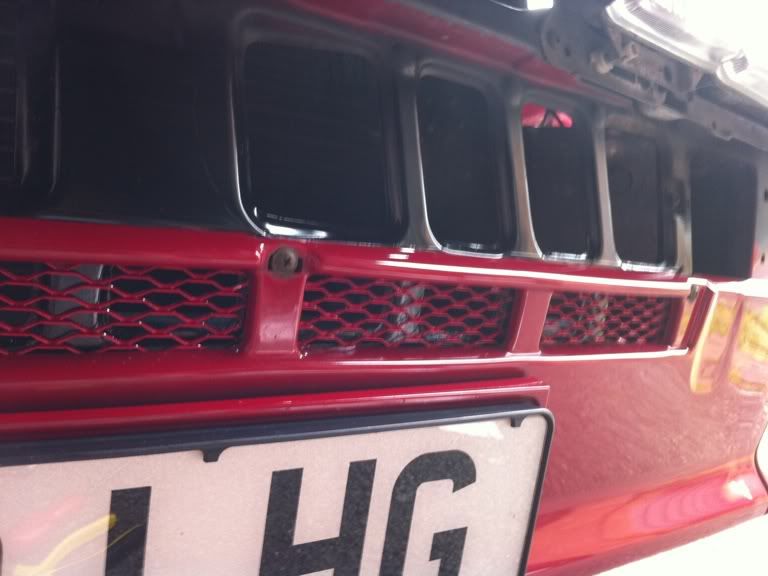
And with the bumper refitted.
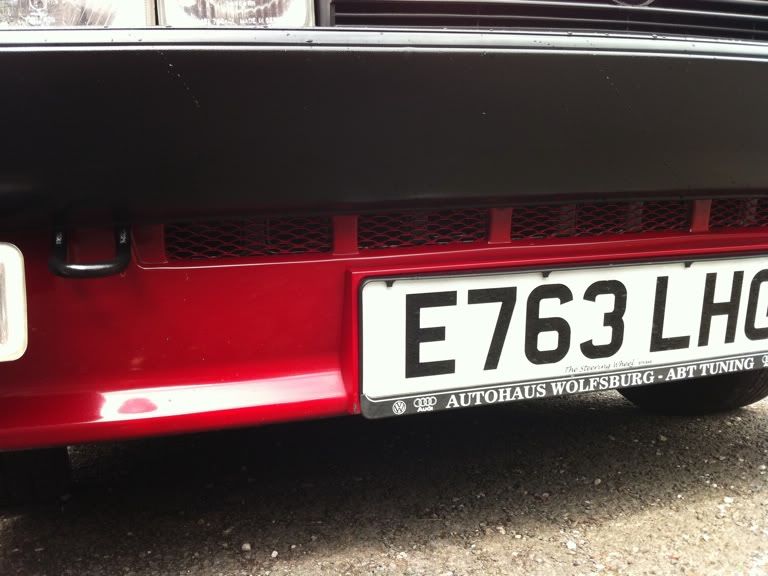
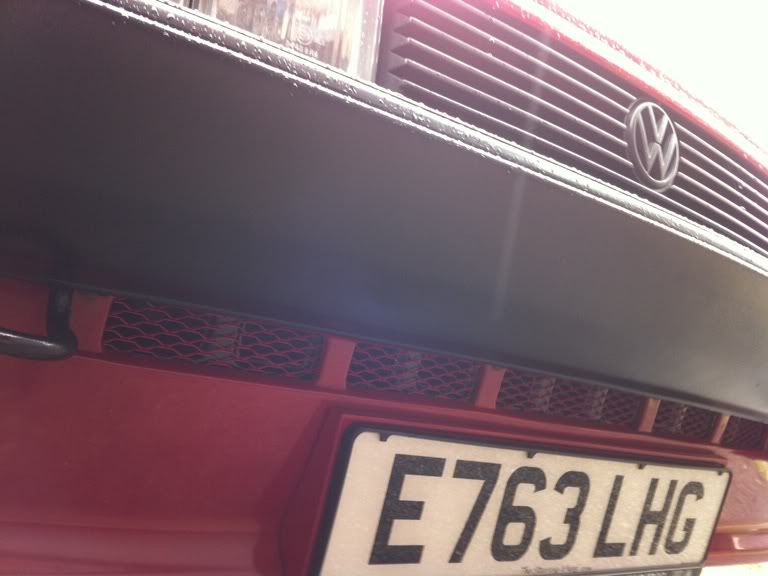
Im very pleased with the result and its cleaned up the front end nicely.
I intend to get some more jobs done tomorrow and then the cars off to the bodyshop the week before the National, to have the dents in the bonnet and roof sorted and then resprayed ( not the whole car, just the bonnet and roof)
So, off comes the front bumper and front skirt is lowered out of the way.
Then the rust is cleaned off, treated and spray painted satin black.
Then i get to try out an idea i've had for some time ( it may have been done before, though i dont recall seeing it recently) which involves fitting wire grill mesh underneath the front skirt. I had a piece of aluminium mesh, which i had intended to spray black but it turns out to be too small. I had a walk to my regular car parts shop and ended up buying a huge sheet of red coloured aluminium mesh, it was way too big but was the last one he had in stock and he gave me a good discount on it. My intention was still to spray it black before fitting it but when i cut the piece i wanted and tried it for size on the car, i decided i liked how it looked and left it red.
And with the bumper refitted.
Im very pleased with the result and its cleaned up the front end nicely.
I intend to get some more jobs done tomorrow and then the cars off to the bodyshop the week before the National, to have the dents in the bonnet and roof sorted and then resprayed ( not the whole car, just the bonnet and roof)
Don't ask me....it was like that when i got here !

Re: Project RED GTX
Looking good Mark, quick question, the front skirt is it stuck in place with tape or will it just come off with the screws out? (mines a right state lol)

-
markh
- Posts: 718
- Joined: Wed Apr 01, 2009 2:14 pm
- fill in the right answer: 15
- Location: Newcastle, Staffordshire.
Re: Project RED GTX
Screws at the top and bottom Heath, screws behind the two circular caps and a bit of adhesive at either end, they are easy to take off bud.
Don't ask me....it was like that when i got here !
-
markh
- Posts: 718
- Joined: Wed Apr 01, 2009 2:14 pm
- fill in the right answer: 15
- Location: Newcastle, Staffordshire.
Re: Project RED GTX
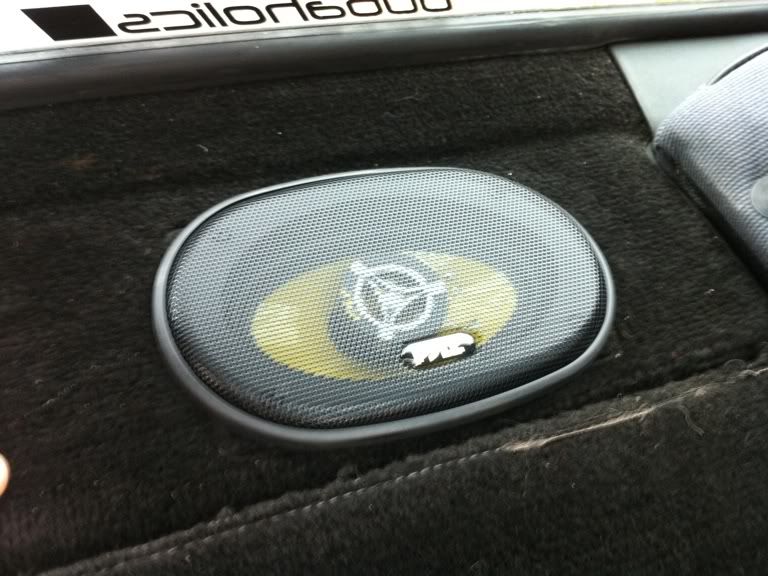
I didnt get much done today, i fitted new rear speakers.
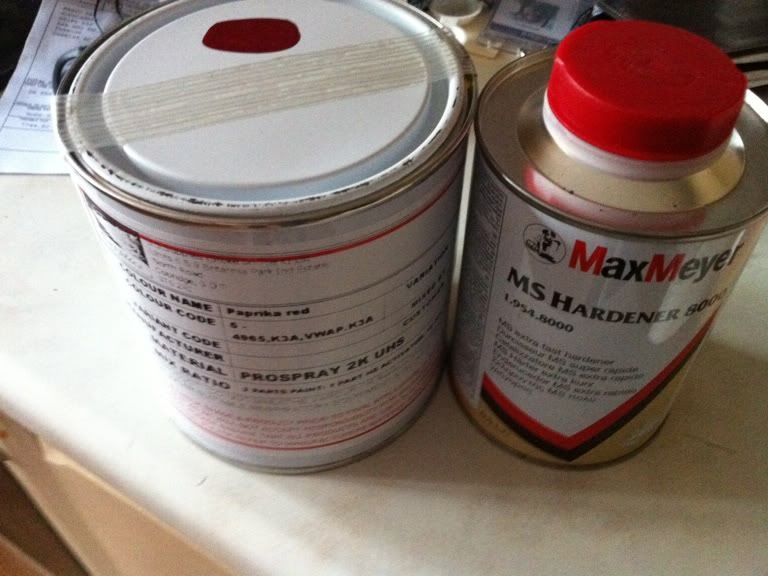
And also went to pick up some paint and activator ready for the body work to be done in the next couple of weeks.
And also went to pick up some paint and activator ready for the body work to be done in the next couple of weeks.
Don't ask me....it was like that when i got here !
-
markh
- Posts: 718
- Joined: Wed Apr 01, 2009 2:14 pm
- fill in the right answer: 15
- Location: Newcastle, Staffordshire.
Re: Project RED GTX
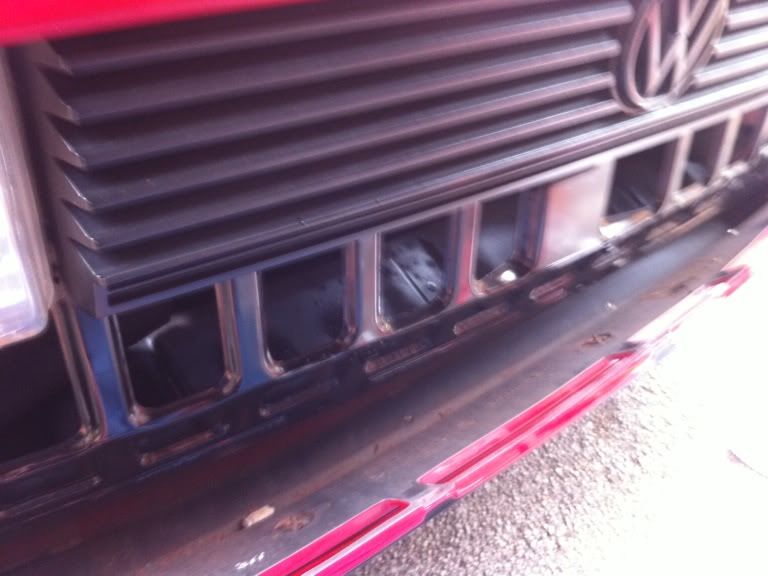
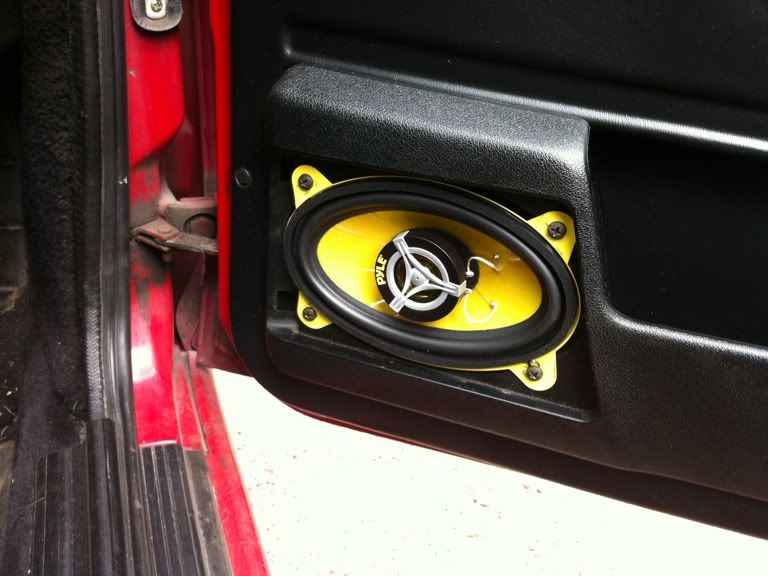
More jobs done today, first off, i fitted new front speakers. they were a bit of a tight fit, so needed some slight fettling to get them in. This is before the grills were put back.
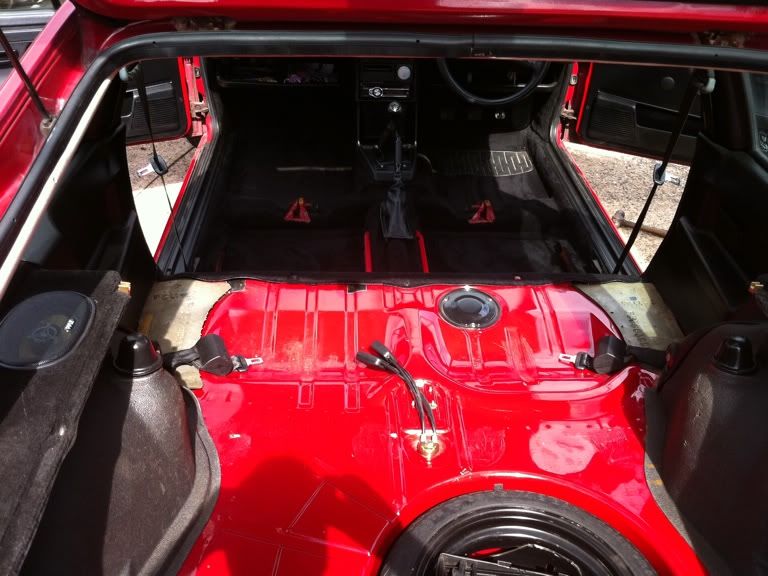
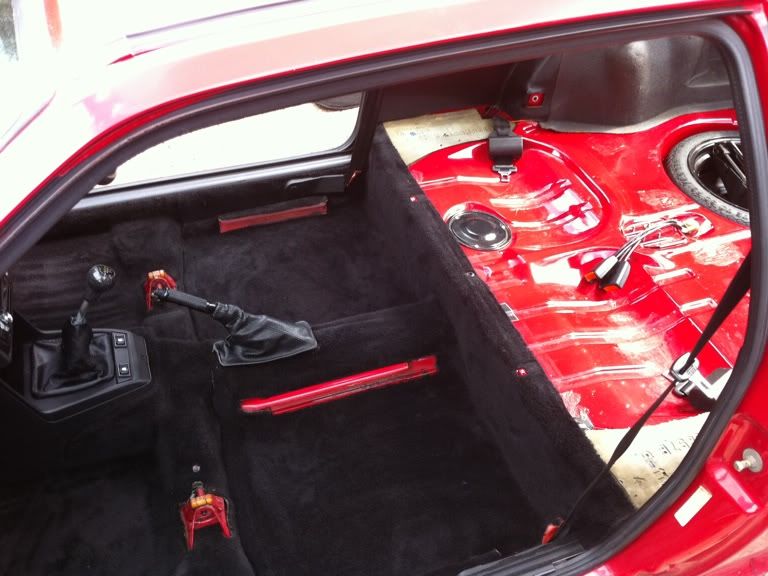
I also wanted to give the interior a thorough clean.
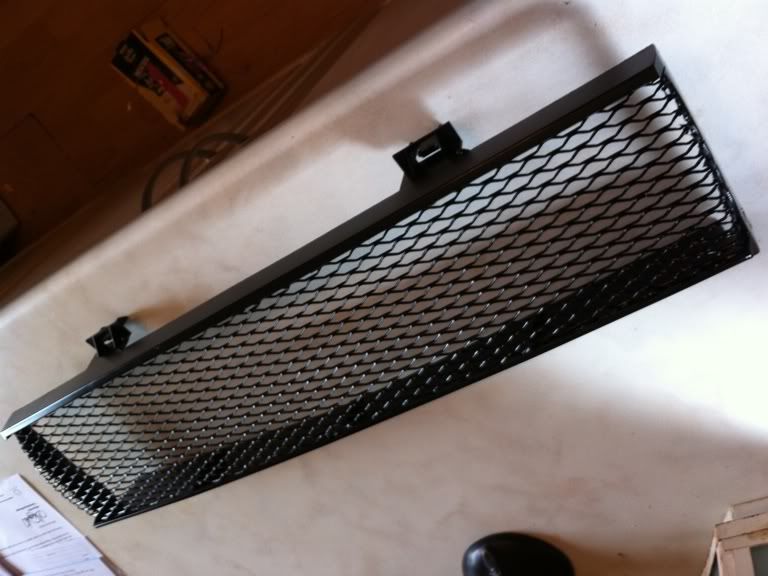
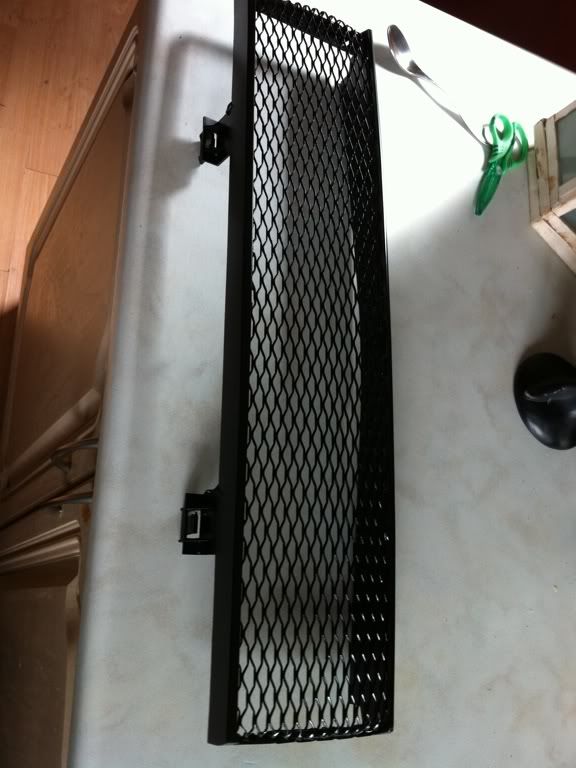
I made myself a new mesh grill. Pretty pleased with it.
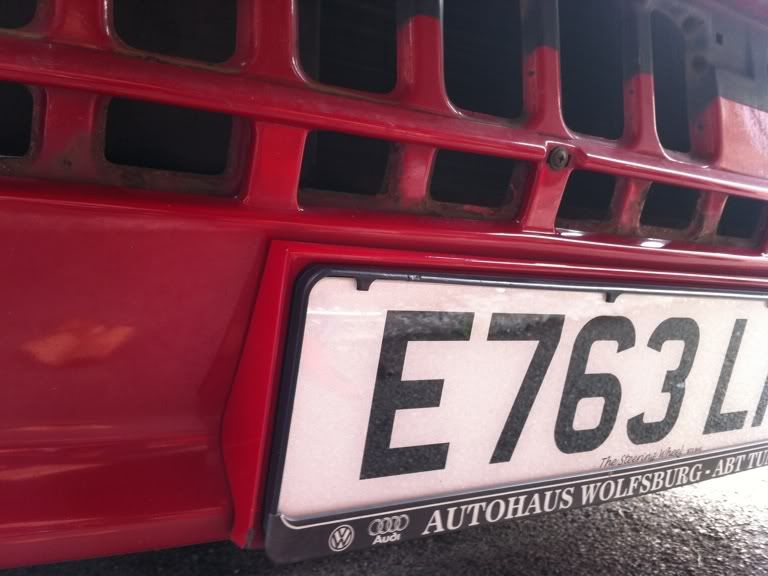
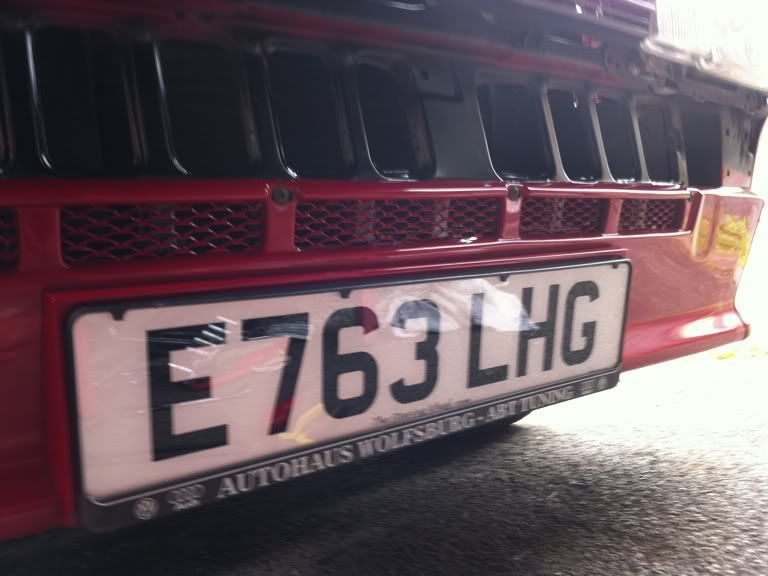
New mesh grill trial fitted along with new "show plates"
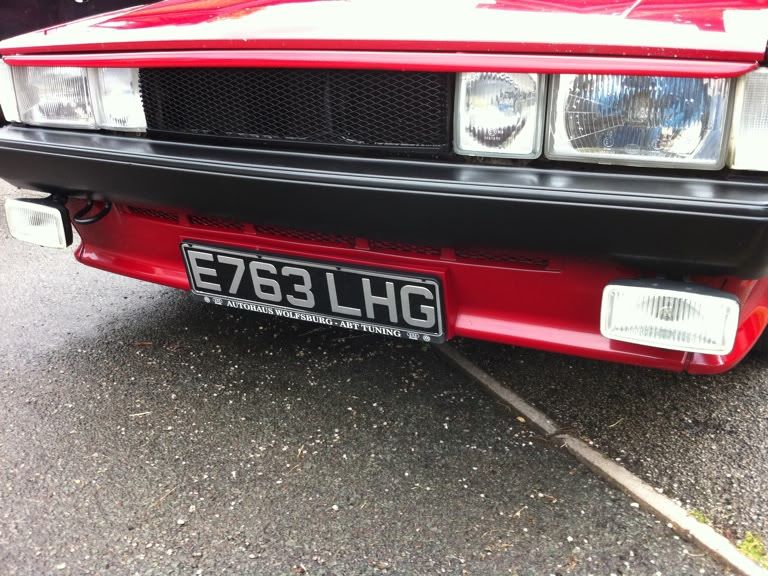
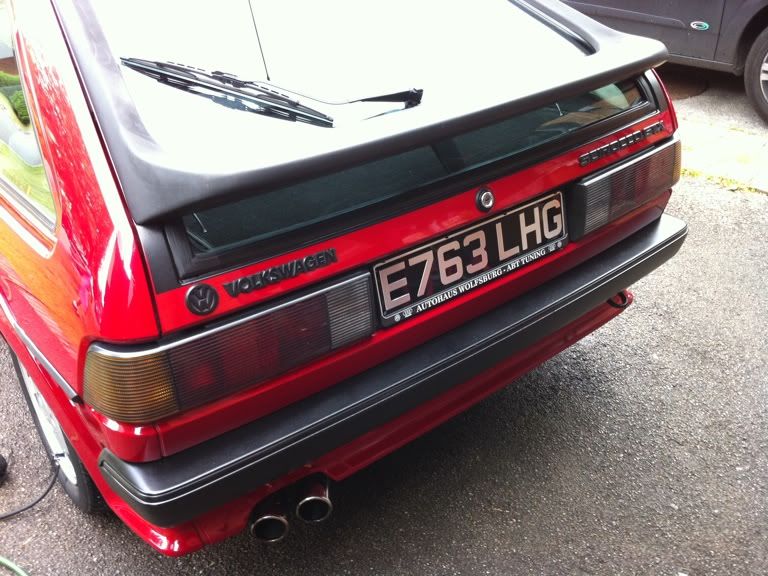
Im really not sure which i prefer, so for now i've refitted the standard grill. Then gave it a much needed wash off. Theres more work to be done but its going in for some paint next week, so the other bits will have to wait. The show plates are exactly that, show plates, so the legal ones have been put back.
I also wanted to give the interior a thorough clean.
I made myself a new mesh grill. Pretty pleased with it.
New mesh grill trial fitted along with new "show plates"
Im really not sure which i prefer, so for now i've refitted the standard grill. Then gave it a much needed wash off. Theres more work to be done but its going in for some paint next week, so the other bits will have to wait. The show plates are exactly that, show plates, so the legal ones have been put back.
Don't ask me....it was like that when i got here !
-
Reverend Frog

- Posts: 497
- Joined: Wed Apr 01, 2009 12:57 pm
- fill in the right answer: 15
- Location: Belfast
Re: Project RED GTX
I think Roccos look so much better with the full-width, 'show plate' typeface. It's not illegal AFAIK to have it on the normal plates, but it's a right pain in the hole finding a supplier who'll make them for you.
looks great anyway Mark
looks great anyway Mark
Previously owned:

1988 1.6 GT
1989 1.8 GT
1982 1.6 GTI
1993 Corrado VR6

1988 1.6 GT
1989 1.8 GT
1982 1.6 GTI
1993 Corrado VR6