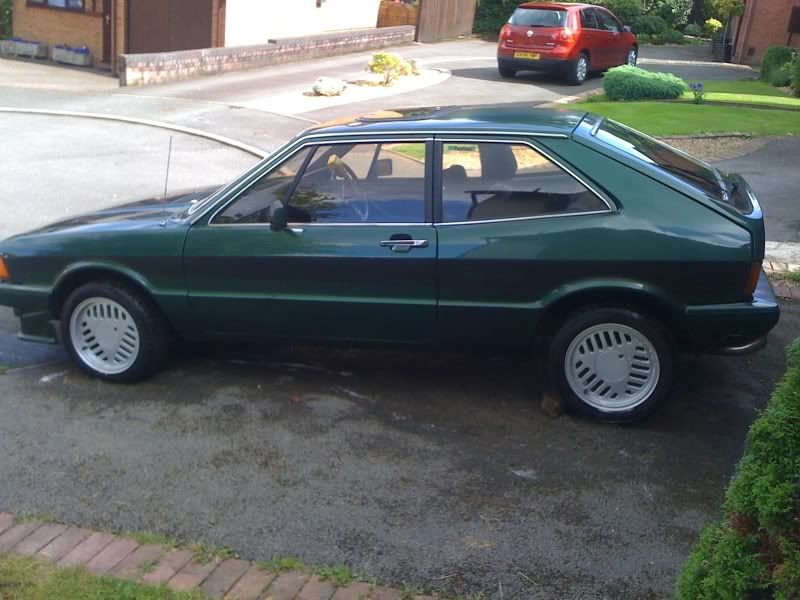
PROJECT RAG.

Scirocco Register members projects
Forum rules
Section for all vehicle and related projects. Please keep responses pertinent to thread.
markh
Posts: 718
Joined: Wed Apr 01, 2009 2:14 pm
fill in the right answer: 15
Location: Newcastle, Staffordshire.

PROJECT RAG.

Post by markh »

Well, DARE will soon be finished, and although 21a is also waitng in the wings, im itching to get the mk1 on the road. I gave it a quick look over yesterday ( still need to do a thorough underside check, when i get chance to get the wheels off) and so far the list includes.
Front and rear wiper blades shot.
Front number plate broken.
Rear fog light not working.
Horn not working.
Front and rear washers not working.
N/s reverse light not working.
Small rust hole in rear lower valance.
Small rust hole in o/s rear wheel well.
Rear light wiring needs tidying.
Under bonnet wiring needs tidying.
Fuel pipes need re-routing.
N/s inner wing has two patches of rot.
Nothing to difficult to sort out, and also on top of that lot is, the brakes need checking, and a general condition check of suspension, exhaust etc. Theres cosmetic jobs to sort out, but im not too concerned about any of that at the mo.
Heres the fuel pipes, and wiring that needs sorting....


Image


Image


And the areas of the inner wing that need attention...

Image


Image

I had 30 mins spare this morning, so i fixed the number plate lights as one had stopped working. I replaced the bulbs with LEDs, and also changed the front side light bulbs for LEDs...

Image

Thats all for now.


Don't ask me....it was like that when i got here !
Image
markh
Posts: 718
Joined: Wed Apr 01, 2009 2:14 pm
fill in the right answer: 15
Location: Newcastle, Staffordshire.

Re: PROJECT RAG.

Post by markh »

Couldnt resist whipping the wheels off for a check underneath ( everything looking good so far !! ) and then fitting these babies....

Image

A nice snug fit at the back...

Image

But unfortunately, stick out a bit too much at the front...Hmmmnn.. :dunno:

Image

Dont know if thats too much to get past MOT, i'l have to make some enquiries. If not, then itl go through MOT with the bottletops off Project21a, then these may find their way back when it passes.... :mafia: :dunno:


Don't ask me....it was like that when i got here !
Image
brass007
Posts: 34
Joined: Wed Apr 01, 2009 8:42 pm
fill in the right answer: 10
Location: Hixon, near a train crash site!

Re: PROJECT RAG.

Post by brass007 »

Hopefully P21A will pass its MOT soon so we can all see your magic on this one Mark, until today totally forgot we had this.
Have you got the bits required or shall I call the 'Toad' for help?

With Fecko gone are you still driving the Karmann Ghia & DARE?

Got a load of fuel hose I need to drop off to you too :yup:


Image
Royalrocket A.K.A Ferocio owned by an 8 year old! With RAG and Dr Dub Storm for company!!!
markh
Posts: 718
Joined: Wed Apr 01, 2009 2:14 pm
fill in the right answer: 15
Location: Newcastle, Staffordshire.

Re: PROJECT RAG.

Post by markh »

Finally after months of wanting to crack on with this project, i finally get to make a start. The interior has been taken out, several reasons for this really ,1, to fit rear seat belts 2, to check the condition of the inner sills, floor and rear arches 3, to give it a good clean out and 4, to fit the black leather interior i recently bought.
First off today was to remove the broken front lower spoiler so it can be repaired and to remove the passenger side wing to check the condition of the inner wing.

Image

Image

Thankfully the inner wing and lower part of the A pillar are in excellent solid condition, so they will be cleaned up and given a good few coats of spray underseal..

Image

Theres no need to remove the drivers side wing as i know that the inner wing is in perfect order. However the drivers side shocker is leaking oil, so i removed it and will be replacing both front struts with two spare ones i have which are in good shape.
Image

Hopefully toworrow morning i can get both struts refitted and the inner wings can have their first coats of underseal. The grill will be repainted before its refitted.


Don't ask me....it was like that when i got here !
Image
User avatar
Ryan
Posts: 931
Joined: Fri Mar 06, 2009 3:28 pm
fill in the right answer: 10
Location: South of Salop

Re: PROJECT RAG.

Post by Ryan »

:read:
I'm loving this thread - can't wait for it to get the markh treatment!


Image
Octavia elegance kombi TDI
User avatar
Risocco
Posts: 1374
Joined: Wed Apr 01, 2009 1:09 am
fill in the right answer: 10
Location: Costa-Del-Kidderminster

Re: PROJECT RAG.

Post by Risocco »

Great stuff mate! Good luck and I'm looking forward to the updates on this thread :beers:

Alex


1983 GL
1986 GT
1994 Corrado VR6
markh
Posts: 718
Joined: Wed Apr 01, 2009 2:14 pm
fill in the right answer: 15
Location: Newcastle, Staffordshire.

Re: PROJECT RAG.

Post by markh »

Thanks chaps. :hi:

Only had an hour spare this morning, so fitted the replacement drivers side strut..
Image

Then took off the passenger side one...

Image

Then gave the replacement one a quick spruce up with some black Hammerite, i'l reassemble and refit this on friday when i'm next off.
Image

Also today i replaced the rear wishbone mountings with some new ones i've had kicking about for a while. The plan for friday is to refit the strut, clean up the front discs and pads ( pads are hardly worn), renew the drivers side metal brake pipe as its a bit crusty, underseal the inner wings and replace the passenger side wing. :good:


Don't ask me....it was like that when i got here !
Image
User avatar
Reverend Frog
Posts: 497
Joined: Wed Apr 01, 2009 12:57 pm
fill in the right answer: 15
Location: Belfast

Re: PROJECT RAG.

Post by Reverend Frog »

Is it sad that I actually get excited when I see a markh restoration thread has been updated? You're the Yoda of the Rocco world Mark!


Previously owned:
Image
1988 1.6 GT
1989 1.8 GT
1982 1.6 GTI
1993 Corrado VR6
markh
Posts: 718
Joined: Wed Apr 01, 2009 2:14 pm
fill in the right answer: 15
Location: Newcastle, Staffordshire.

Re: PROJECT RAG.

Post by markh »

Heres another installment for you then Rich !! :chortle:
Ok, so today things didnt quite go to plan, i thought i;d start off by undersealing the passenger side inner wing before the strut went back in and whilst scraping of the old underseal i unearthed two areas of rot, one at the front lower corner and the other at the top corner near the bulkhead, that had been very well hidden under thick coats of filler and underseal.

Image

I forgot to take a before pic of the other area, but here it is after its been repaired and seam sealered..
Image

I started to spray the new underseal, but it was bloody freezing today and it wouldnt spray right, so i'l finish it next time, hopefully !!

Then i reassembled the passenger side front strut and refitted it...
Image

The rot in the lower front corner has also been plated and seam sealed..
Image

Another job sorted was the replacement of the front metal brake pipes, it was only really the drivers side that needed replacing, but as all the whole system needs to be bled anyway i thought i may as well change both.
Image

Image

Image

When we bought the car we were told that it sometimes jumps out of gear due to the wrong clutch cable being fitted, but whilst changing the front brake pipes i found that the when the rear ones had been previously replaced, they had been thread between the gearbox and the gear linkeage instead of fastnened back against the chassis in the original clips. This meant they were pushing against the long selector rod and restricting its travel, so i may as well replace them too and fit them correctly.
Although i've done a lot of work on it today, i dont really feel that i've got very far forward, just seem to be taking more and more bits OFF !!

Image

Still , its all part of the fun of restoration projects !!! :dash: :training:

Due to crappy work commitments, its going to be over a week now until i can get anymore done. :ire:


Don't ask me....it was like that when i got here !
Image
brass007
Posts: 34
Joined: Wed Apr 01, 2009 8:42 pm
fill in the right answer: 10
Location: Hixon, near a train crash site!

Re: PROJECT RAG.

Post by brass007 »

This thread is going to have more hits than a dart board!
:beers: :beers: :beers: :beers: :beers: :beers: :beers:


Image
Royalrocket A.K.A Ferocio owned by an 8 year old! With RAG and Dr Dub Storm for company!!!
User avatar
The Autoad
Posts: 732
Joined: Sat Feb 28, 2009 5:57 pm
fill in the right answer: 10
Location: Nottingham
Contact:

Re: PROJECT RAG.

Post by The Autoad »

welcome to mk1 ownership Mark, rust is your friend.

They always go in that lower bloody front corner, well caught, rust shoots....Mark saves!


Your friendly neighbourhood Scirocco restorer for hire
markh
Posts: 718
Joined: Wed Apr 01, 2009 2:14 pm
fill in the right answer: 15
Location: Newcastle, Staffordshire.

Re: PROJECT RAG.

Post by markh »

It's not the easiest shape to replicate from a flat sheet of steel is it Ant ?
I'm just glad the other side is solid ! :good:


Don't ask me....it was like that when i got here !
Image
User avatar
Dr. Dub
Posts: 312
Joined: Sat Mar 07, 2009 12:28 pm
fill in the right answer: 15
Location: LV426

Re: PROJECT RAG.

Post by Dr. Dub »

Wow this brings back memories. That smell of the mig burning off the remnants of underseal stays with you forever. Nice work Mark. :good:


Currently without a car (long story)
Previous rides. 2x 89 Scirocco GTs & 84 Storm
markh
Posts: 718
Joined: Wed Apr 01, 2009 2:14 pm
fill in the right answer: 15
Location: Newcastle, Staffordshire.

Re: PROJECT RAG.

Post by markh »

Not a great deal has happened with this car recently, but last week i managed to find an hour to fit rear seatbelts and replace the wiper stalk ( due to only one speed working). So this week sees me with a whole week off work, but as im looking after the kids while theyre off school, no time to get up to the garage to do some long overdue work.
So instead i decide i going to start cleaning up the Mk1 Storm interior i picked up a few weeks ago, seeing as its sat in my garage at home. I bought some proper leather cleaner and coloured feed, which isnt cheap i'l tell you !! Anyway, the seats were filthy, covered in dust and mouse cack as theyd been stored for over 12 years, so i started off giving them a good wash off with warm water and a bit of washing up liquid, which made a hell of a difference. While these dried i started work on the door cards first, removing the door pockets and vents, then went over them with the leather cleaner and then the coloured feed. The difference was amazing, so i couldnt wait to start on the seats. Ive done the rear bench, but so far have only split the fronts down and washed them off, hopefully i can finish them this week.
Anyway heres some leather porn for you......

The finished door cards and rear bench, well pleased with how these have cleaned up.

Image

Image

And the fronts before i started to strip and wash them....

Image

Image


Don't ask me....it was like that when i got here !
Image
LewisT
Posts: 2
Joined: Sun Apr 05, 2009 6:41 pm

Re: PROJECT RAG.

Post by LewisT »

looking great mate!!!


love yhe fact that you got a shot of your bike front wheel in the pic too, didnt think pink is particularly you but hey ho!! :hehe: :hehe: :hehe:


Post Reply