
For those that want a bit more info on dialling out bump steer, check out these videos.
https://youtu.be/X3DTTL9xRQ0 - about 25mins in
https://youtu.be/ob-FUF0Sh_E
In fact, I highly recommend watching all 11 episodes, what they are doing can only be described as a motorsport work of art.
Ben
HERMAN THE GERMAN! '91 Scala 20vt
Forum rules
Section for all vehicle and related projects. Please keep responses pertinent to thread.
Section for all vehicle and related projects. Please keep responses pertinent to thread.
-
treefingers
- Posts: 400
- Joined: Wed Aug 14, 2013 1:04 pm
- fill in the right answer: 15
-
bengould

- Posts: 805
- Joined: Fri Jul 09, 2010 1:25 pm
- fill in the right answer: 10
- Location: Renfrew.
Re: HERMAN THE GERMAN! '91 Scala 20vt
I used to work with nic before I moved up to Scotland. His knowledge is unbelievable. I stumbled upon his channel completely by accident when YouTube suggested one of his videos. Recognised him straight away and have been watching since. Am really looking forward to seeing what the final product looks like, even though it's a mini.
Ben.
Ben.

-
treefingers
- Posts: 400
- Joined: Wed Aug 14, 2013 1:04 pm
- fill in the right answer: 15
Re: HERMAN THE GERMAN! '91 Scala 20vt
ah cool. yeah minis aren't my thing either - it's going the right way.
and the fabrication turns me on a little bit.
and the fabrication turns me on a little bit.
-
treefingers
- Posts: 400
- Joined: Wed Aug 14, 2013 1:04 pm
- fill in the right answer: 15
Re: HERMAN THE GERMAN! '91 Scala 20vt
Been very much productive with the car now that I can walk again. I can walk on my own two feet, no crutches!
I am all cripply nay longeeeer!
It's so good.
So with the whole engine electrics getting a general pimping with muchos help from Tim at The Phirm, I've been sorting bits on the car in the effort that all of this will coincide and the beast will live and breathe like never before!
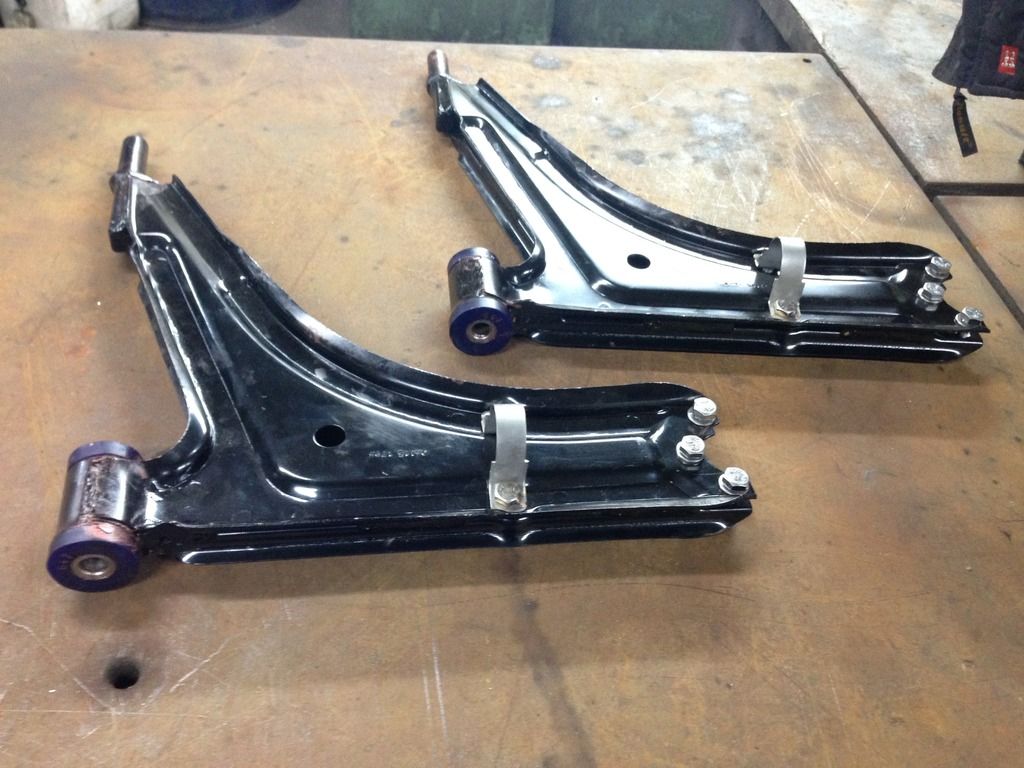
I never replaced the wishbones, and they were having a good go at turning ginger. So out they came..
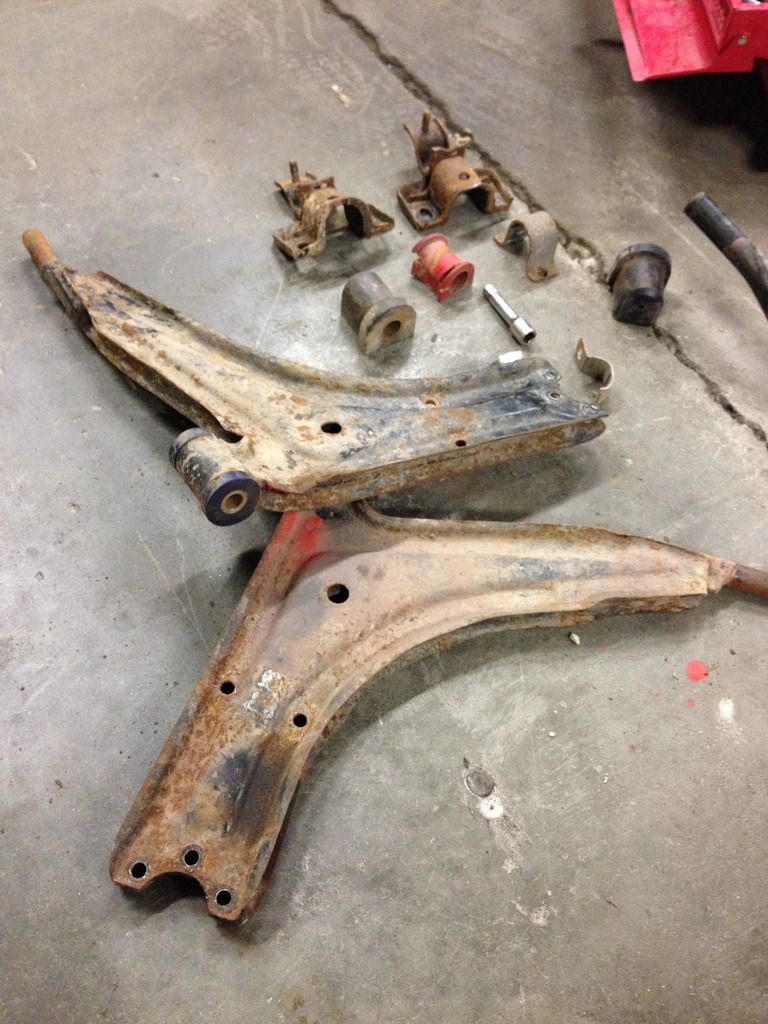
Got new Febi wishbones for £13 each!!!! New arb clamps too (bushes are currently in the post somewhere). I managed to swap the one piece wishbone bushes over with some precision angle grinding.
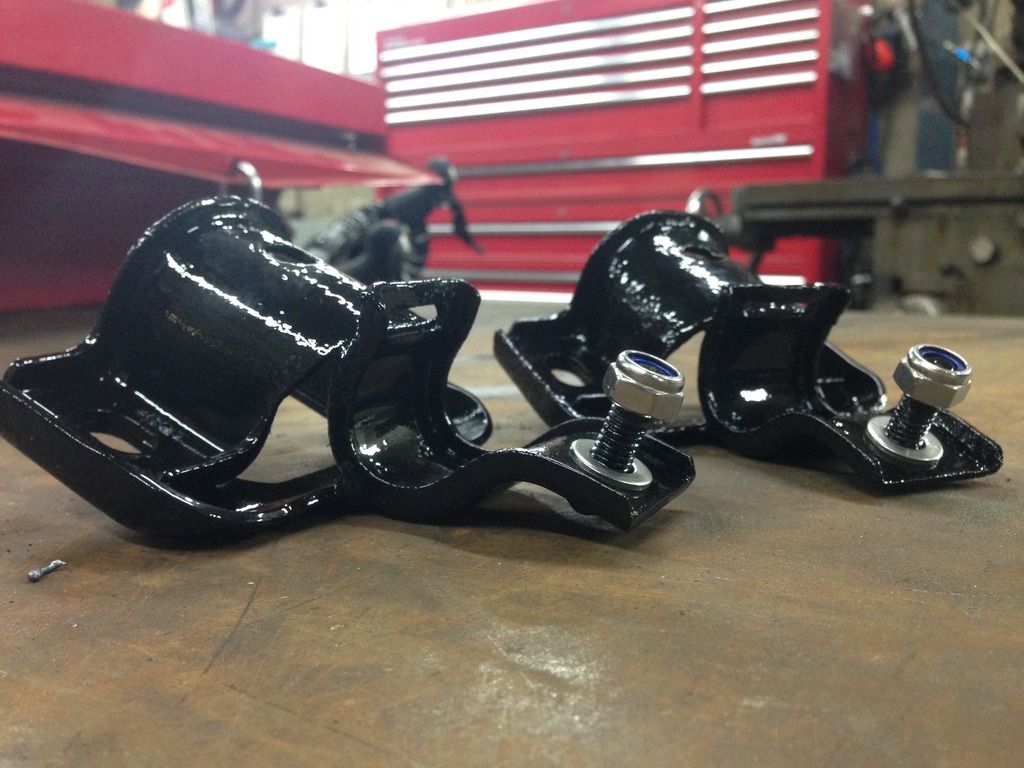
Brackets shot blasted, etch primed, primed, chassis blacked. That'll do it.
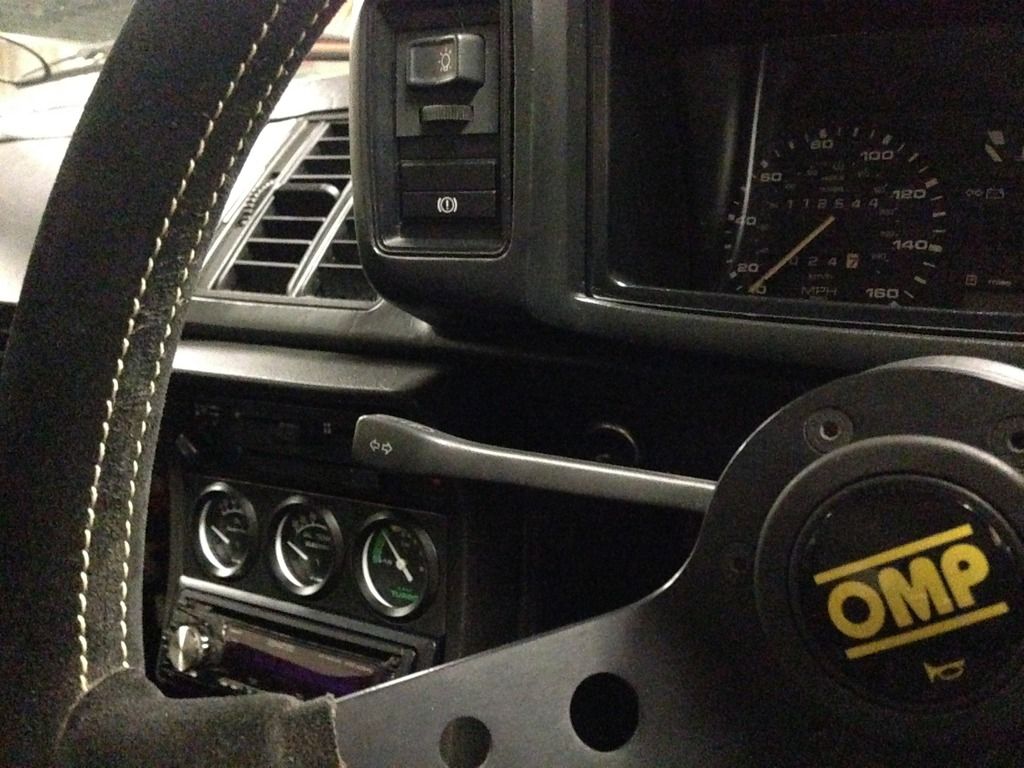
Here's a pic of my nice TIM gauges. Oil pressure, oil temperature, boost pressure.
Got a new rain tray for my birthday (thanks Jim!)
I have to post this picture because driving past this gave me so much sadistic joy.
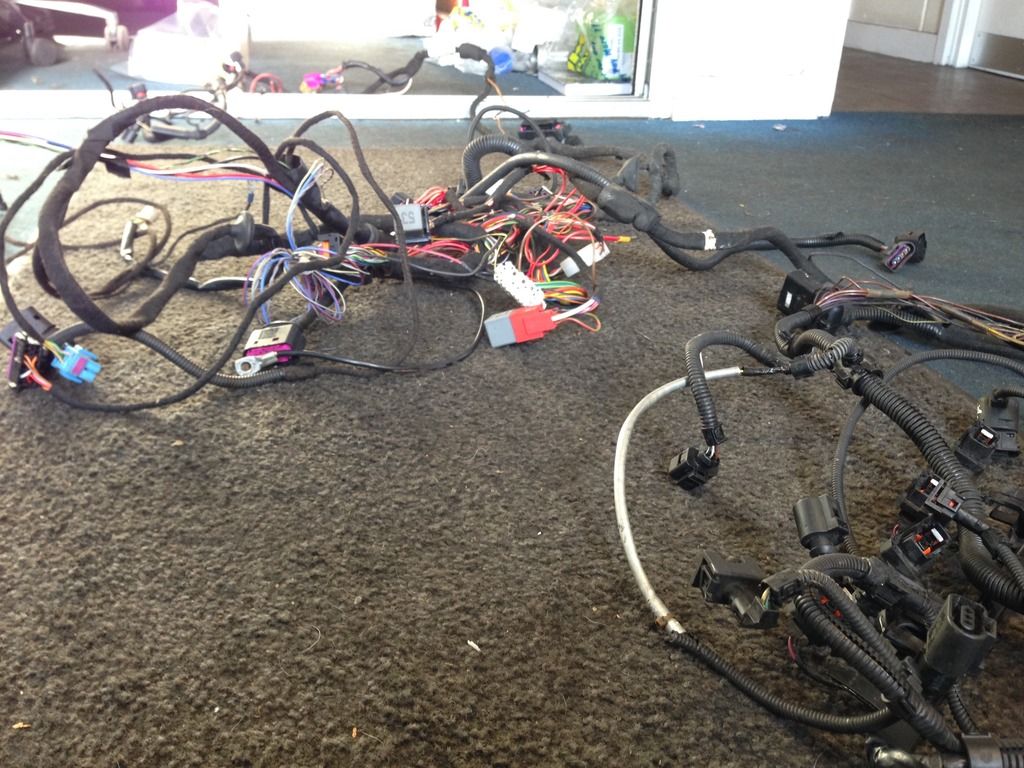
And on to the main course... sorting out the bloody electrical side. I bought an un-tampered AUQ loom and ECU, and took it to the Phirm so we could make this pile of mishmashed headache...
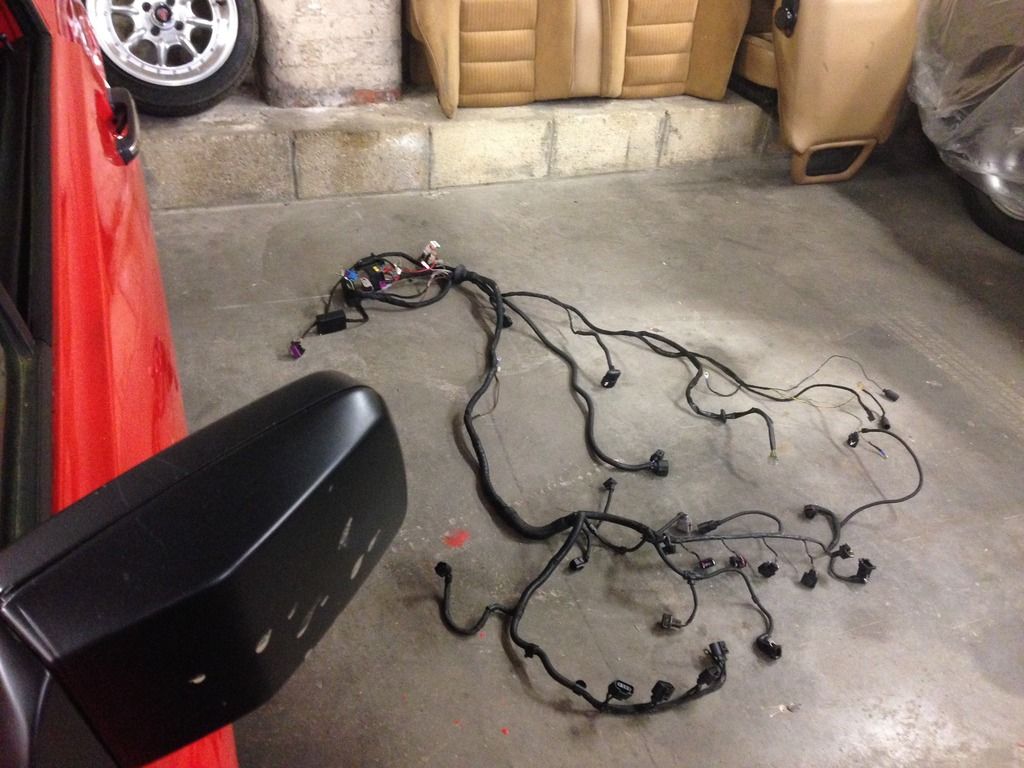
...turn into this most coherent arrangement.. a single beautifully made engine loom
The other side of improving the electrics is to add in more good things for the clever ECU to control.
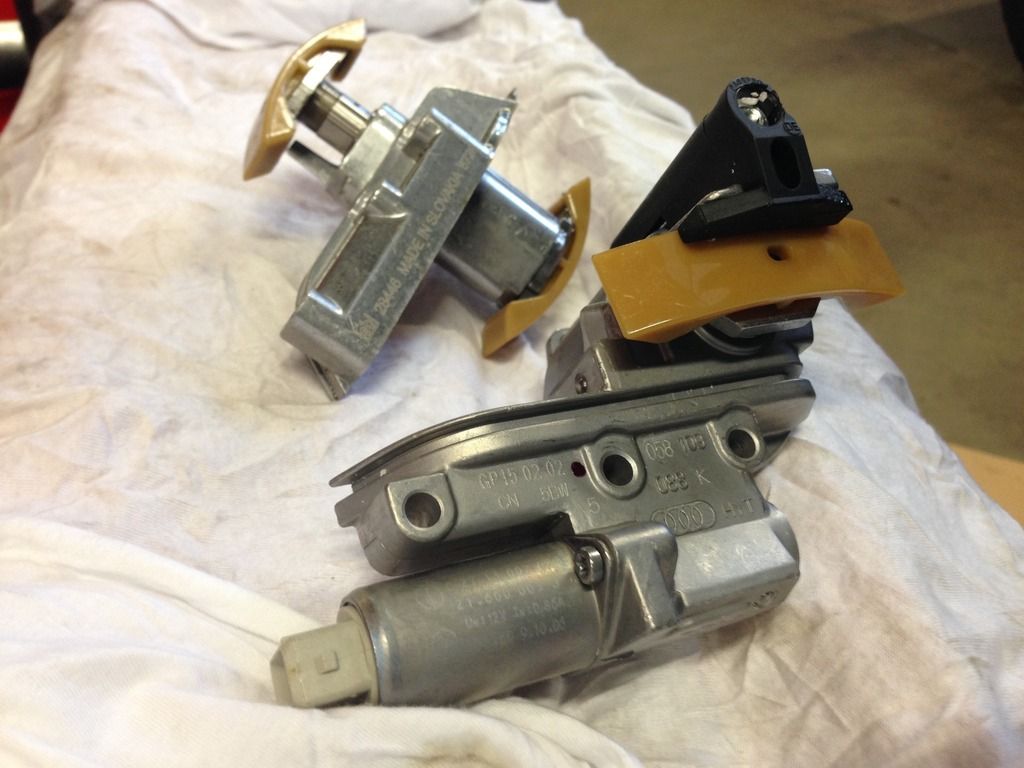
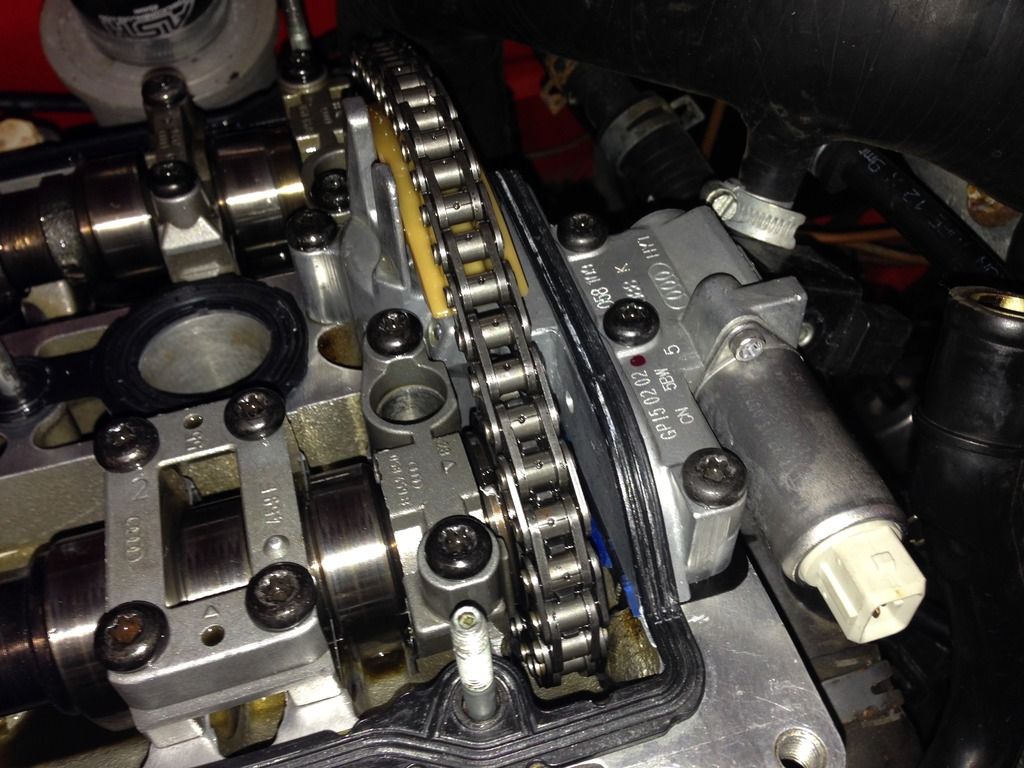
This means opening up the engine to swap out the non-vvt cam chain tensioner (that's seen about 8 miles) with a genuine VAG vvt one.
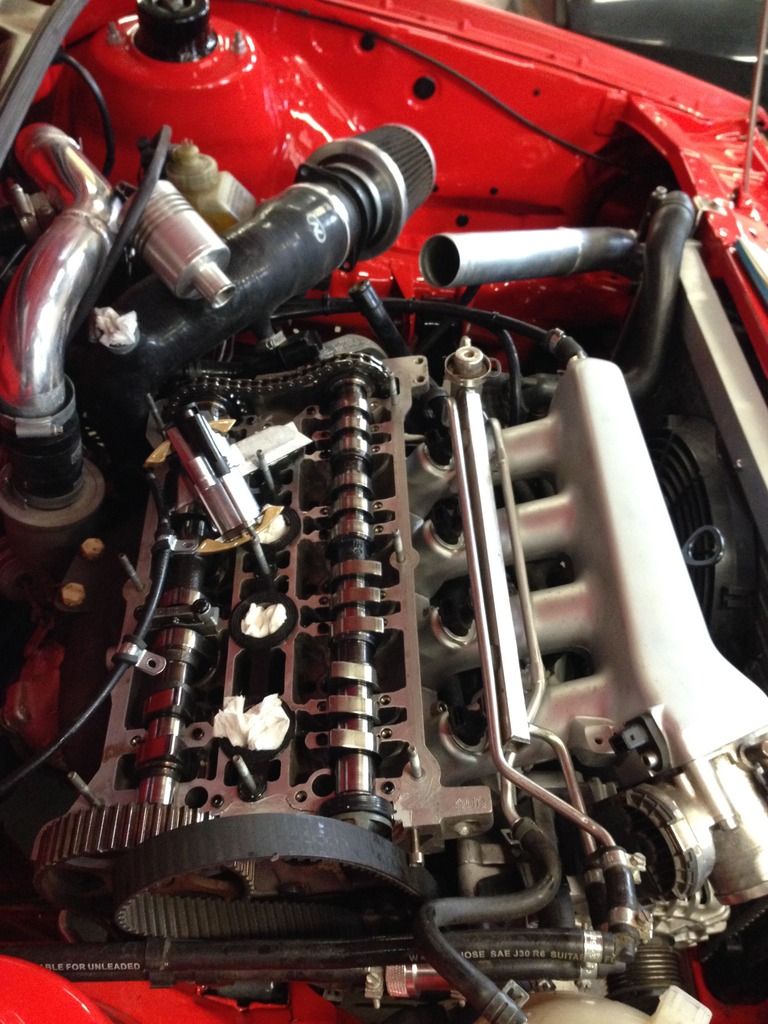
I stuck a new chain and gasket on too. Hopefully I won't have to open up the engine again for a good while.
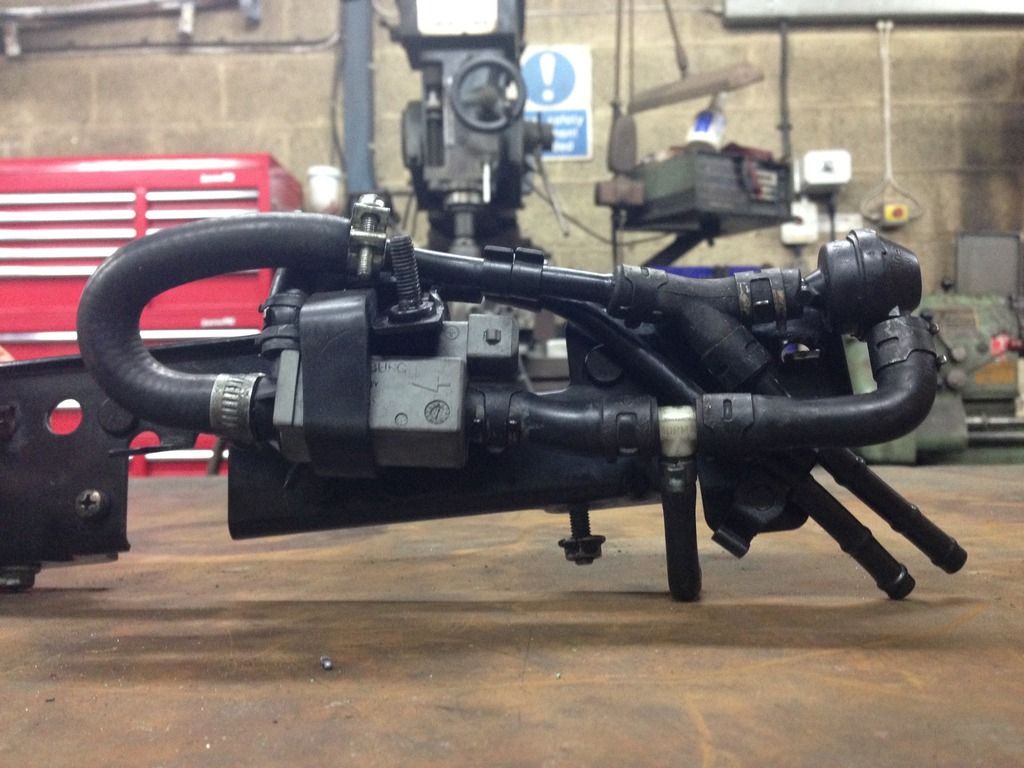
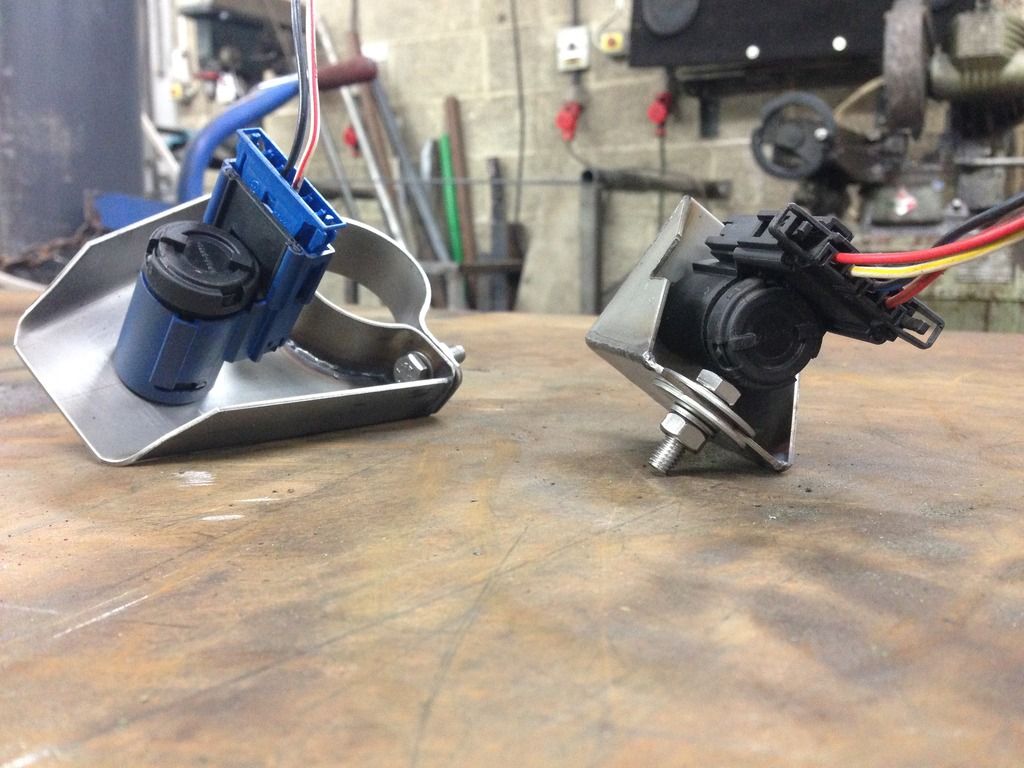
The N249 valve allows the ECU control of the diverter valve. It can open the diverter via a solenoid much faster than back pressure acting on its diaphragm. Most people delete this part. I picked this up today from a Mr Knox and it's going in my car. Tim says it'll give me more power because it will help keep the turbo spooled up. Sounds like a plan.
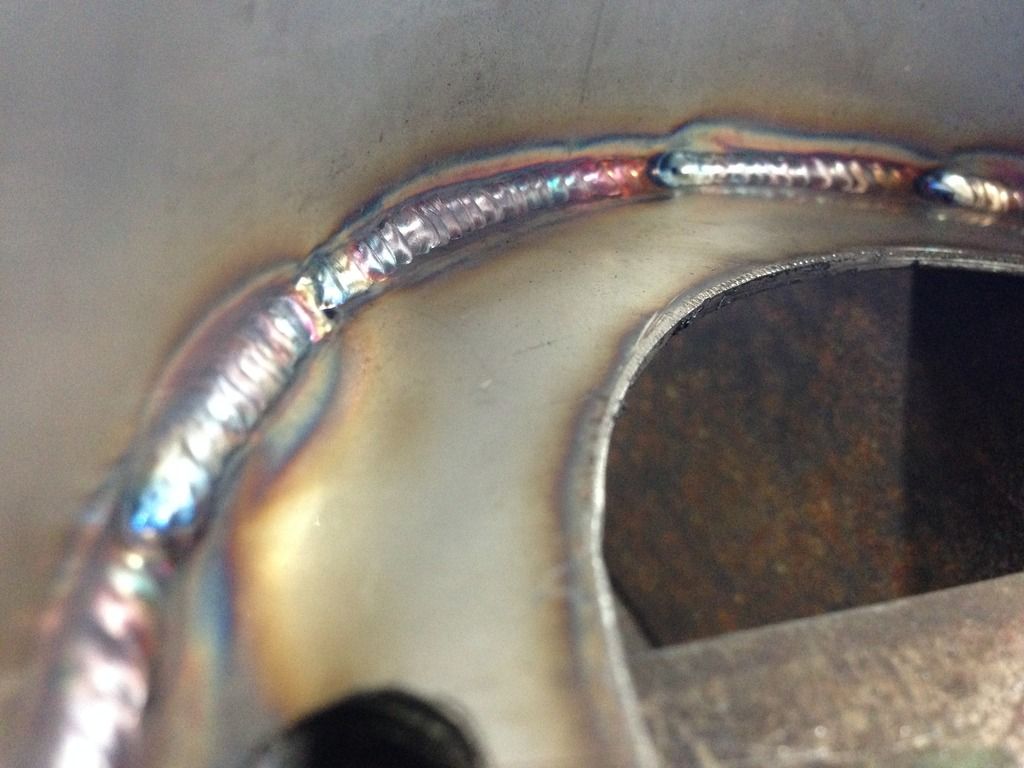
Brake and clutch switches are going in. Did some TIG welding today and fabbed up these brackets from 1.5mm stainless. One will mount on a tab near the Rocco brake switch and the other'll clamp on the steering column.
I made them so the switches twist in and out. Secure and removable!

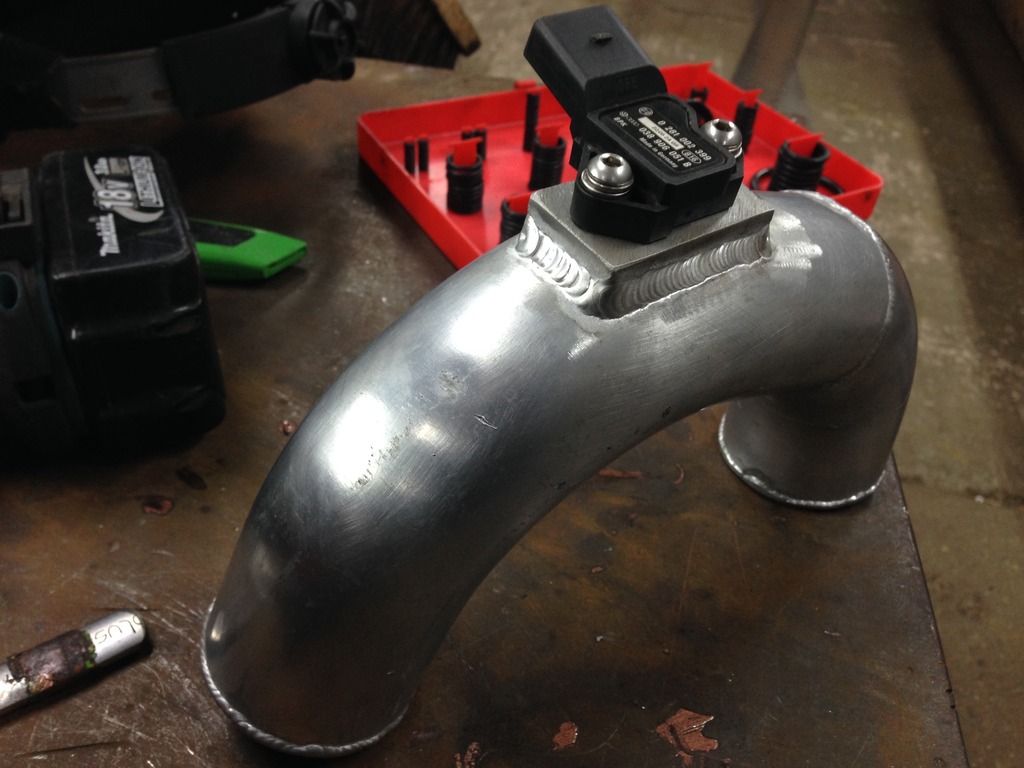
I moved the mounting point of the manifold absolute pressure sensor so it was in the airstream, like it is on the MK4 cars. Got my mate Keith to weld it cos he's rad.
Herman keeps geting more four-wheeled friends too.

More to do. Stuff planned for next week. Wednesday and Thursday are days that I'm excited about.
I am all cripply nay longeeeer!
It's so good.
So with the whole engine electrics getting a general pimping with muchos help from Tim at The Phirm, I've been sorting bits on the car in the effort that all of this will coincide and the beast will live and breathe like never before!
I never replaced the wishbones, and they were having a good go at turning ginger. So out they came..
Got new Febi wishbones for £13 each!!!! New arb clamps too (bushes are currently in the post somewhere). I managed to swap the one piece wishbone bushes over with some precision angle grinding.
Brackets shot blasted, etch primed, primed, chassis blacked. That'll do it.
Here's a pic of my nice TIM gauges. Oil pressure, oil temperature, boost pressure.
Got a new rain tray for my birthday (thanks Jim!)
I have to post this picture because driving past this gave me so much sadistic joy.
And on to the main course... sorting out the bloody electrical side. I bought an un-tampered AUQ loom and ECU, and took it to the Phirm so we could make this pile of mishmashed headache...
...turn into this most coherent arrangement.. a single beautifully made engine loom
The other side of improving the electrics is to add in more good things for the clever ECU to control.
This means opening up the engine to swap out the non-vvt cam chain tensioner (that's seen about 8 miles) with a genuine VAG vvt one.
I stuck a new chain and gasket on too. Hopefully I won't have to open up the engine again for a good while.
The N249 valve allows the ECU control of the diverter valve. It can open the diverter via a solenoid much faster than back pressure acting on its diaphragm. Most people delete this part. I picked this up today from a Mr Knox and it's going in my car. Tim says it'll give me more power because it will help keep the turbo spooled up. Sounds like a plan.
Brake and clutch switches are going in. Did some TIG welding today and fabbed up these brackets from 1.5mm stainless. One will mount on a tab near the Rocco brake switch and the other'll clamp on the steering column.
I made them so the switches twist in and out. Secure and removable!
I moved the mounting point of the manifold absolute pressure sensor so it was in the airstream, like it is on the MK4 cars. Got my mate Keith to weld it cos he's rad.
Herman keeps geting more four-wheeled friends too.
More to do. Stuff planned for next week. Wednesday and Thursday are days that I'm excited about.
-
james butler

- Posts: 3007
- Joined: Fri Apr 24, 2009 1:54 pm
- fill in the right answer: 10
- Location: birmingham
Re: HERMAN THE GERMAN! '91 Scala 20vt
looking great buddy keep up the good work!! 
I dont mind project cars but I HATE SANDING!!!
-
mark1gls
- Posts: 3957
- Joined: Thu Apr 02, 2009 9:28 pm
- fill in the right answer: 10
- Location: Somerset
Re: HERMAN THE GERMAN! '91 Scala 20vt
I guess you noticed you fitted the antiroll bar clamp etc on the wrong side of the new wish bones if you have fitted them yet as you have 2 nearside ones in the picture?
I had to do a little touch up on the paint of my new Febi wish bones as there was marks and chips to the paint as the paint is very thin especially around the welds.
I had to do a little touch up on the paint of my new Febi wish bones as there was marks and chips to the paint as the paint is very thin especially around the welds.
Mk1 78 Scirocco GLS 1.6 FR, weekend toy.
Mk1 88 Golf GTi cabriolet 1.8 DX. Daily drive.
Membership No. 323
Mk1 88 Golf GTi cabriolet 1.8 DX. Daily drive.
Membership No. 323
-
treefingers
- Posts: 400
- Joined: Wed Aug 14, 2013 1:04 pm
- fill in the right answer: 15
Re: HERMAN THE GERMAN! '91 Scala 20vt
yeah they werent fitted like that :p
Loom in, car has been mapped and is running so sweet. Bags of power and the noise is so good! Exhaust note is so quiet and the turbo is loud. The Collins diverter valve is pretty much a pneumatic jukebox. Always a different chatter or whooooosh noise!
Taxed and mot'd on Friday. Keeps munching coilpacks though! Ive ordered the latest revision so should be good there soon. Done 200 miles since the rebuilt, oil was changed yesterday. Going to run on mineral oil until I reach around 1500 miles then it's synthetic all the way.
So this was how the car was running Feb 2015 pre rebuild (can't work out how to embed videos on here?)
https://youtu.be/-ylRs4sdY0o
and here it was yesterday, a year later!
https://youtu.be/2wRMjkMK8Hk
Currently running no front ARB as Im awaiting some proper middle clamps from Germany.
This car makes me smile so much.
-
treefingers
- Posts: 400
- Joined: Wed Aug 14, 2013 1:04 pm
- fill in the right answer: 15
Re: HERMAN THE GERMAN! '91 Scala 20vt
over 800 miles on the engine since rebuild.. this thing rocks.
-
treefingers
- Posts: 400
- Joined: Wed Aug 14, 2013 1:04 pm
- fill in the right answer: 15
Re: HERMAN THE GERMAN! '91 Scala 20vt
1500 miles complete!! next job is to change the mineral break-in oil for some 5w40 fully synthetic and enjoy the extra ponies and thrashing possibilities that will bring :)
Engine is running sweet, I'm thinking my first go at rebuilding an engine was a success. Let's hope it stays that way!
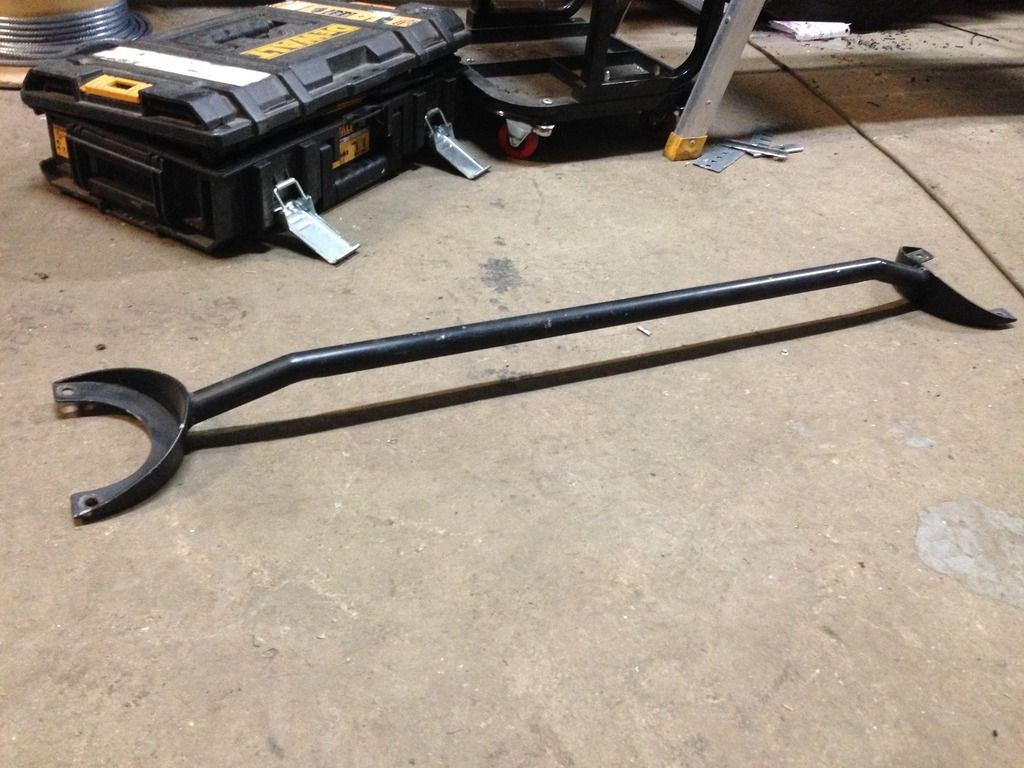
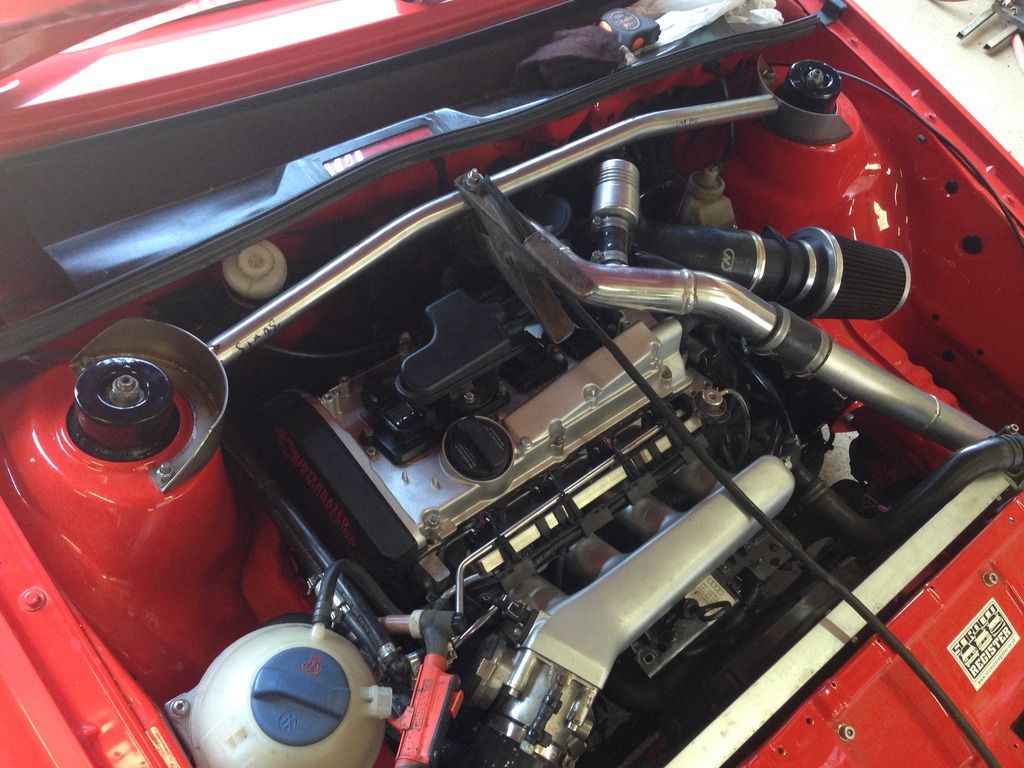
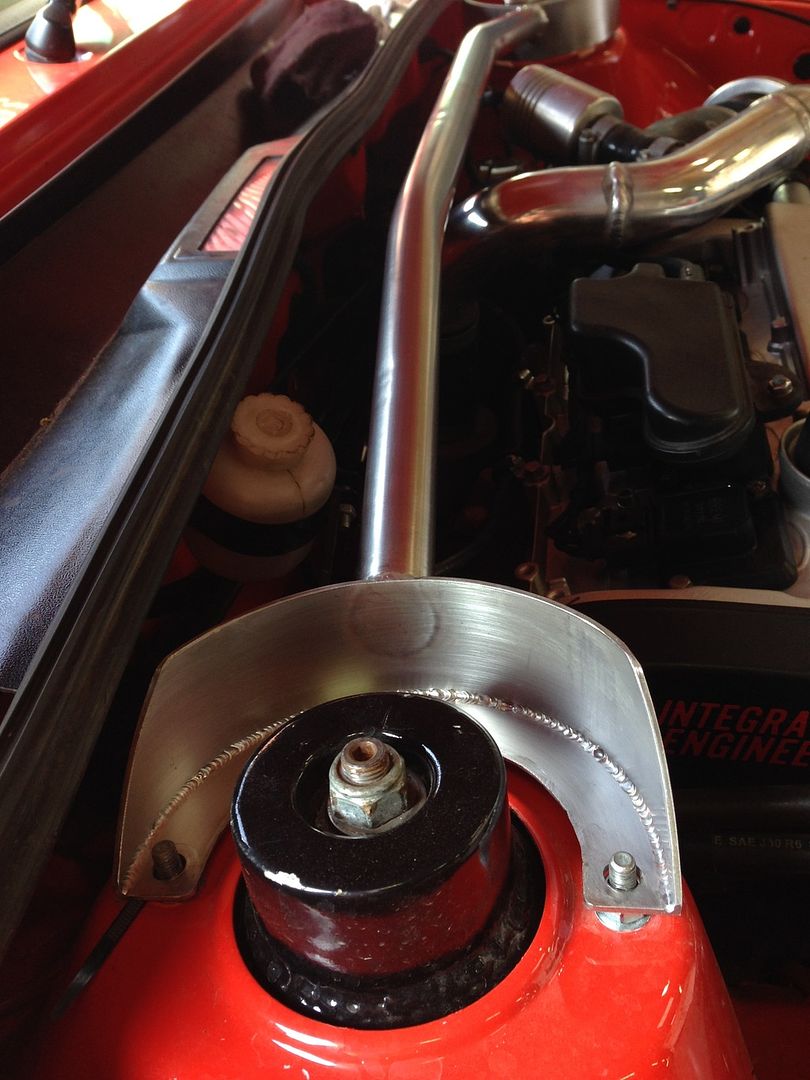
One job I was quite looking forward to was making a new upper strut brace. The original steel brace I made wouldn't fit since I moved the PCV system back to the OEM location. The recipe was a similar design, but made from stainless steel this time.
Here's the original brace to remake.
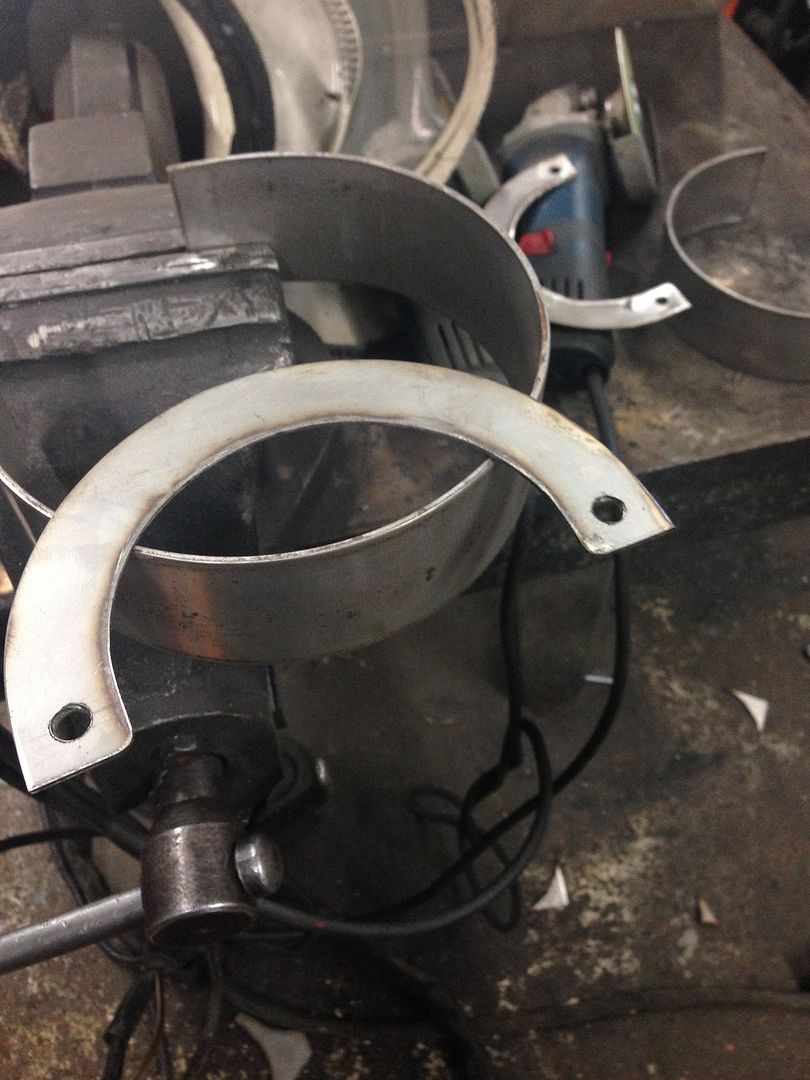
Cut some shapes with the plasma cutter and sent some metal through the rollers. Using 2.5mm 304 ss. Used my digital verniers to get the measurements of the turrets. Laser cutting would have been sweeter but it's just not economical for low volumes like this. Got a die grinder last week, would have been handy to have it for this job.
Got some more TIG practise in
For the tube I used some 1.5mm wall stainless tubing. This makes the whole brace stronger and lighter than the steel one. Plus it'll probably out-live the car!! I bent it using a bottle jack style tube bender I borrowed from my boss. Took absolutely ages to get the tubing shaped to fit the turret mounts!

Note new Beru coil packs.. not had any problems with these at all. Also new is the vacuum reservoir on top of the valve cover.. this gives a vacuum supply to the diverter valve so that the ECU can control it via another valve, called the N249.
Finished! Used some pickling paste, it removes the heat marks and makes it look shiney and all lovely. Yes I know it's not bolted in!!!
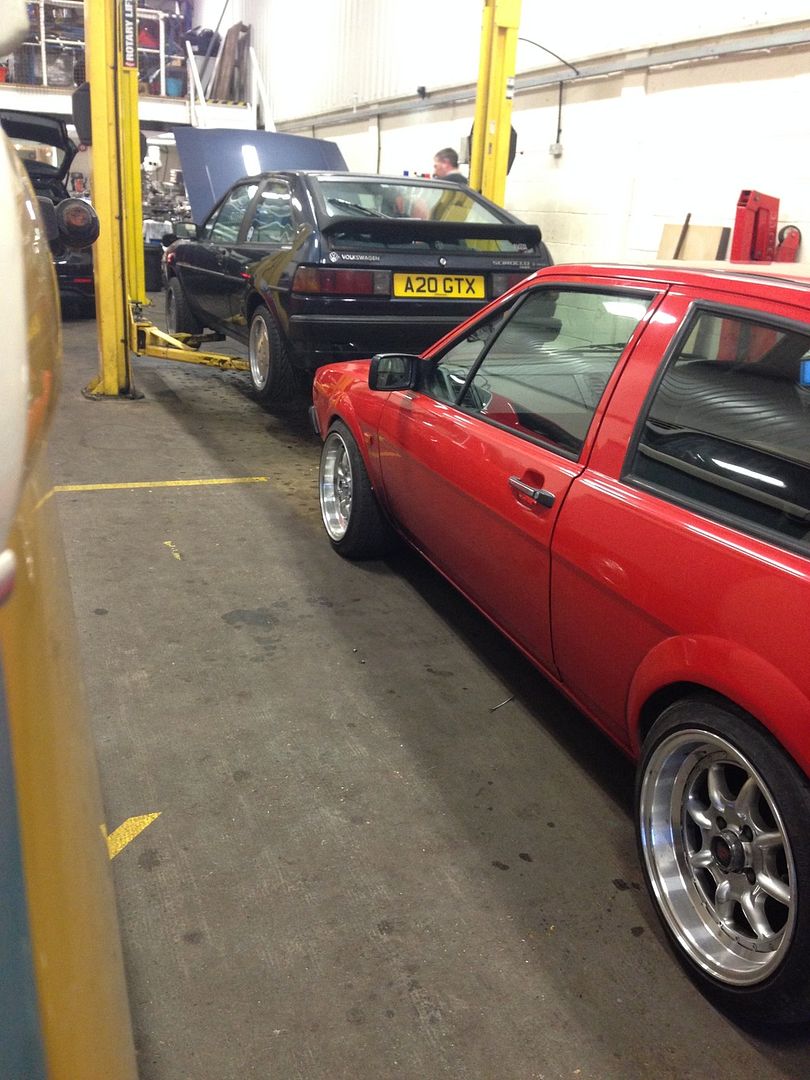
Here's a nice shot of Sean's car next to mine at the Phirm... non-body kit rules!!!!!!!
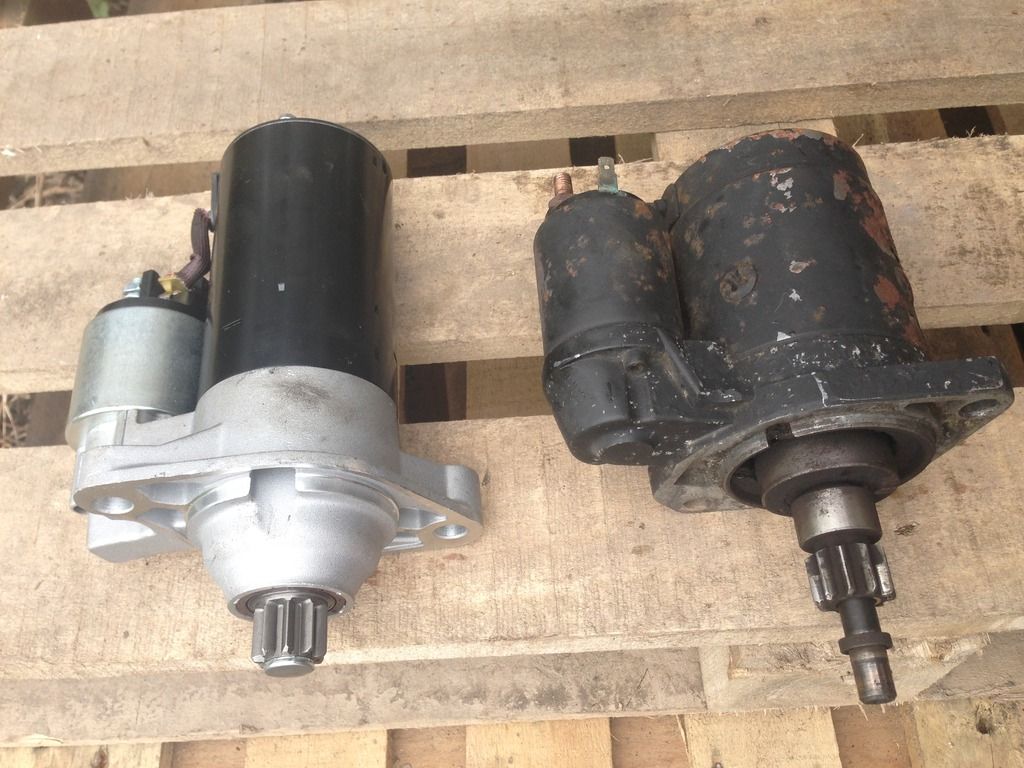
My ABF starter motor failed and euro's sent me this motor... for a 2.3L engined car! I don't think so.. Went to return it and they were out of 02A starter motors so I'm actually running an 02J starter motor now, which fits and works fine in an 02A.
I've been having a mare with the brakes.. if I adjust the bulkhead linkage enough so that I have reasonable pedal travel I end up with brakes that bind. I've been carrying a 13mm spanner with me so that I can adjust the linkage on the go.. I really want to get this sorted as it's unnerving having all this power but not the confidence in the anchors!!
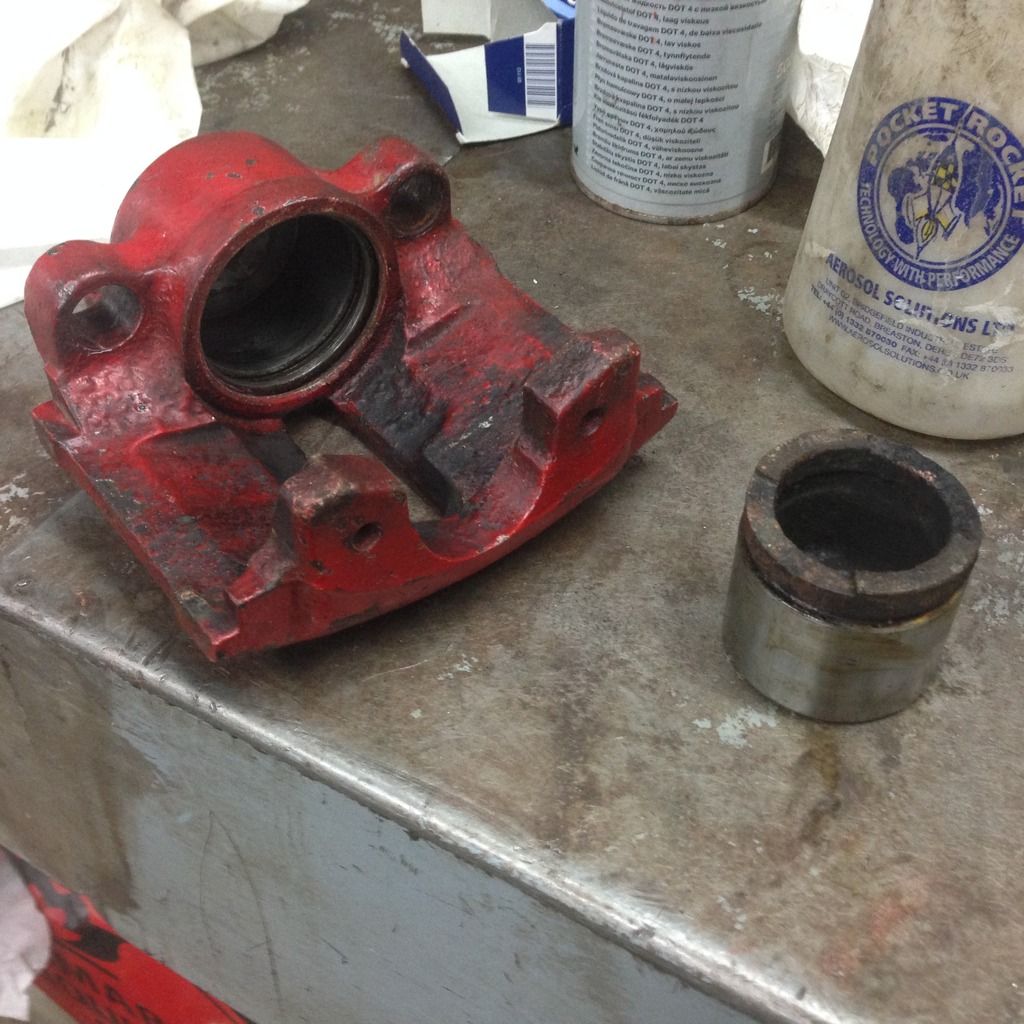
I've had a new master cylinder and brake lines, and the linkage itself isn't sticky, so I deduced it must be the calipers (which I took apart but only cleaned). I got a rebuild set for each side comprising pistons, seals and slide rubbers.
The Astra brakes are looking a bit worse for wear now! Pistons and bores had slight corrosion
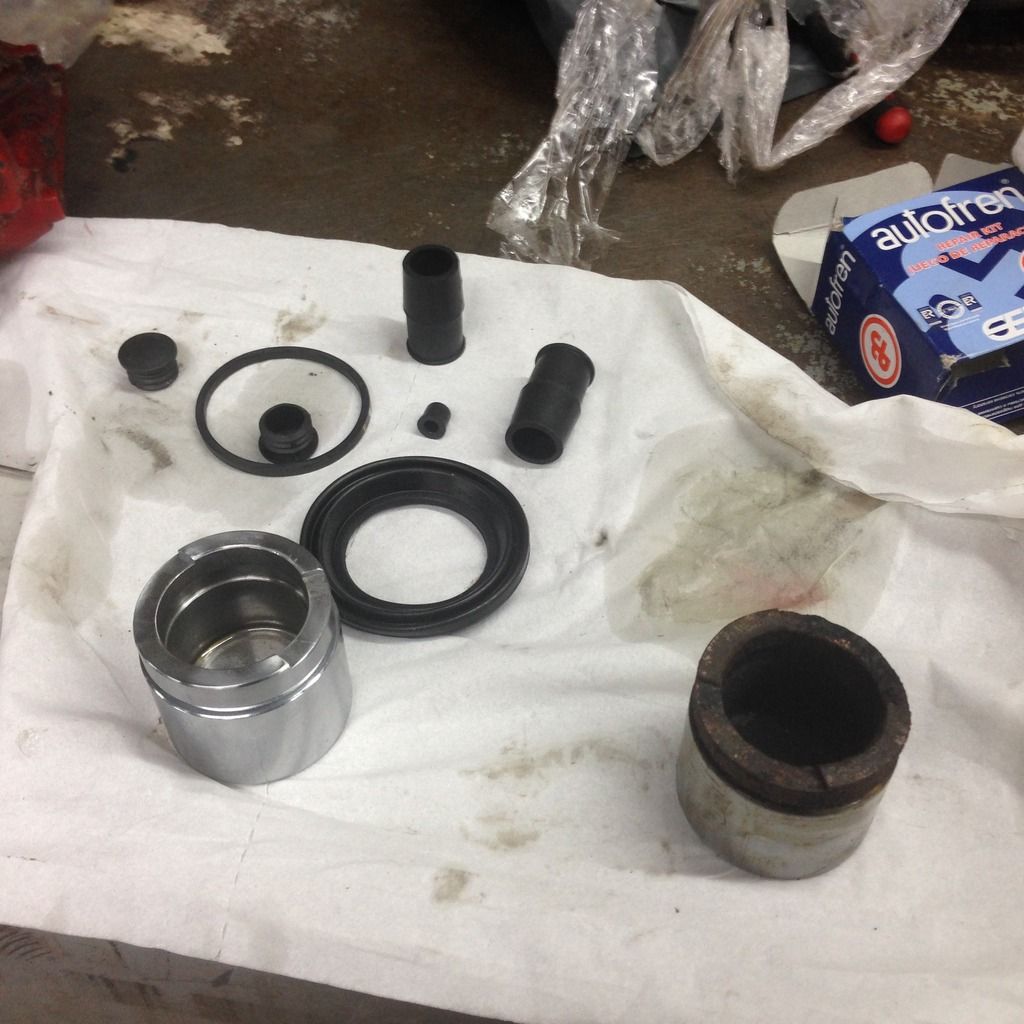
New rebuild kit
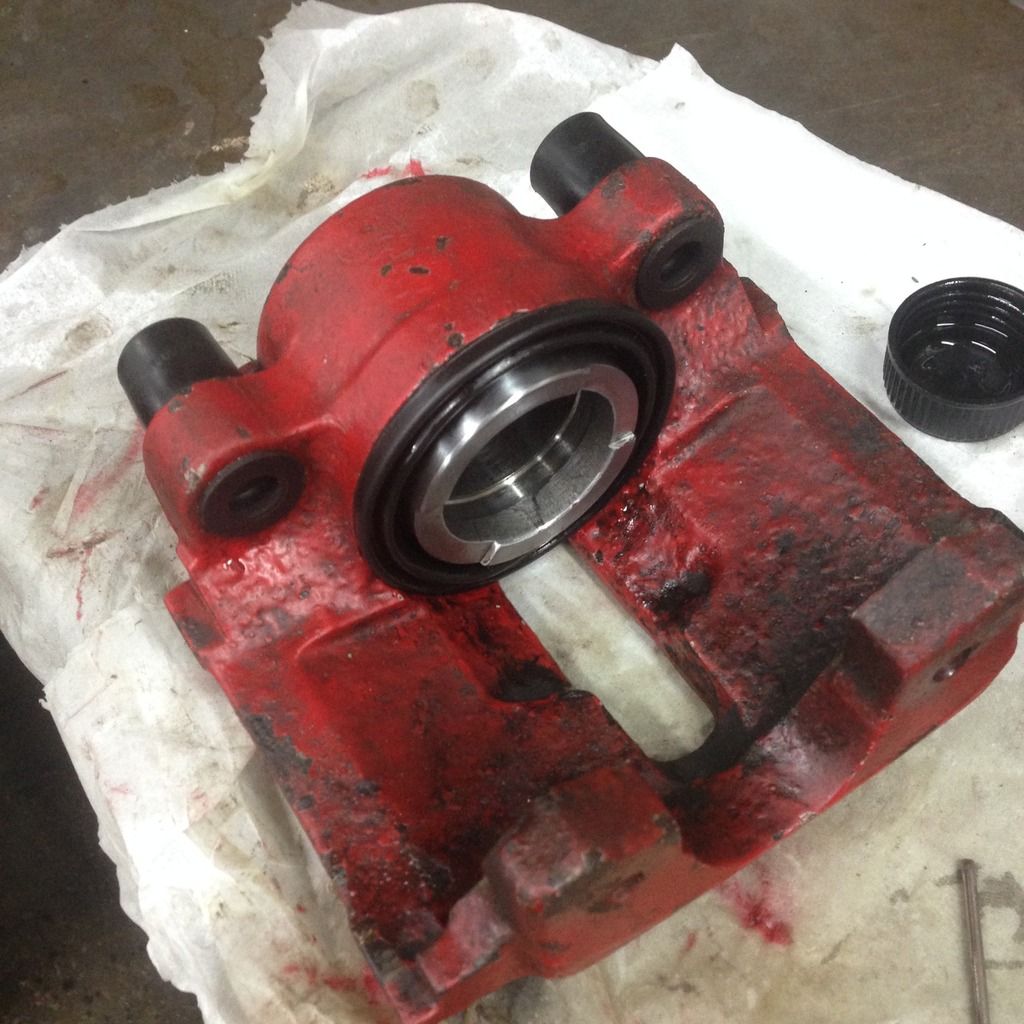
The brakes are back on now but I'm still getting slight binding on the front right I think.. I wonder if I can get the caliper bores honed, if that'll fix it? Did I clean the bores thoroughly enough? I don't know where to go with this. I'm tempted to say f-it and get a wilwood kit and a rear disc conversion.. ££££££....
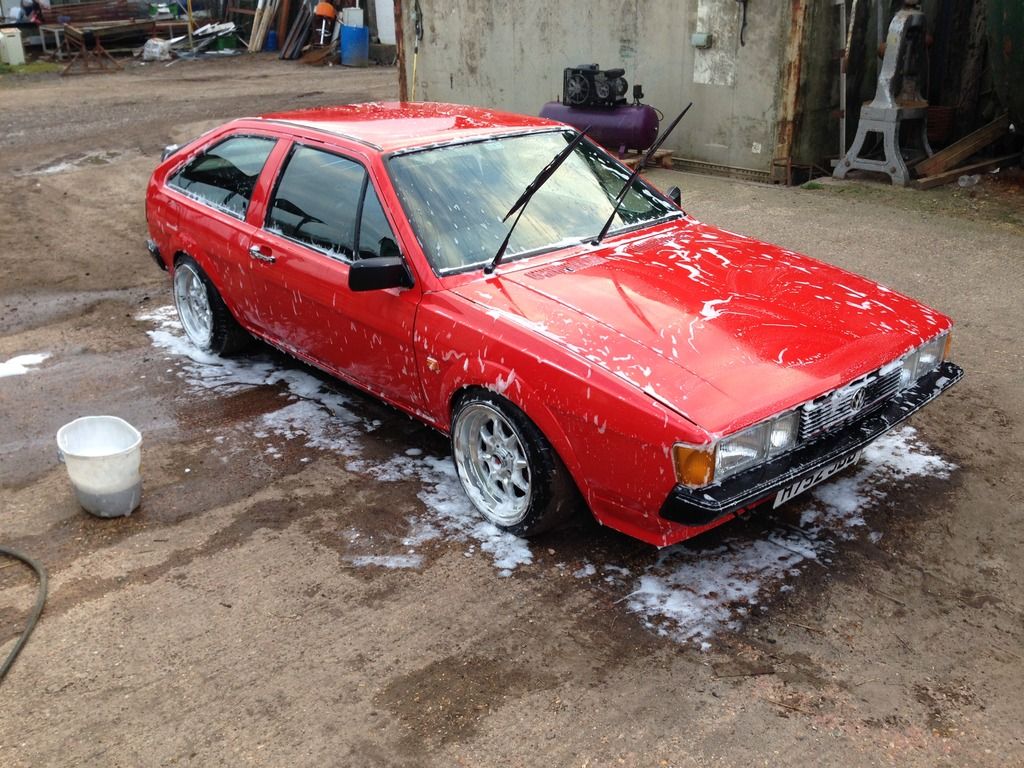
Anyhoo here's a soapy pic
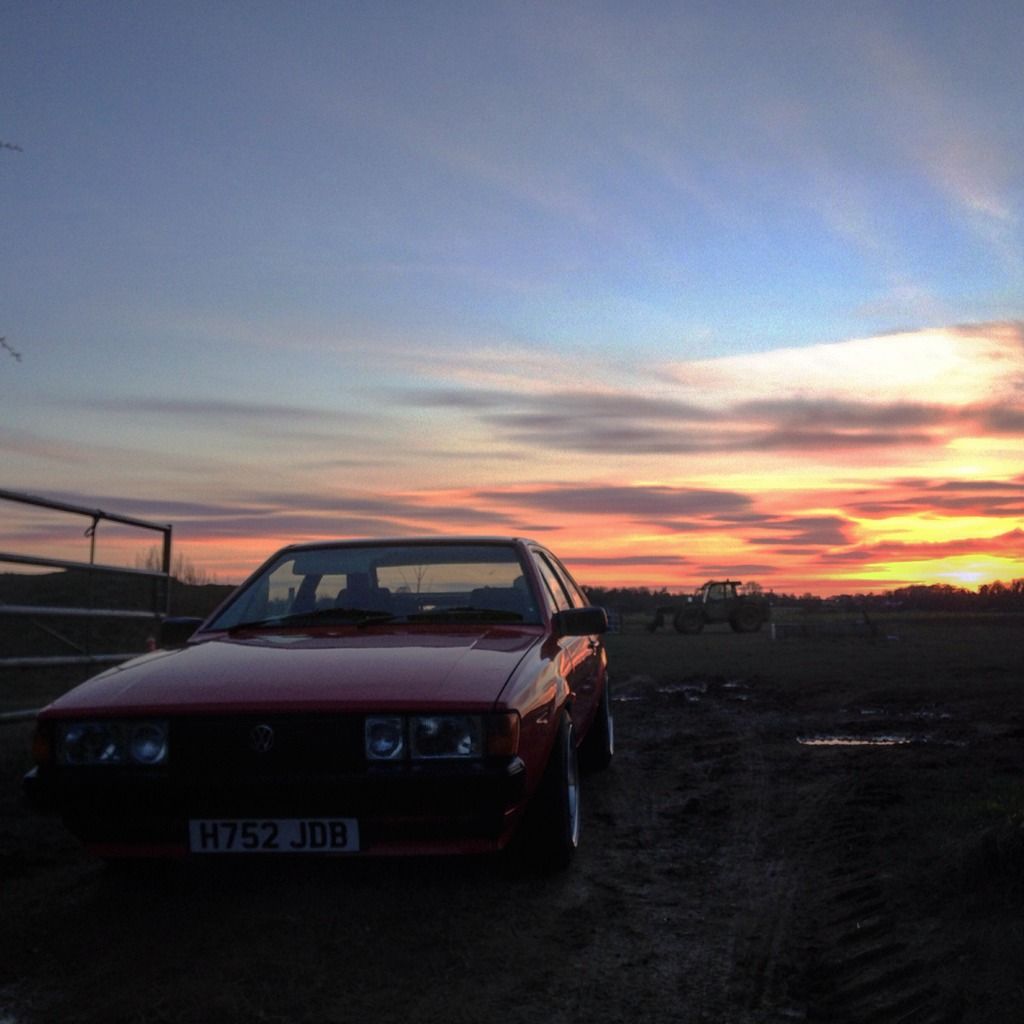
And a sunset pic
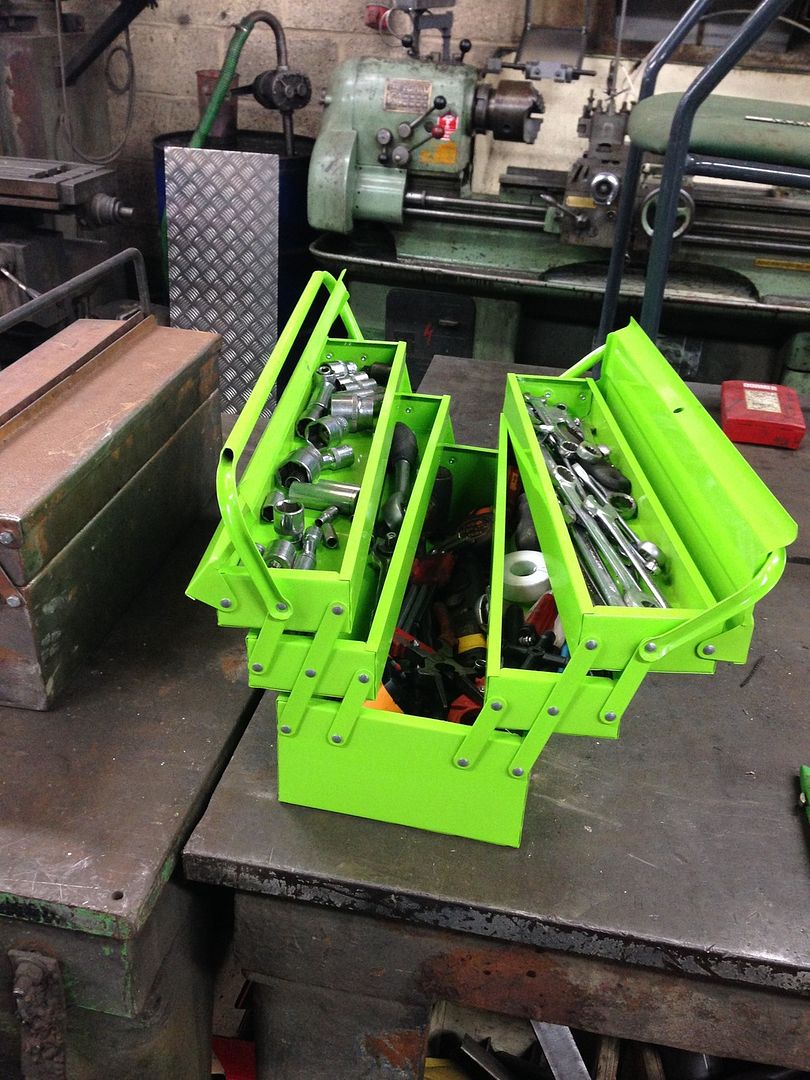
And a pic of my new toolbox after a tractor drove over my last one and squashed it! It was the brightest toolbox I could find! I made the one on the left ages ago from 2mm steel.. when it's empty it weighs the same as the green one, full up!
Engine is running sweet, I'm thinking my first go at rebuilding an engine was a success. Let's hope it stays that way!
One job I was quite looking forward to was making a new upper strut brace. The original steel brace I made wouldn't fit since I moved the PCV system back to the OEM location. The recipe was a similar design, but made from stainless steel this time.
Here's the original brace to remake.
Cut some shapes with the plasma cutter and sent some metal through the rollers. Using 2.5mm 304 ss. Used my digital verniers to get the measurements of the turrets. Laser cutting would have been sweeter but it's just not economical for low volumes like this. Got a die grinder last week, would have been handy to have it for this job.
Got some more TIG practise in
For the tube I used some 1.5mm wall stainless tubing. This makes the whole brace stronger and lighter than the steel one. Plus it'll probably out-live the car!! I bent it using a bottle jack style tube bender I borrowed from my boss. Took absolutely ages to get the tubing shaped to fit the turret mounts!
Note new Beru coil packs.. not had any problems with these at all. Also new is the vacuum reservoir on top of the valve cover.. this gives a vacuum supply to the diverter valve so that the ECU can control it via another valve, called the N249.
Finished! Used some pickling paste, it removes the heat marks and makes it look shiney and all lovely. Yes I know it's not bolted in!!!
Here's a nice shot of Sean's car next to mine at the Phirm... non-body kit rules!!!!!!!
My ABF starter motor failed and euro's sent me this motor... for a 2.3L engined car! I don't think so.. Went to return it and they were out of 02A starter motors so I'm actually running an 02J starter motor now, which fits and works fine in an 02A.
I've been having a mare with the brakes.. if I adjust the bulkhead linkage enough so that I have reasonable pedal travel I end up with brakes that bind. I've been carrying a 13mm spanner with me so that I can adjust the linkage on the go.. I really want to get this sorted as it's unnerving having all this power but not the confidence in the anchors!!
I've had a new master cylinder and brake lines, and the linkage itself isn't sticky, so I deduced it must be the calipers (which I took apart but only cleaned). I got a rebuild set for each side comprising pistons, seals and slide rubbers.
The Astra brakes are looking a bit worse for wear now! Pistons and bores had slight corrosion
New rebuild kit
The brakes are back on now but I'm still getting slight binding on the front right I think.. I wonder if I can get the caliper bores honed, if that'll fix it? Did I clean the bores thoroughly enough? I don't know where to go with this. I'm tempted to say f-it and get a wilwood kit and a rear disc conversion.. ££££££....
Anyhoo here's a soapy pic
And a sunset pic
And a pic of my new toolbox after a tractor drove over my last one and squashed it! It was the brightest toolbox I could find! I made the one on the left ages ago from 2mm steel.. when it's empty it weighs the same as the green one, full up!
-
mark watson
- Posts: 201
- Joined: Mon Apr 18, 2016 3:47 pm
- fill in the right answer: 15
- Location: south africa
Re: HERMAN THE GERMAN! '91 Scala 20vt
magic job treefingers , here on this side of the earth we can go all out , no mot or insurance , so can do what you want , but your attention to detail is great , we have a magic local management system , spitronics , works the charm from the old 8 valve right up to the 20 valve , fitted 1 the other day to a modded 2.8 v6 audi running a gt35 turbo and it started on the wooden pallet.
-
mark watson
- Posts: 201
- Joined: Mon Apr 18, 2016 3:47 pm
- fill in the right answer: 15
- Location: south africa
Re: HERMAN THE GERMAN! '91 Scala 20vt
the nice thing is with the exchange rate you are paying peanuts for it , i think around 22 - 1 , to the rand , so prob around 170 quid
-
treefingers
- Posts: 400
- Joined: Wed Aug 14, 2013 1:04 pm
- fill in the right answer: 15
-
treefingers
- Posts: 400
- Joined: Wed Aug 14, 2013 1:04 pm
- fill in the right answer: 15
Re: HERMAN THE GERMAN! '91 Scala 20vt
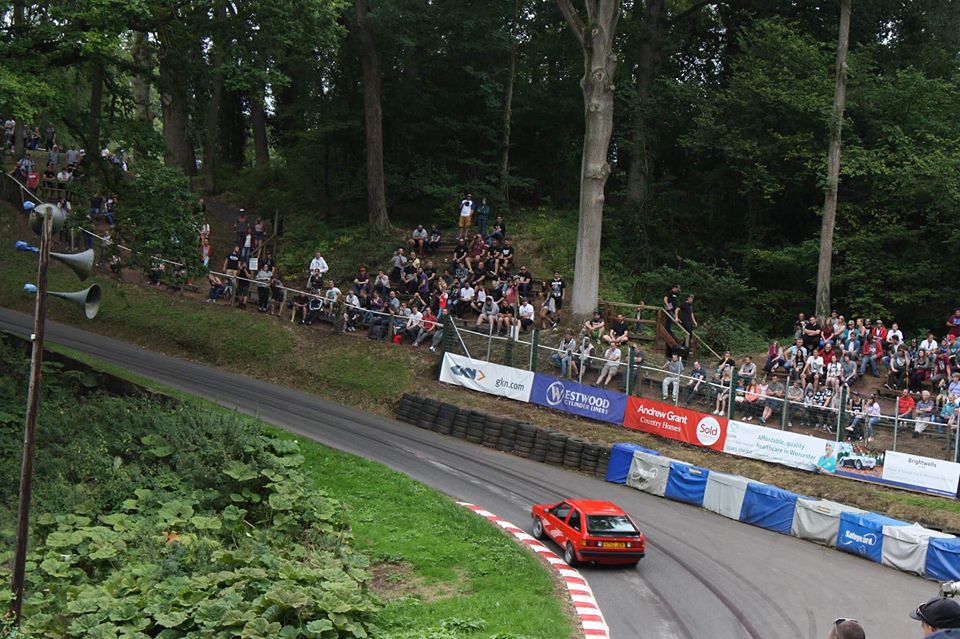
Nearly two years since my last post! I've been grateful that the car works well enough now to take on some outings. This is Herman at Shelsey Walsh hillclimb:
These are some of the tings I've done since the last update..
- Upgrade the front brakes to 280mm G60 discs with some spacer plates I made
- New balljoint extenders, decent ones this time
- New wheels with paint that lasted 10 months! Now powdercoated
- Intercooler upgraded from smallest that would fit to largest that would fit
- Mapped by Badger 5 making about 220bhp and 35nm. Makes more than this now.
(This was with the tiny intercooler. Intake air temperatures on the rolling road were at 60ºC! I fitted the big intercooler and went round Castle Combe with by bro in the passenger seat. On the laptop we measured intake temps in the low 20's, that's with WOT and around 6k rpm! A massive improvement.)
- Made a full stainless exhaust system. Messed around with a steel backbox, removing deadening material and making it smaller and smaller until I got the sound I wanted. Took about 5 attempts to get it right! I replaced it with a stainless backbox in the same size.
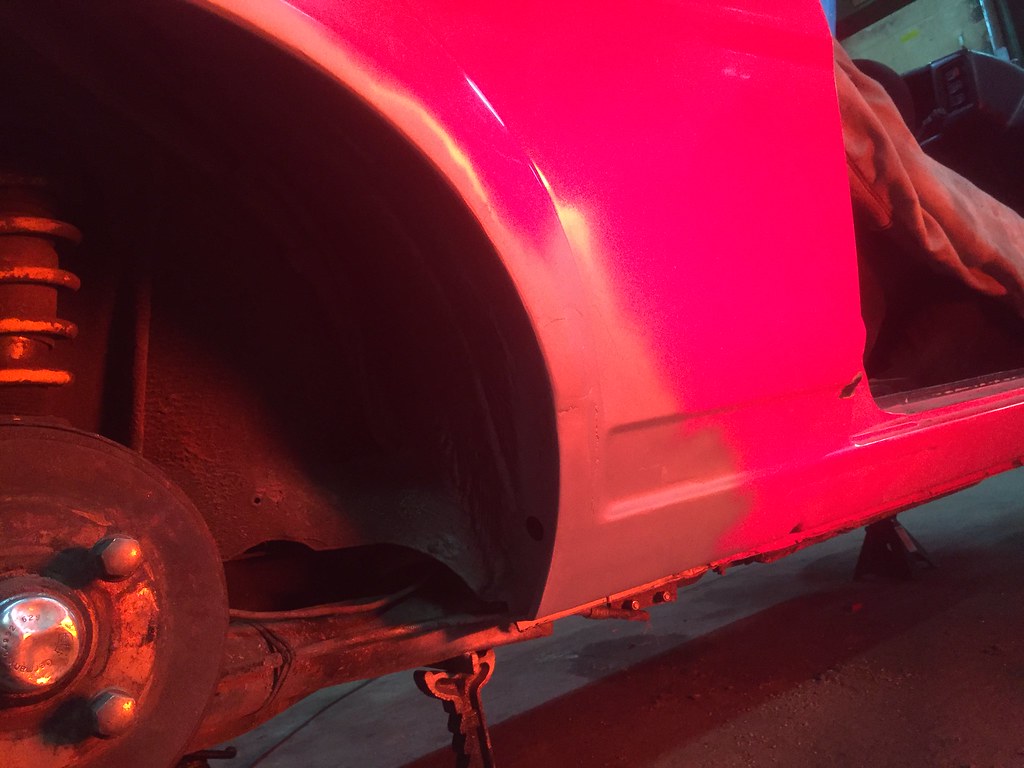
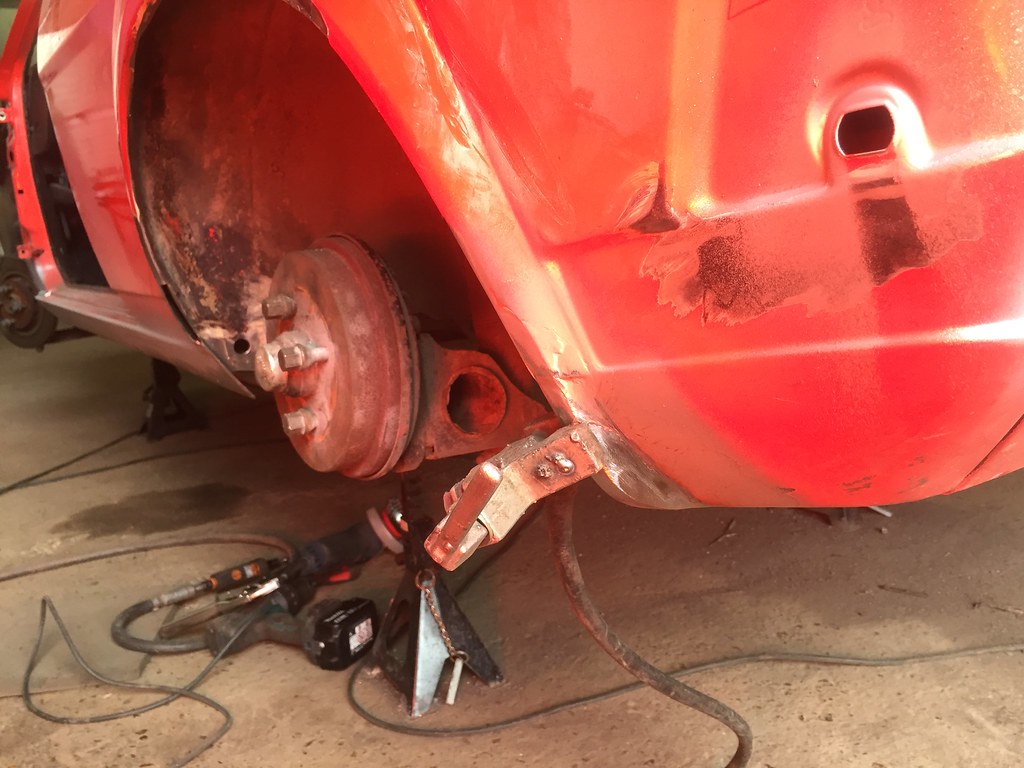
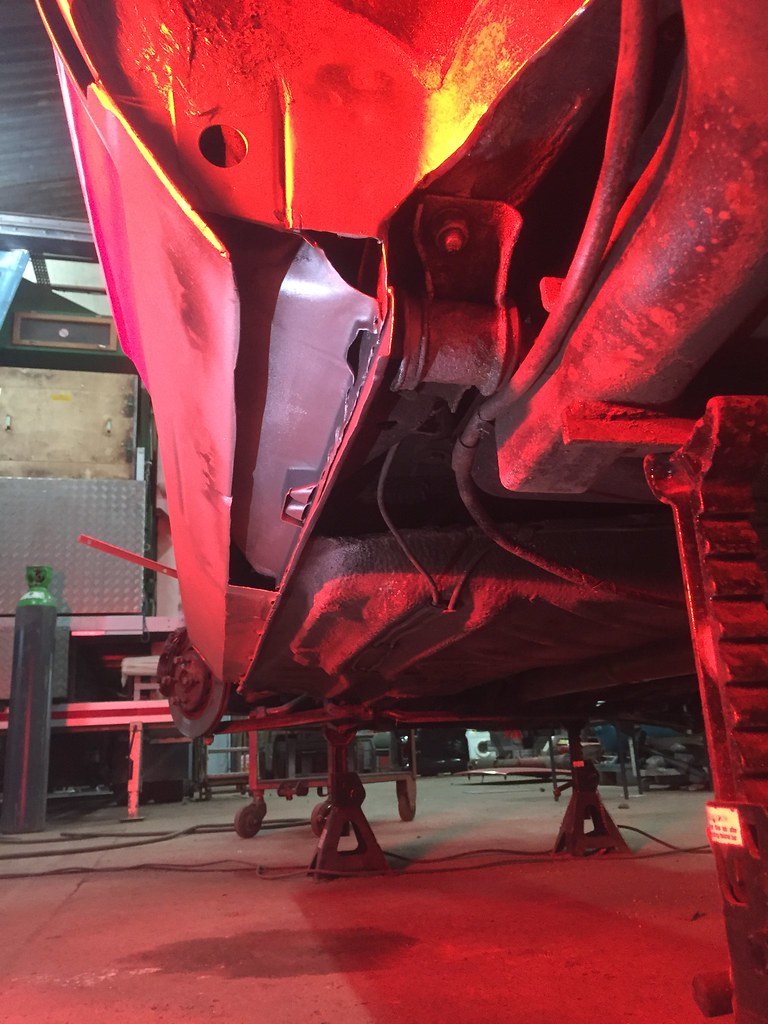
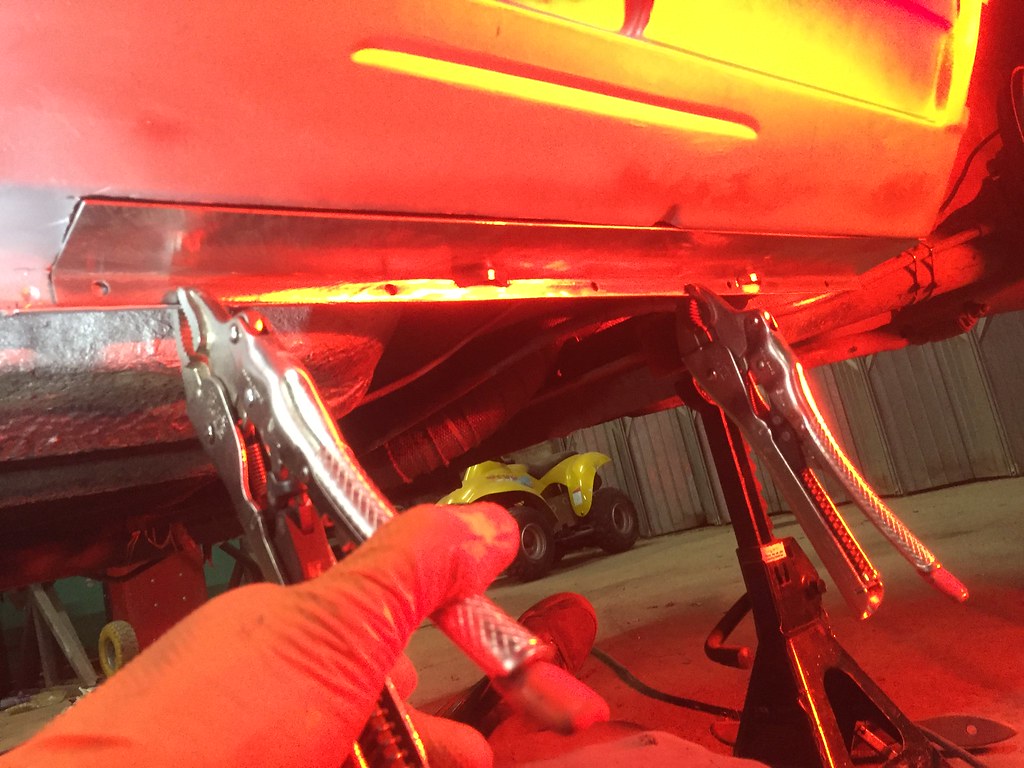
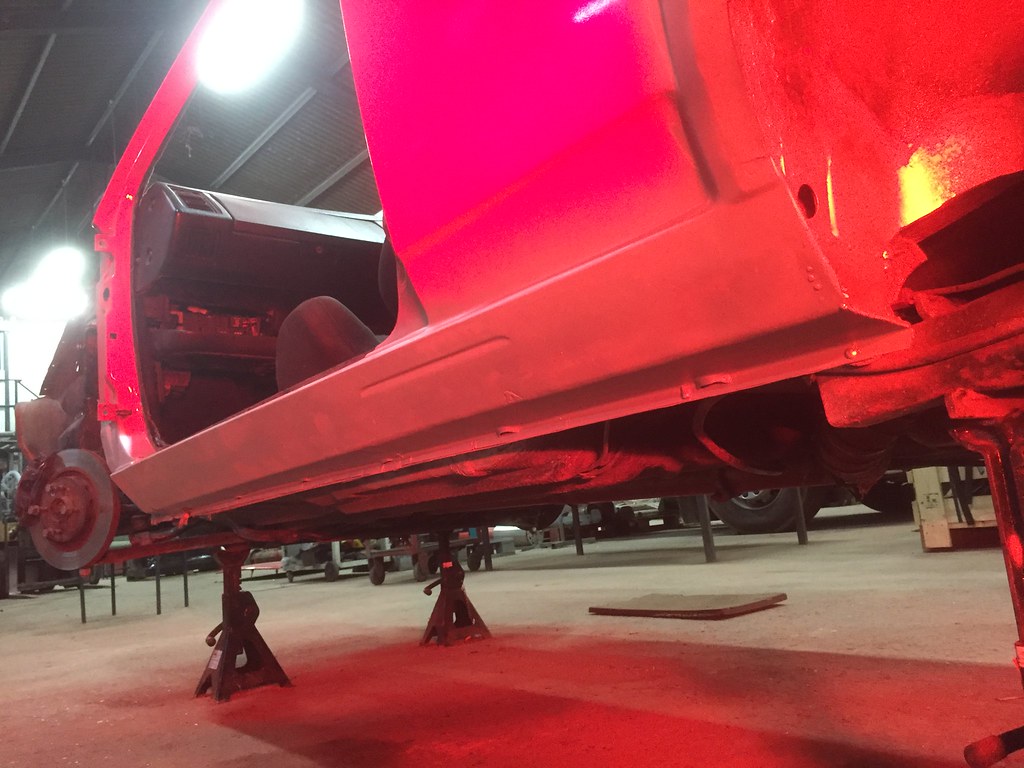
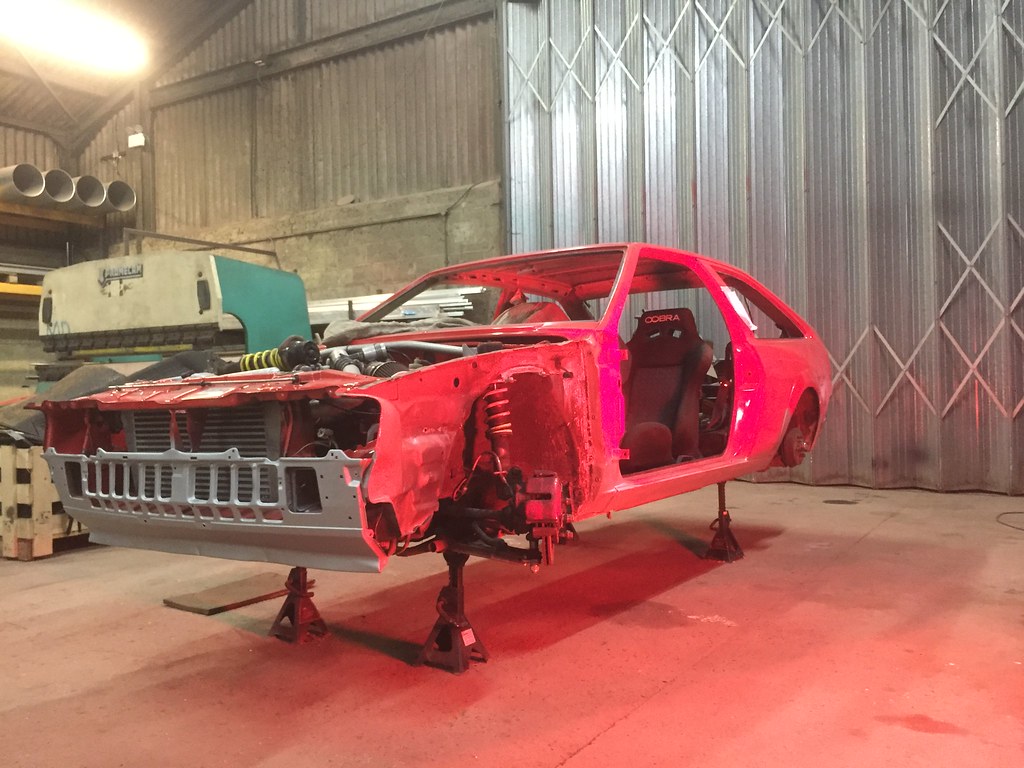
I had a second-hand wing to paint to replace the damaged passenger wing, and the front valance needed repainting. One thing led to another and I ended up deciding to respray the whole car... I'm currently 3 days and over 30 hours in so far.. LOTS to do, and there's a deadline. Got a week off work though, so here we go again..
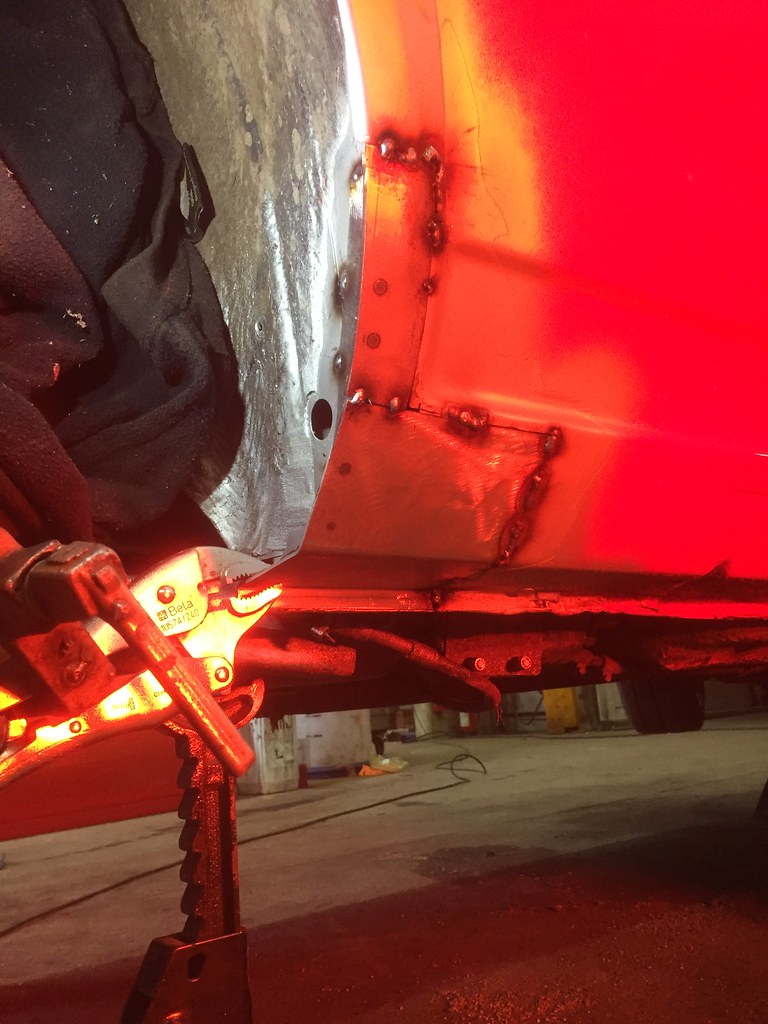
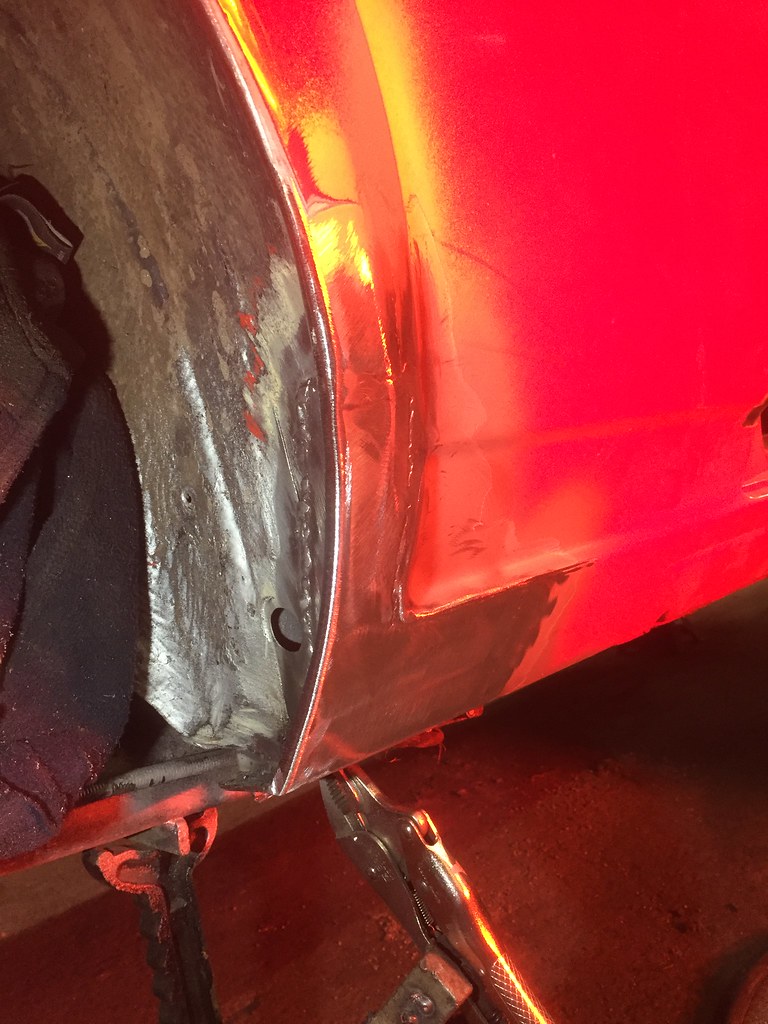
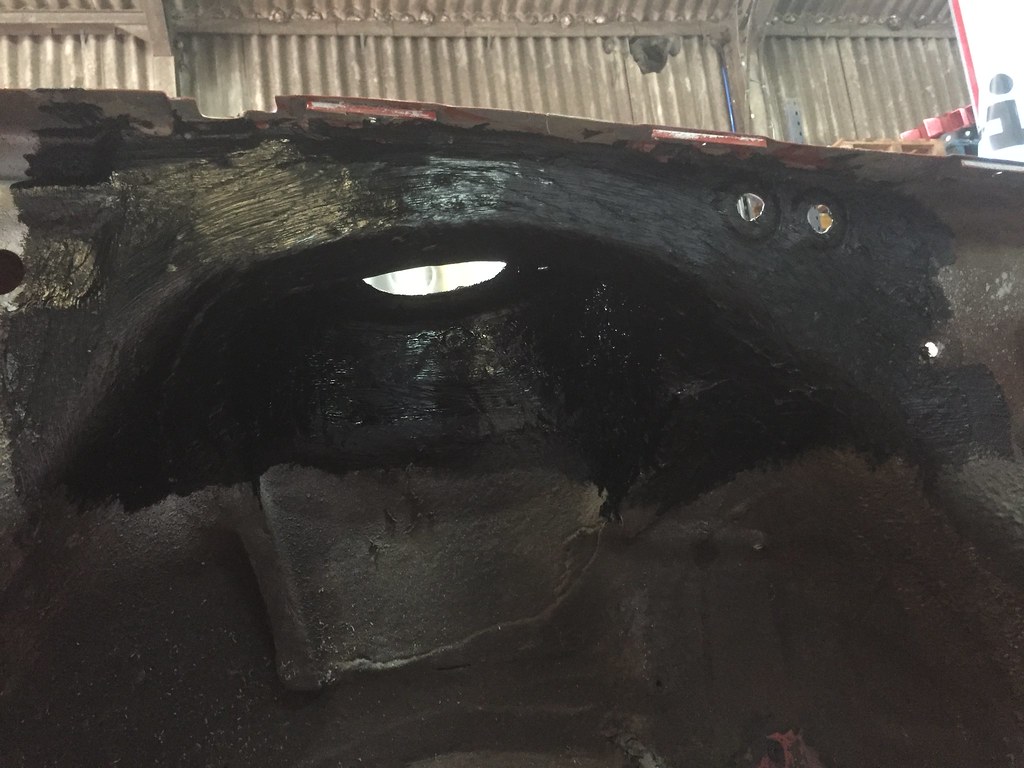
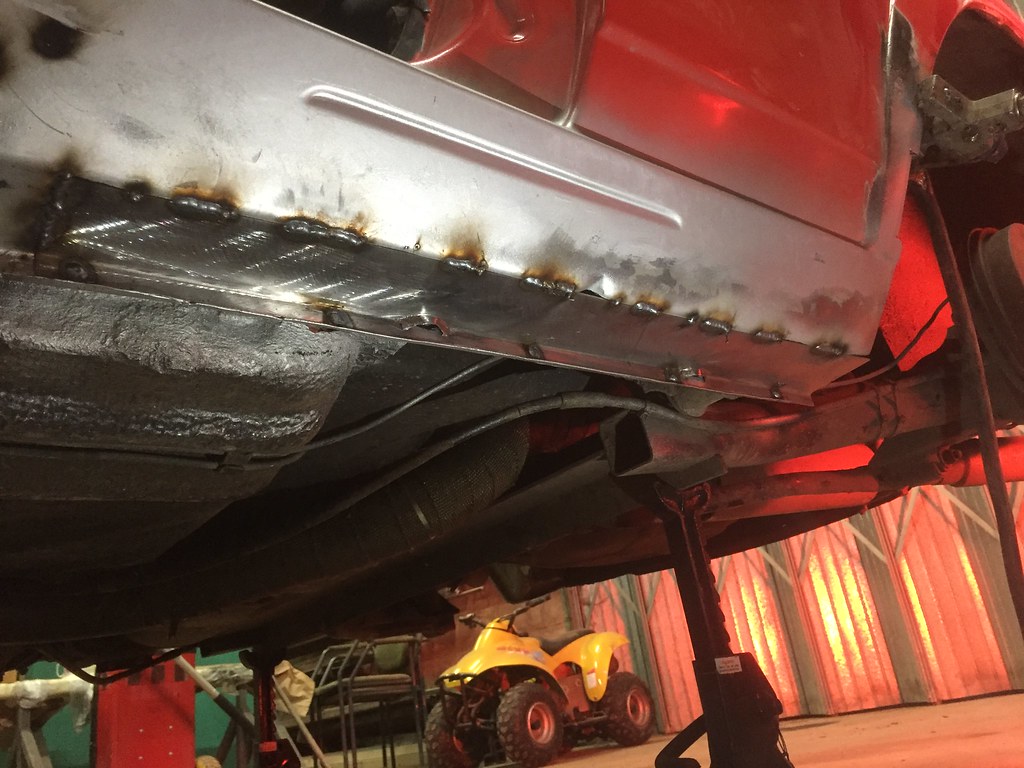
To begin with it's out with the rust..

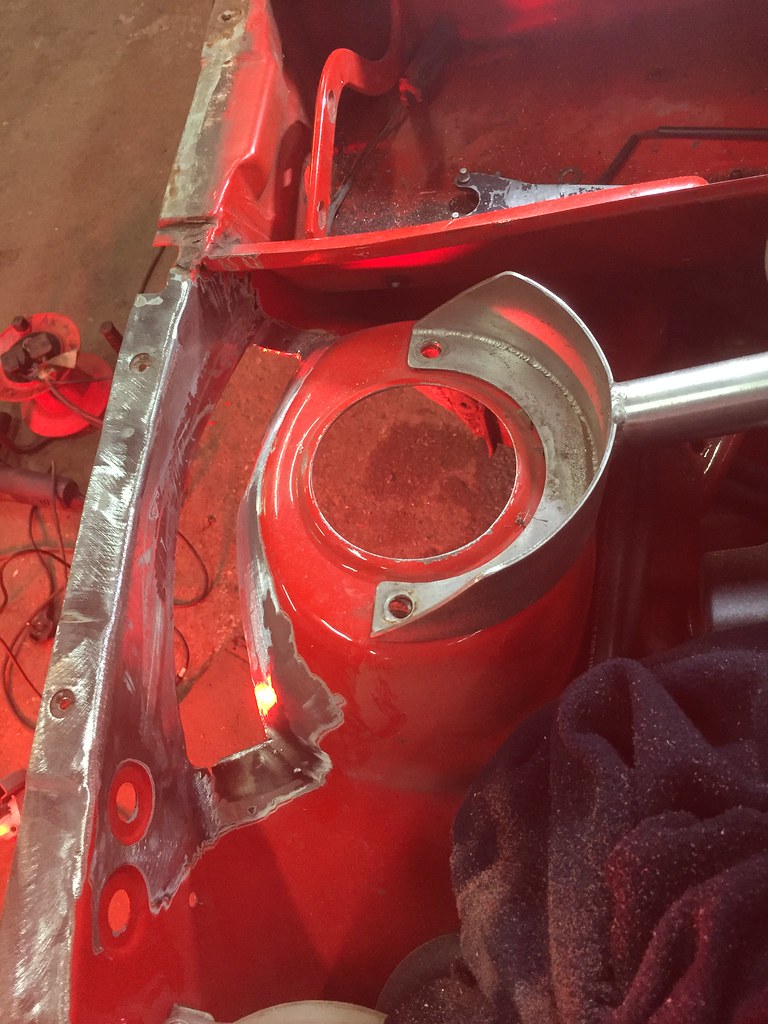
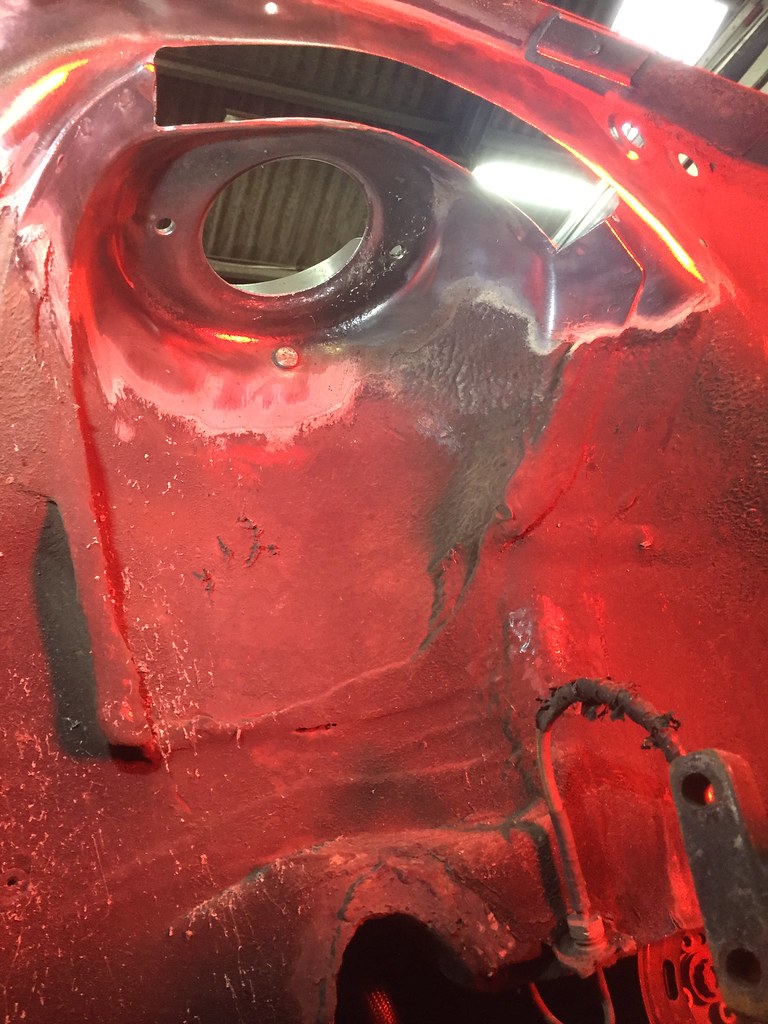
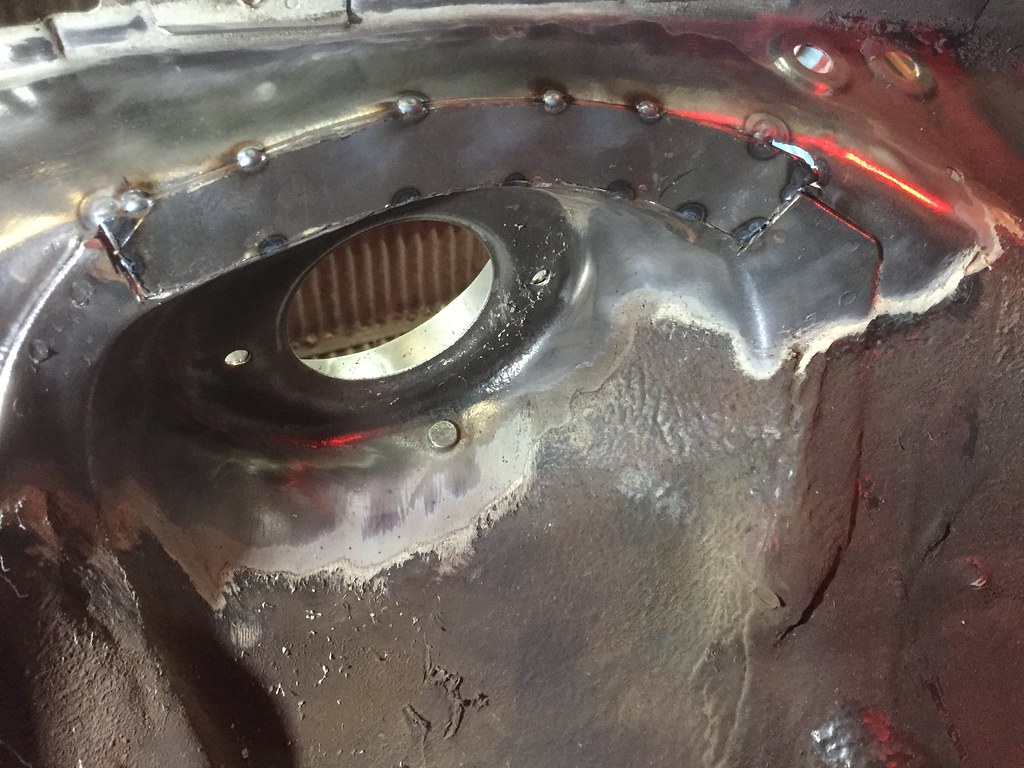
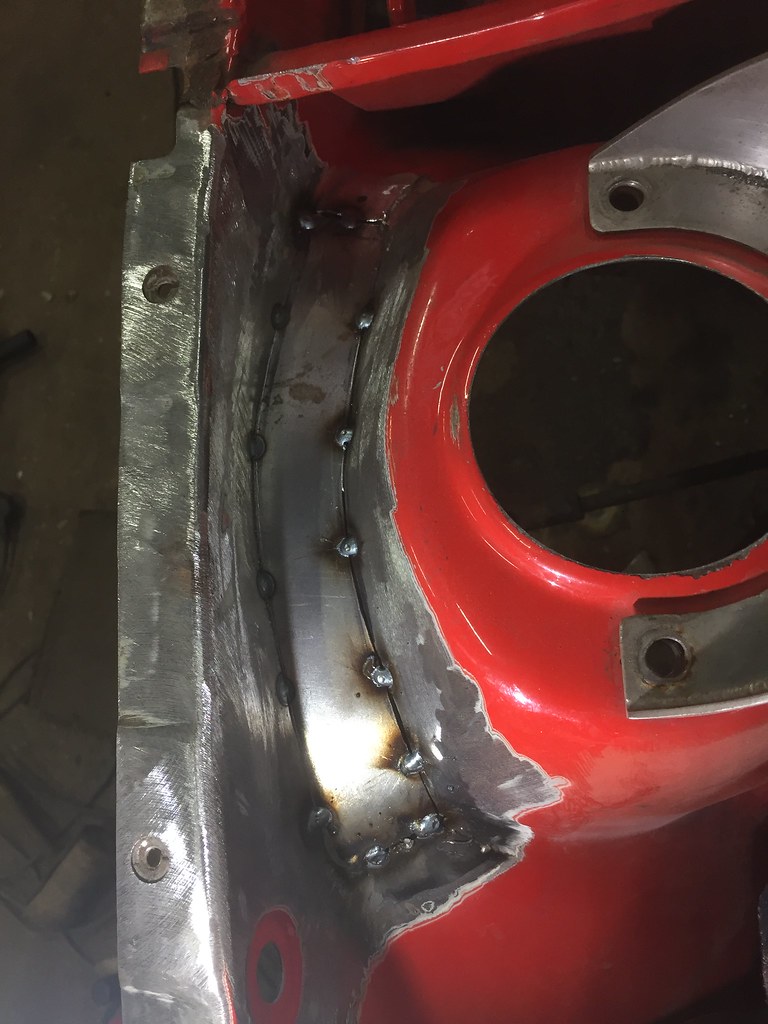
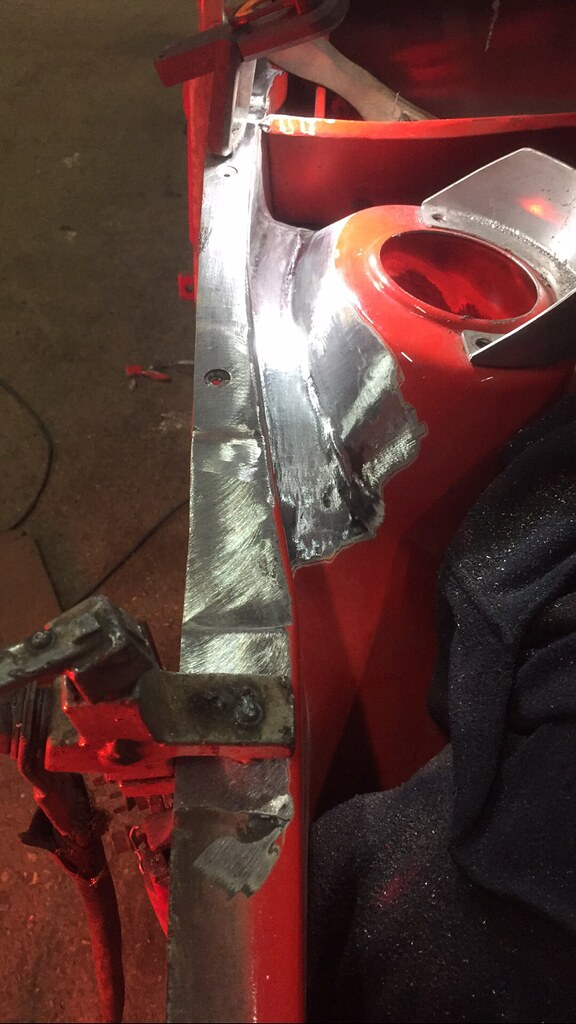
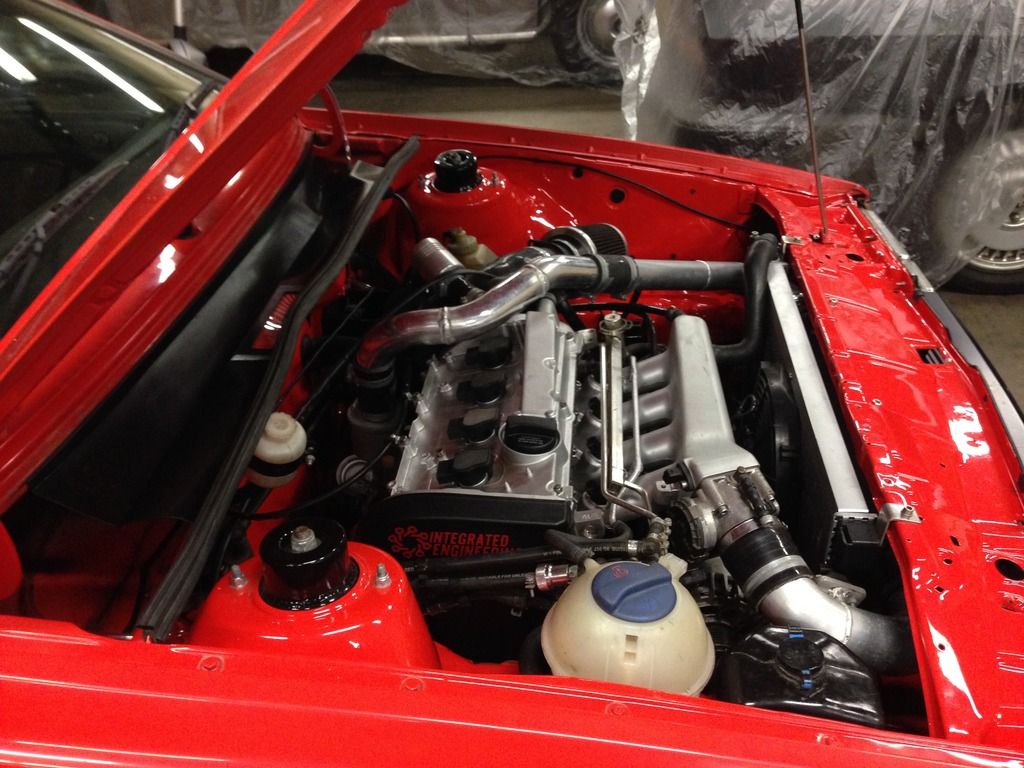
Note the expansion of the intercooler behind the grill. It's so big the inlet pipe is in the way of the washer bottle now, and needs relocating.
These are some of the tings I've done since the last update..
- Upgrade the front brakes to 280mm G60 discs with some spacer plates I made
- New balljoint extenders, decent ones this time
- New wheels with paint that lasted 10 months! Now powdercoated
- Intercooler upgraded from smallest that would fit to largest that would fit
- Mapped by Badger 5 making about 220bhp and 35nm. Makes more than this now.
(This was with the tiny intercooler. Intake air temperatures on the rolling road were at 60ºC! I fitted the big intercooler and went round Castle Combe with by bro in the passenger seat. On the laptop we measured intake temps in the low 20's, that's with WOT and around 6k rpm! A massive improvement.)
- Made a full stainless exhaust system. Messed around with a steel backbox, removing deadening material and making it smaller and smaller until I got the sound I wanted. Took about 5 attempts to get it right! I replaced it with a stainless backbox in the same size.
I had a second-hand wing to paint to replace the damaged passenger wing, and the front valance needed repainting. One thing led to another and I ended up deciding to respray the whole car... I'm currently 3 days and over 30 hours in so far.. LOTS to do, and there's a deadline. Got a week off work though, so here we go again..
To begin with it's out with the rust..
Note the expansion of the intercooler behind the grill. It's so big the inlet pipe is in the way of the washer bottle now, and needs relocating.