Project White GT

Scirocco Register members projects
Forum rules
Section for all vehicle and related projects. Please keep responses pertinent to thread.
markh
Posts: 718
Joined: Wed Apr 01, 2009 2:14 pm
fill in the right answer: 15
Location: Newcastle, Staffordshire.

Project White GT

Post by markh »

Thought id make a start by checking this over to see what work needs to be done and in all honestly, theres not a huge amount wrong with it.
Image
Image
The previous owner had parked it up after a suspected gearbox failure, it was making a grinding, clanking noise when driving. I jacked it up to check the CV joints and wheel bearings, passenger side ok but on checking the drivers side i find that the brake disc poo shield had corroded, dropped off and wrapped itself up between the caliper and the disc. I remove the remains of the shield, and test drive the car up and down the alleyway and its all good, no noise and no clunking.
Image
The check over has thrown up a few minor jobs, front pads, front metal brake pipes and flexi's and also rear metal pipes to the wheel cylinders. The rear exhaust silencer, rear shocks and springs and handbrake cables, were all replaced a few days before the car was parked up. It will also get a decent service. Underneath it is in fantastic condition, no rot around the beam mounts or rear arches, the fuel tank looks almost like new and although rusty, the filler neck can be cleaned up and used again. Strangely for a GT, its also got antiroll bars fitted.
Image
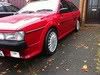
The bodywork and paints is also in amazing condition, all apart from the drivers door, which is basically knackered. So i made a start on changing the door for a better one. Trim off.
Image
Then manky door removed.
Image
Replacement door fitted, after swapping the glass and window winder over from the old door.
Image
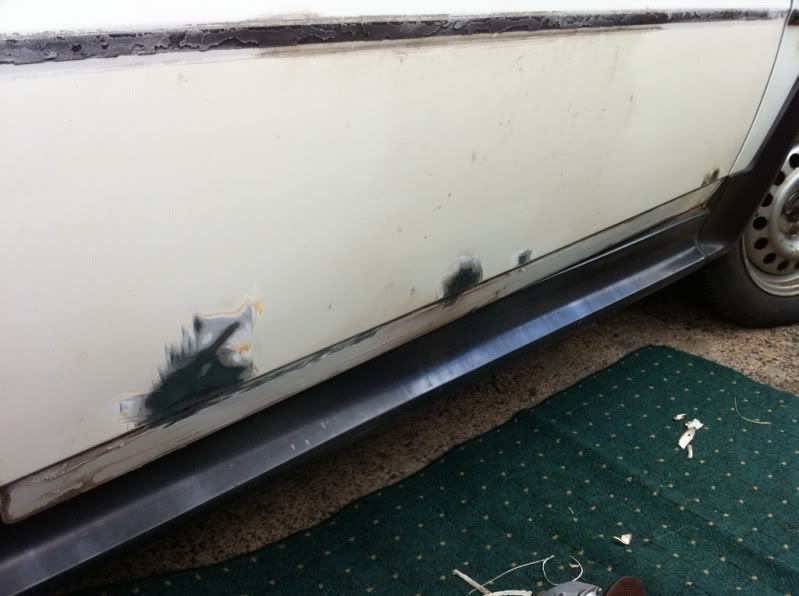
Theres a couple of rust scabs on the bottom of the new door, so im going to rectify these and probably repaint the whole bottom edge of the door, then i can refit the original black door bottom trim from the old door.
Heres the old door.
Image
Image
I still need to refit the interior door trim, but i need to make a new plastic membrane before i can do this.
Well, its a start, i may do some more tomorrow but id also like to spend a bit of time on the Mk1.


Don't ask me....it was like that when i got here !
Image
the edmundator
Posts: 2928
Joined: Wed Apr 01, 2009 7:34 pm
fill in the right answer: 10
Location: BEDFORD
Contact:

Re: Project White GT

Post by the edmundator »

markh wrote:Strangely for a GT, its also got antiroll bars fitted.
It's a 1.8, isn't it? I think they all had the ARBs.


Register Member 829
--
1980 (1976) Mk1 Junior Cup Replica
1987 MK2 GTX
User avatar
Cpt Custom
Posts: 761
Joined: Mon Jul 19, 2010 1:46 pm
fill in the right answer: 15
Location: Northallerton

Re: Project White GT

Post by Cpt Custom »

Great news. Another markh resto thread ... a must read! Better than a Haynes manual any day! :read:


Image 1987 Alpine White Mk2 GT Lily
markh
Posts: 718
Joined: Wed Apr 01, 2009 2:14 pm
fill in the right answer: 15
Location: Newcastle, Staffordshire.

Re: Project White GT

Post by markh »

Not a huge step forward, but a couple of small jobs done. First was to make a new plastic liner before the door card gets refitted.
Image
The front fog lights were pretty knackered, so they get binned.
Image
Image
And a brand new set bought off ebay, fitted in their place.
Image
Swapping them over was a doddle, the new lamps came with new fittings and bulbs, all i had to do was swap the bulb looms over from the old lamps. Obviously the car needs a good clean all over, but the new lamps make the front look better already.
Image


Don't ask me....it was like that when i got here !
Image
monzajake
Posts: 744
Joined: Thu Mar 05, 2009 7:13 pm
fill in the right answer: 15
Location: surrey

Re: Project White GT

Post by monzajake »

nice work dude... :good:


Image
markh
Posts: 718
Joined: Wed Apr 01, 2009 2:14 pm
fill in the right answer: 15
Location: Newcastle, Staffordshire.

Re: Project White GT

Post by markh »

Cheers Jake. :hi:
I thought today i'd have a check around under the bonnet and a few small issues came to light. The earth lead from the coil bracket to the rocker cover was missing, so that gets a second hand one fitted, there was a broken wire going to the inlet manifold heater, so that got a new terminal fitted and the alternator belt is changed for a new one. There was the usual water leak from the plastic flange at the gearbox end of the cylinder head and true to form the housing is split.
Image
I had one of the old type alloy flanges ( no danger of this one splitting ) so fitted that with a new seal and while changing the flange i noticed the oil pressure switch was leaking, so binned it and bought a new one.
Image
One of the thermo switches on the front flange was broken, this was replaced with a good second hand one.
Image
To complete the work on the cooling side of things, i changed the old hose from the expansion tank to the radiator with a new one, flushed the system with clean water, refilled it with fresh antifreeze and ran the engine to check for leaks and cooling fan operation.
The plug leads, dizzy cap and rotor arm were all replaced just before the car was taken off the road and so are in perfect condition, however the plugs were looking ropey so a new set of Bosch plugs get fitted.
The gear linkage bushes were practically none existent, resulting in the old stiring paint with a broom handle gearstick effect. I stripped out the linkage, degreased everything and refitted it with new bushes, a huge improvement.


Don't ask me....it was like that when i got here !
Image
markh
Posts: 718
Joined: Wed Apr 01, 2009 2:14 pm
fill in the right answer: 15
Location: Newcastle, Staffordshire.

Re: Project White GT

Post by markh »

Some small odd and sods sorted today. Refitted the drivers door card, changed the cracked nearside front indicator lens, and sorted a few electrical gremilins. The indicators didnt work and the green indicator warning light on the dash constantly glowed dimly, changing the hazard warning switch for a decent second hand one cured this. The nuber plate lights and rear wiper only worked intermittently and i traced this down to a broken earth wire inside one of the rubber wire guides at the top of the tailgate by the hinges. I had won a pair of brand new front flexi brake hoses on ebay for the bargain price of £7 and they arrived today and i intend to crack on and get them fitted along with new front metal brake pipes, tomorrow. :yup:


Don't ask me....it was like that when i got here !
Image
markh
Posts: 718
Joined: Wed Apr 01, 2009 2:14 pm
fill in the right answer: 15
Location: Newcastle, Staffordshire.

Re: Project White GT

Post by markh »

Today sees the brakes get an overhaul. Started off by replacing the front flexi hoses, only the passenger side needed doing really but i thought i may as well change both sides. The good news is after cleaning off the mud and gunk, the metal pipes are in really good condition, the unions came undone easily when fitting the new flexis, so i just cleaned them up and smeared them with lithium grease. The brake pads had loads of life left in them, barely worn in fact, so i took them out, refaced them, cleaned up the rusty discs, greased the caliper sliders and reassembled everything.
Image
The old flexi hoses were changed because the ferrules had started corroding.
Image
Everythings good with the front suspension, the shocker inserts have seen very little road use since they were changed along with the top mounts. While the car was up in the air, i also checked the gearbox oil level.
So moving onto the back brakes the good news continues as the rest of the metal brake pipes dont need changing, again they get a clean up and a coating of grease. Removing the rear drums, throws more luck my way, as the shoes and cylinders are as good as new. I just gave them a clean off with brake cleaner spray and readjusted them. The drums were quite worn, and seeing as i had had a new pair kicking about for a while, i thought i might as well change them along with new wheel bearings.
Image
Then the whole brake system gets bled and fresh DOT4 brake fluid put in.
While the rear wheels are off, i had time to tackle the rusty filler neck. All the brackets are still intact and despite the rust, the filler neck is savable. It gets a scrape off, wire brushed then sanded, oxide primer, then a thick coat of brush on primer. It still needs a top coat but as i was short of time by now and had to get the car moved, it had to go back on in primer.
Image
As with the front suspension, the rear set up is in excellent condition. The wheel arches under the bodkit are perfect and rust free too.
Other jobs completed are, changing the rear sidelight bulbs, as the passenger side one had blown and cleaning up and painting the metal fuel lines under the car.


Don't ask me....it was like that when i got here !
Image
markh
Posts: 718
Joined: Wed Apr 01, 2009 2:14 pm
fill in the right answer: 15
Location: Newcastle, Staffordshire.

Re: Project White GT

Post by markh »

I really couldnt be bothered with anything too involved today, so fitted new wiper blades front and back, fixed the non working horn and refitted some of the trim in the boot. The car came without a stereo and speakers, although the original speakers were supplied with the car, so i refitted the speakers and then put in a spare stereo i had.
Thats it until im off work again next week, when i can hopefully start tackling the paint on the lower part of the drivers door.


Don't ask me....it was like that when i got here !
Image
markh
Posts: 718
Joined: Wed Apr 01, 2009 2:14 pm
fill in the right answer: 15
Location: Newcastle, Staffordshire.

Re: Project White GT

Post by markh »

Gave the filler neck a couple of coats of white hammerite, no reason for it being white, its just paint that i had kicking about.
Image
The wheels need a repaint, so while the drivers side rear wheel was off to do the filler neck, i started with that one. I gave it a rub down and degreased it, before applying several coats of silverwheel paint.
TOP TIP == its always a pain painting wheels and keeping paint off the tyres, obviously one solution is go to a tyre fitting place and get the tyres whipped off then refitted when the paintings done. This however can be costly and is also a bit of a ball ache, so an easy solution is to give the tyre walls a wipe over with grease before painting, concentrating around the wheel rim (clean off any grease that gets onto the wheel rim before painting) and the lettering on the sidewalls, any overspray wont stick and the grease can be wiped off with an old rag, then the whole lot washed with hot soapy water.
Heres the wheel after painting, with part of the grease wiped away.
Image
And the finished wheel ( still needs a hot wash to get the last of the grease off)
Image
Also made a start on the drivers door refurb, removed the bottom strip and ground down the rust patches with an angle grinder.
Image
The larger rust patch also had a small dent, so i skimmed it with filler and rubbed it down.
Image
Then cleaned off the old adhesive from the door rub strip and gave the whole panel a rub down with 1200 grade wet and dry paper.My plan is to at least get it in primer tomorrow.
Image


Don't ask me....it was like that when i got here !
Image
decon
Posts: 25
Joined: Mon Feb 14, 2011 7:26 am

Re: Project White GT

Post by decon »

Very Nice work Mark

Making feel bad for not being able to get to mine


User avatar
Reverend Frog
Posts: 497
Joined: Wed Apr 01, 2009 12:57 pm
fill in the right answer: 15
Location: Belfast

Re: Project White GT

Post by Reverend Frog »

I absolutely bloody love mark's resto threads: this man does not take shortcuts.

Plus that's an awesomely useful Top Gear top tip about painting the wheels, I would never have thought of that


Previously owned:
Image
1988 1.6 GT
1989 1.8 GT
1982 1.6 GTI
1993 Corrado VR6
markh
Posts: 718
Joined: Wed Apr 01, 2009 2:14 pm
fill in the right answer: 15
Location: Newcastle, Staffordshire.

Re: Project White GT

Post by markh »

Cheers chaps. :chill:
First job of the day, mask up the body ready for primer on the door.
Image
Then build up several layers of white primer.
Image
Once dry, this gets another rub down with some worn 1200 grade paper and plenty of water, to give a smooth finish ready for the base colour.Then it gets 4 coats of base colour at 20 minute intervals and then around 5 coats of lacquer to give it a deep shine. Im pretty pleased with the finish.
Image
This will now be left until next week to completely cure, before getting another very light flatting with worn 1200 grade and water to get as smoother a finish as possible. Then i can refit the rub strip and bottom trim.
Other jobs done in between waiting for primer, paint and lacquer to dry include, fixing the broken earth wire in the tailgate wirimg, fitting LED bulbs in the front sidelights and number plate lights and rubbing down and painting the rest of the wheels.
Image
I took the front bumper off, degreased it and cleaned it before painting it satin black and refitting it. Still need to do the rear one.
Image
Im looking forward to getting the rest of the bodywork cleaned up and the paintwork polished.


Don't ask me....it was like that when i got here !
Image
LEEP
Posts: 252
Joined: Wed Apr 01, 2009 9:02 pm
fill in the right answer: 10
Location: HALIFAX WEST YORKS

Re: Project White GT

Post by LEEP »

looking good as always mark :hugegrin:


SCIROCCO GT
Member 934
User avatar
Cpt Custom
Posts: 761
Joined: Mon Jul 19, 2010 1:46 pm
fill in the right answer: 15
Location: Northallerton

Re: Project White GT

Post by Cpt Custom »

Very nice Mark! :vcool:


Image 1987 Alpine White Mk2 GT Lily
Post Reply