
THIS IS JUST A GUIDE PRODUCED BY MYSELF AFTER DOING IT. IF YOU MESS IT UP, BREAK UR LIGHTS OR HURT YOURSELF IT IS NOT MY FAULT.
I ACCEPT NO RESPONSIBILITY FOR YOUR ACTIONS.
TOOLS NEEDED:
1 phillips screwdriver - to remove/replace lights
1 flat head screwdriver - to separate glass from frame
1 can of gray/black primer
1 can of black gloss (or whichever color you choose)
1 hairdryer
2 Stanley knife blades - a spare in case first one gets blunt/you loose it
OR a scalpel. - to remove the glue
tiger seal/ sika flex/ silicone - for sealing the lights back together
1 roll of masking tape
an old newspaper.
some fine wet & dry paper
some free time - this takes longer than you think, esp the separating of the lens and removal of the original sealer.
first off remove the whole light assembly - saves having to re-adjust the lights
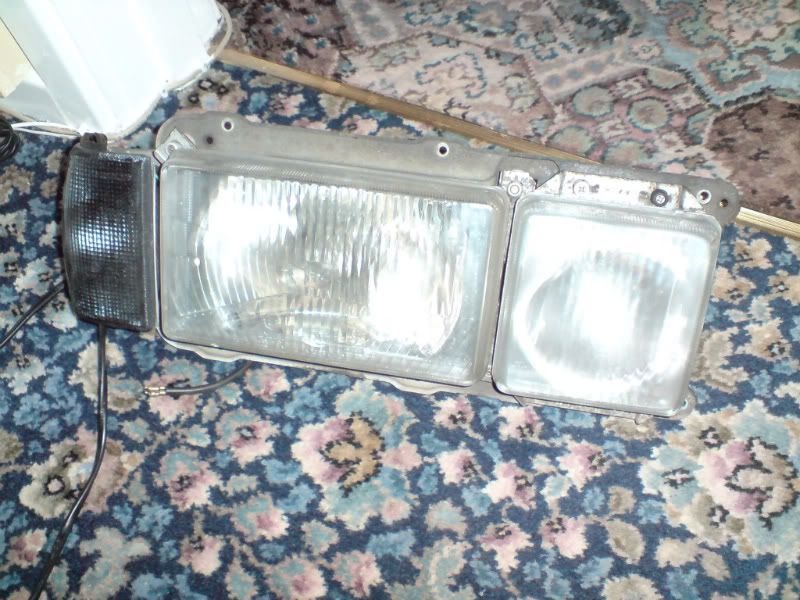
this is 4 or 5 screws that can be got too by opening the bonnet and going through the gap between the bumper and lights.
Once off, give them a quick wipe.
then set to a set with the wifes/Gf's/self's hairdryer.
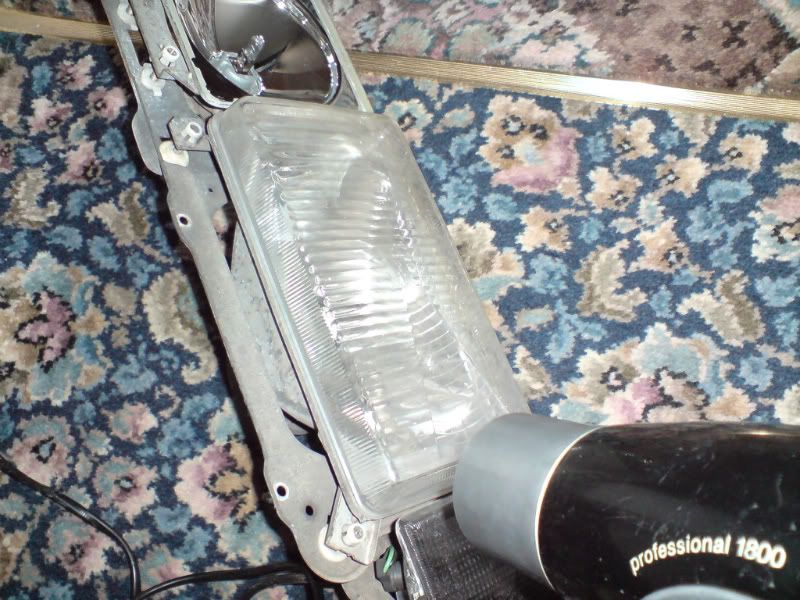
keep moving round the glass 'aiming' at the seal between the glass and frame. - best to do one lens at a time.
when the glass becomes hot use a small screwdriver to prise the glass away from the frame. moving round the lens CAREFULLY ease the lens off. BE VERY CAREFUL AT THIS POINT, IF IT DOESNT START MOVING IT NEEDS TO BE HOTTER! while doing this dont be surprised if u chip a few bits of glass off - WATCH YOUR EYES.
once youve got both lenses off go round the lenses and frame with a stanley knife blade to remove all (well pretty much) of the original glue.
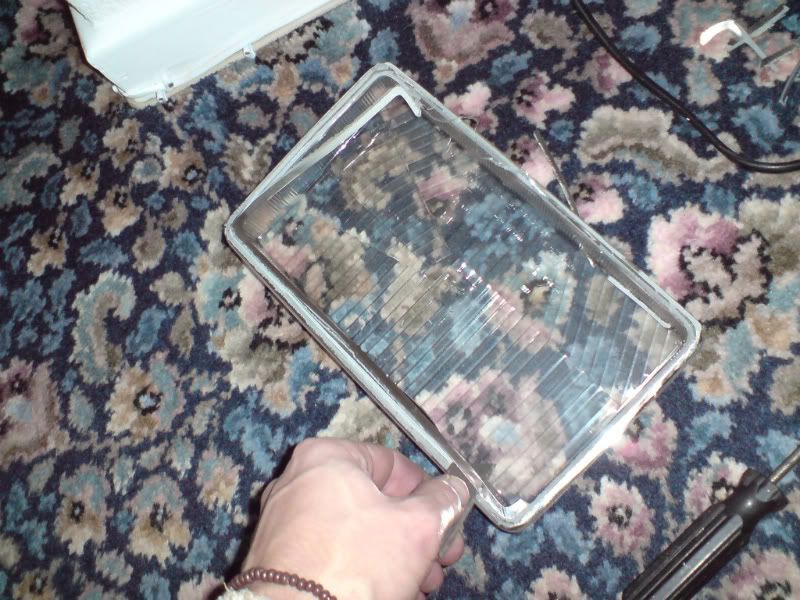
this does take some time and your fingers/thumb will be tired after lol.
right
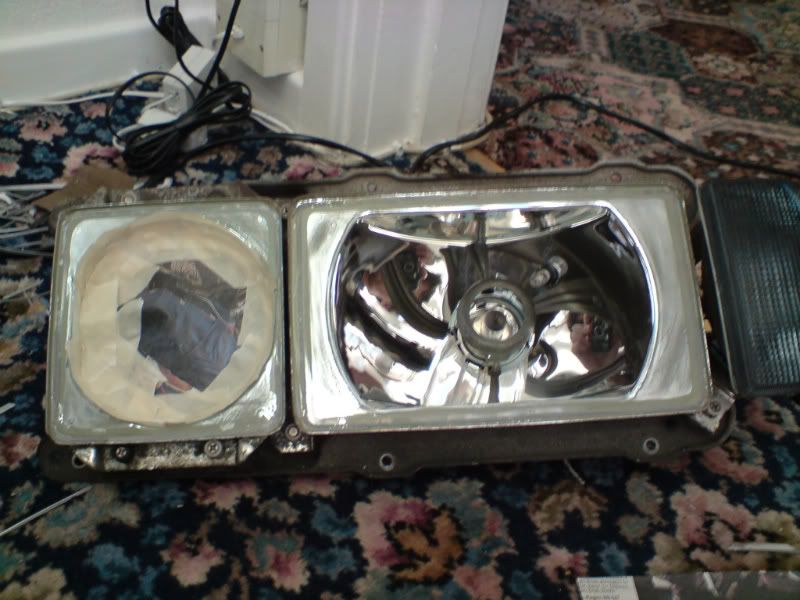
get some fine (i think i used 800/1000) wet & dry and flatten off the chrome on the flat surface of the lights.
and then give them a dry wipe with a bit of cloth.
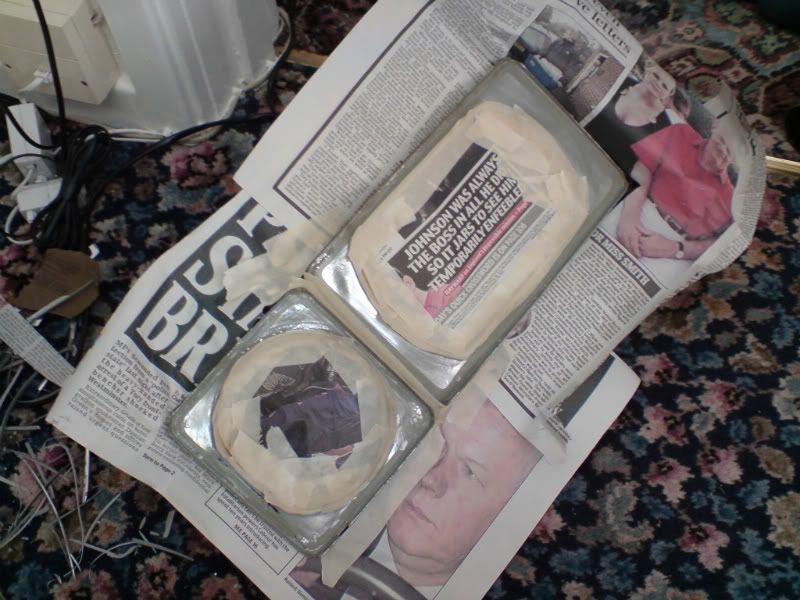
once there cleaned up, its time to mask up the area's you dont want to spray. be VERY CAREFUL with the masking tape, rub the tape on ur top/jeans to take off some of the stickyness - the chrome comes off the reflectors EASY.
use newspaper and plenty of masking tape to make sure the frame and indicator dont get painted.
next task - primer, unfortunatly i didnt get a pic for sum reason.
the first coat needs to be pretty thick to get a good covering over any remaining chrome - i did about 2 to 3 layers of primer.
if your impatient like me use the hairdryer to speed to the drying process of the primer.
next step is to paint it, i used gloss black but you could use matt or even the body colour paint? could look quite cool?
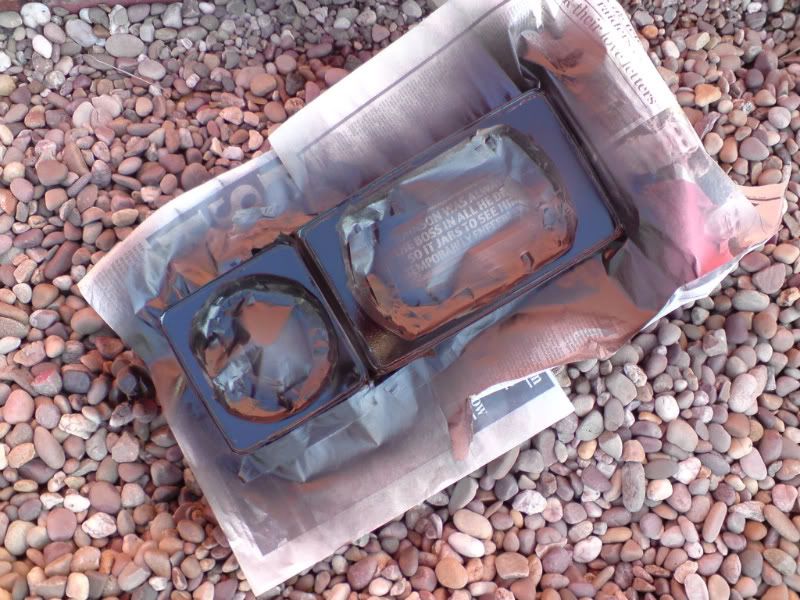
again i did about 3 layers of paint.
NOTE: if you start one set of lights first and then start the other, while the paint is drying you can be doing another job on the other set. ;)
once dry remove all the masking tape and paper - AGAIN BE CAREFUL REMOVING THE TAPE OFF THE CHROME, I PULLED A FEW SMALL BITS OFF BUT NOTHING BIGGER THAN A FEW mm.
your headlight should look basically like this now - also worth mentioning, if there is a bit of over spray on the chrome, either gently rub it off or if its small LIG (Let It Go) ;) you wont be able to tell once the lens is back on.

now to seal the lens back on i used Tiger Seal - an industry strength sealant.
but you could use Sika-flex or normal silicone,
the tiger seal i used was Black.
unfortunately due to messing bout with the lights i didnt get a pic of this step.
basically run a decent sized bead around the painted area, making sure there are NO gaps. now put the lens back on, THE RIGHT WAY round, not that i put it on upside down first time
once firmly pressed on check round the joint to make sure there are no gaps and smooth over any excess with your finger, due to using tiger seal after a few hours in a warm house i fitted them to the car, however if using normal silicone it will probably be best to leave them in the house over night to set properly.
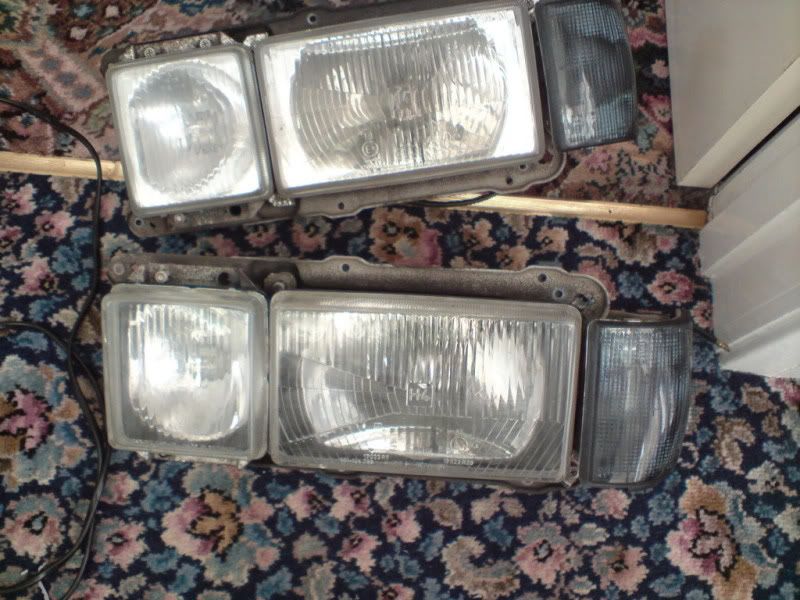
below is a BEFORE and AFTER, i did mine one at a time incase i didnt like it lol
fitting is just the opposite of removal.
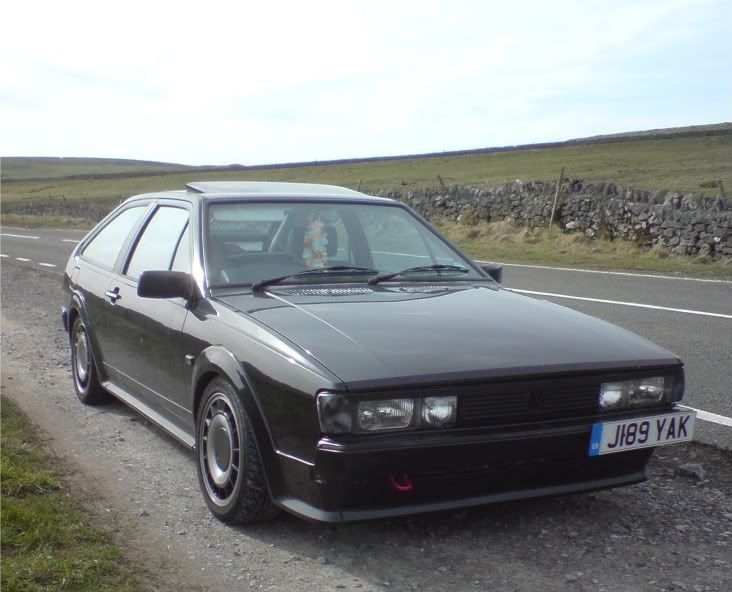
a day later the front of your Rocco now looks like this
unless its white, blue, green, red etc etc lol
hope this helps some of you out, what you think?
any questions, feel free to ask me, but NO i wont do another set lol