Cleaning inner driving lights
Posted: Sun Jul 10, 2016 12:44 am
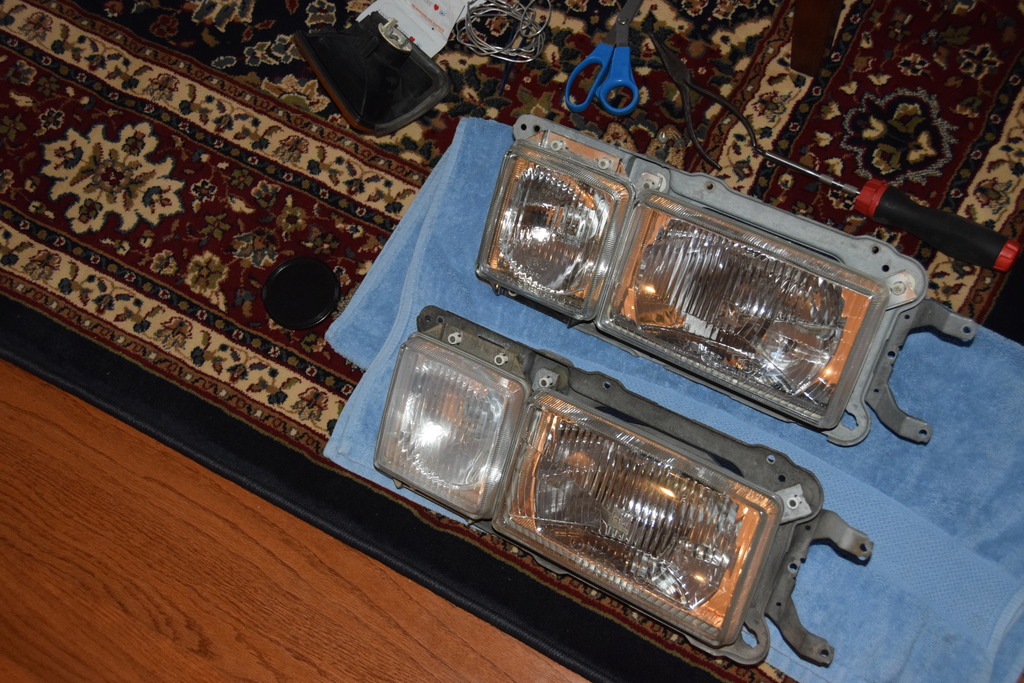
My Scirocco's inner lights had developed a "foggy" look - almost like the discoloration you see on much newer plastic headlights. I decided to see how hard it would be to clean them and it turned out not to be too bad. I removed the lights from the car and put a pre-moistened lens cleaner wipe into the headlight housing. I then used a thin popsicle stick through the bulb opening to move the wipe around the inside of the lens until it was clean. It took me about 2 hours start to finish.
Here's a comparison (I removed the turn signals but that is not necessary for this):
Here are a few notes:
One thing to consider is whenever you touch the headlights on a Scirocco, you run the risk of breaking the plastic headlight adjusters. The plastic gets very brittle with heat and age and they crack easily. When reinstalling one of my light assemblies, I broke two when I pushed the connector back onto the headlight. I'd recommend that all Scirocco owners keep some spare adjusters around just in case, but especially if you have to do anything with the lights.
For starters, you need to remove the headlight assembly from the car, which is relatively easy. Remove wiring connectors from the rear of the lights as well as the turn signal bulb and socket. Then remove the screws securing the front of the headlight frame to the body of the car. To access the lower screws I had to loosen the front bumper slightly (two 19mm bolts on each side). I did not have to remove the bumper or even remove the bolts - just loosen them enough to move the bumper slightly and was then able to access the lower screws. Removing the front grille, or at least the three top clips, gives a little more room as well.
With the headlight assembly out of the car, place it face down on a towel. Remove the driving light bulb cover and bulb. Take a pre-moistened eyeglass or camera lens wipe and cut it in half (or a bit smaller if it's big). Insert the wipe into the driving light though the bulb hole, allowing the wipe to expand as it falls onto the inside of the lens. Using the popsicle stick (or something similar - just nothing with a sharp end that could scratch the glass), work the wipe around on the inside of the lens until it's clean. Getting the corners is a bit tedious - something more flexible like a long pipe cleaner might work better here.
After the lens is clean, remove the wipe. To do this, turn the light over so the bulb hole is facing down and the wipe will fall down near the hole. Use a pair of tweezers to grab the wipe and pull it back out. Reinstall the bulb and bulb cover. Install the assembly back in the car and reconnect the lights. Again, be careful not to break the headlight adjusters. Test the lights to make sure everything is ok.
Put the grille back in place if it was loosened or removed, and put the bumper back into position and tighten the 19mm bolts.
I've seen some posts on other wesbites suggest alternate ways to clean the inside of similar lights, but none of them really sounded good to me because the reflectors are fragile and can easily be ruined by strong solvents or anything abrasive. The way I describe is a bit tedious, but you don't risk damaging the reflectors.
Tom