
Forum Update: This forum is now a legacy platform with limited activity. We recommend joining our Facebook group for the latest discussions and updates. The forum will remain online and usable but it's classed as an archive.
Users are NOT sync'd between the website and the forum. This means you MUST create an account for both.
Users are NOT sync'd between the website and the forum. This means you MUST create an account for both.
Kamei GTX - Finally Finished?
Forum rules
Section for all vehicle and related projects. Please keep responses pertinent to thread.
Section for all vehicle and related projects. Please keep responses pertinent to thread.
-
Reverend Frog

- Posts: 497
- Joined: Wed Apr 01, 2009 12:57 pm
- fill in the right answer: 15
- Location: Belfast
Re: Kamei GTX - Getting closer!
have to say i was never really a fan of the purple look before, but this looks as mean as. hats off to you
Previously owned:

1988 1.6 GT
1989 1.8 GT
1982 1.6 GTI
1993 Corrado VR6

1988 1.6 GT
1989 1.8 GT
1982 1.6 GTI
1993 Corrado VR6
Re: Kamei GTX - Getting closer!
To begin with i did like the purple, over time i didnt stay a fan of it tho 
Much happier with the black!
Managed to get some of the finishing touches on it today, gone with chrome handle inserts
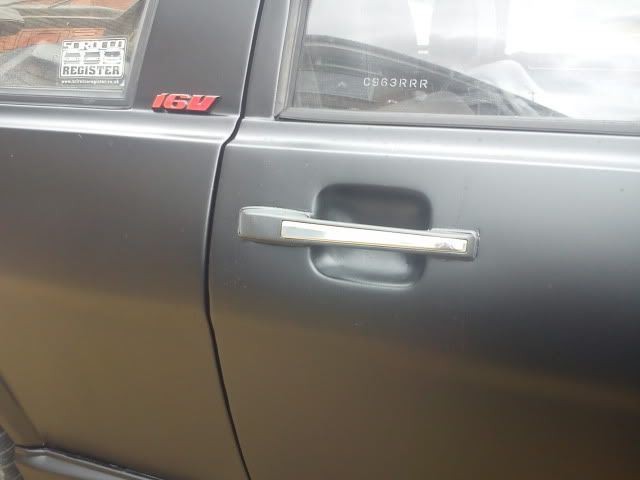
Breaks the black up nicely without being too out of place. Was thinking about full chrome handles but im not sure now
Got the last of the badges in place
Then spent ages cleaning all the crap out of the car and getting it hoovered out - much better now
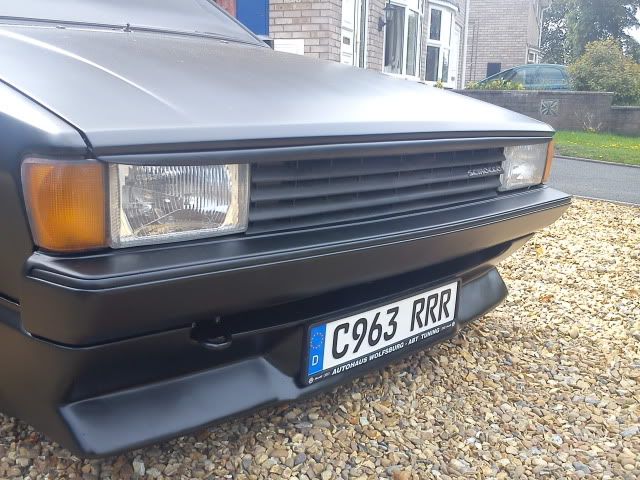
Finally, my new reg plate surrounds arrived so they went straight on the car
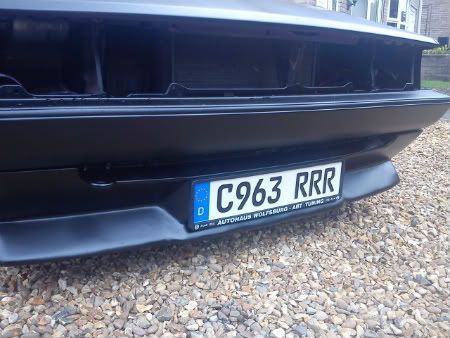
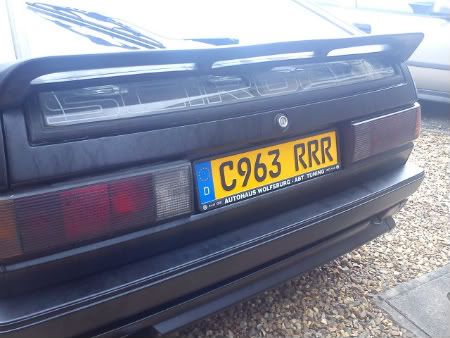
Had the german plates for well over a year - its taken me this long to get them fitted
Much happier with the black!
Managed to get some of the finishing touches on it today, gone with chrome handle inserts
Breaks the black up nicely without being too out of place. Was thinking about full chrome handles but im not sure now
Got the last of the badges in place
Then spent ages cleaning all the crap out of the car and getting it hoovered out - much better now
Finally, my new reg plate surrounds arrived so they went straight on the car
Had the german plates for well over a year - its taken me this long to get them fitted

VW Scirocco 16V GTX, Kamei X1 and a half
-
Reverend Frog
- Posts: 497
- Joined: Wed Apr 01, 2009 12:57 pm
- fill in the right answer: 15
- Location: Belfast
Re: Kamei GTX - Getting closer!
It really does look infinitely better in this incarnation. just my opinion, of course :)
I agree that you should stick with just the chrome inserts: the whole handle might be a bit much. Plus they cost a fortune!
I agree that you should stick with just the chrome inserts: the whole handle might be a bit much. Plus they cost a fortune!
Previously owned:
1988 1.6 GT
1989 1.8 GT
1982 1.6 GTI
1993 Corrado VR6
1988 1.6 GT
1989 1.8 GT
1982 1.6 GTI
1993 Corrado VR6
Re: Kamei GTX - Getting closer!
Actually running out of things to do on the car now!
Decided that the engine bay can wait until next spring, cant see me getting the weather for it now
With that in mind i needed to get the slam panel done, but first i wanted to get rid of the battery tray
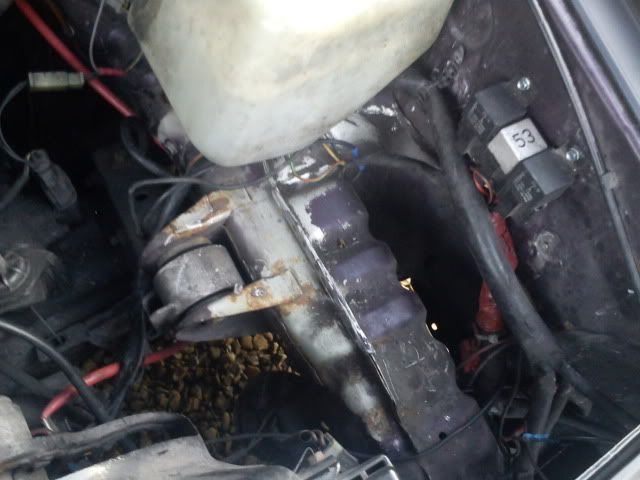
Looks loads better with it taken out - wasnt that difficult once i had drilled the spot welds and attacked it with an angle grinder
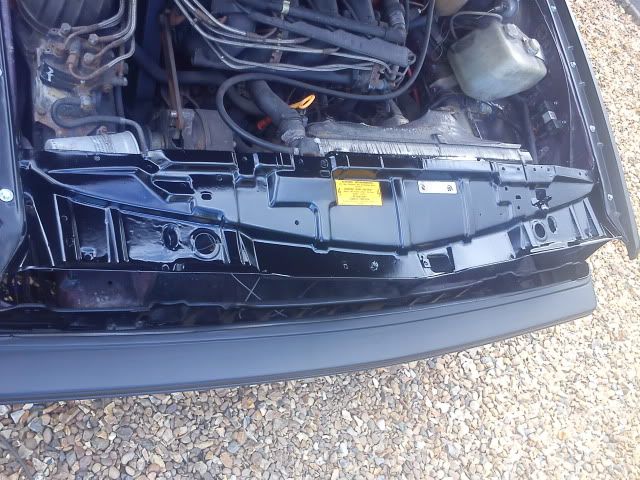
With that done i got the slam sprayed
While that was drying (cheated and fired the engine up to bake the paint rather than wait a few hours!) i got the steering wheel put back together
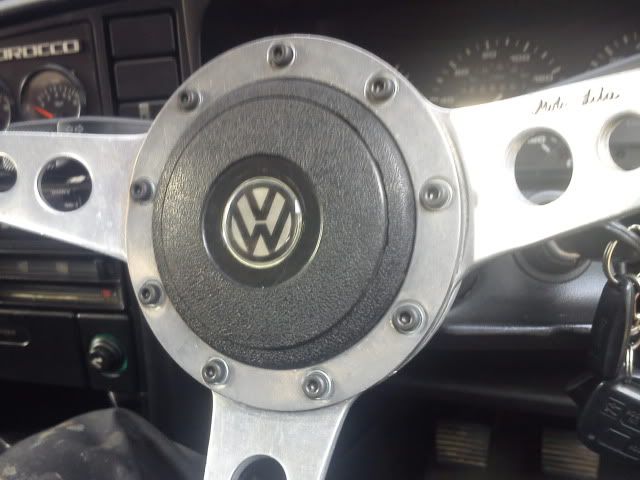
All new cap bolts etc..
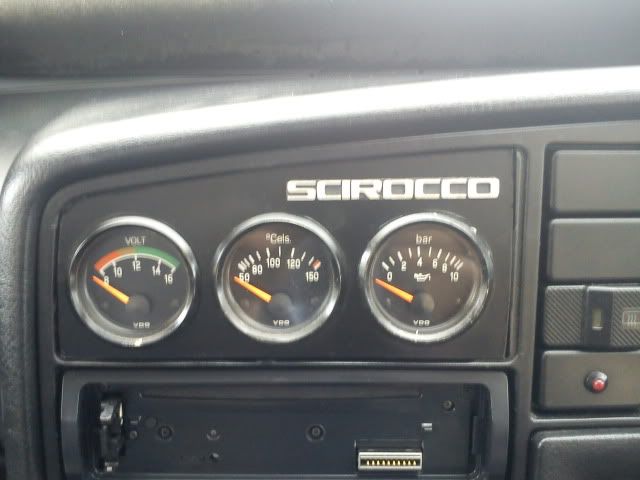
Then fit the last amp in the system
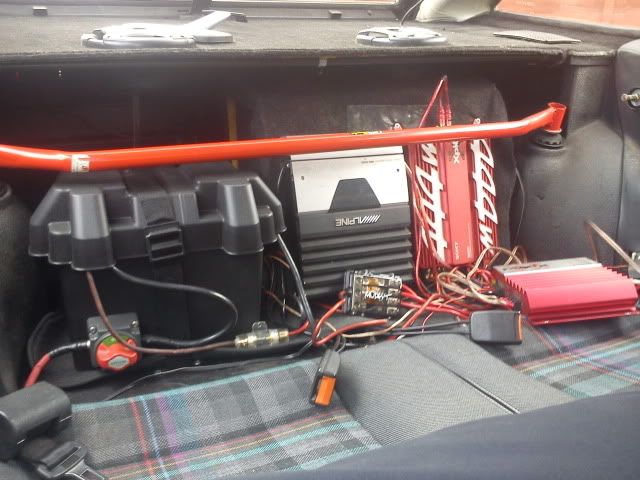
Not much room left in the boot now!
Then finally after the paint had dried
8 months after i stripped the front end down its finally back together and looking good
Decided that the engine bay can wait until next spring, cant see me getting the weather for it now
With that in mind i needed to get the slam panel done, but first i wanted to get rid of the battery tray
Looks loads better with it taken out - wasnt that difficult once i had drilled the spot welds and attacked it with an angle grinder
With that done i got the slam sprayed
While that was drying (cheated and fired the engine up to bake the paint rather than wait a few hours!) i got the steering wheel put back together
All new cap bolts etc..
Then fit the last amp in the system
Not much room left in the boot now!
Then finally after the paint had dried
8 months after i stripped the front end down its finally back together and looking good
VW Scirocco 16V GTX, Kamei X1 and a half
-
Cpt Custom

- Posts: 761
- Joined: Mon Jul 19, 2010 1:46 pm
- fill in the right answer: 15
- Location: Northallerton
Re: Kamei GTX - Getting closer!
Looking really good ... that name plate on the front grill is a nice touch!

-
Risocco

- Posts: 1374
- Joined: Wed Apr 01, 2009 1:09 am
- fill in the right answer: 10
- Location: Costa-Del-Kidderminster
Re: Kamei GTX - Getting closer!
Dan, you thought of tinting the front lights too? May look good 
Either way, cracking progress dude
Either way, cracking progress dude
1983 GL
1986 GT
1994 Corrado VR6
1986 GT
1994 Corrado VR6
Re: Kamei GTX - Getting closer!
Managed to actually run out of things to do now
Got a spare rad cowling cleaned up, sprayed
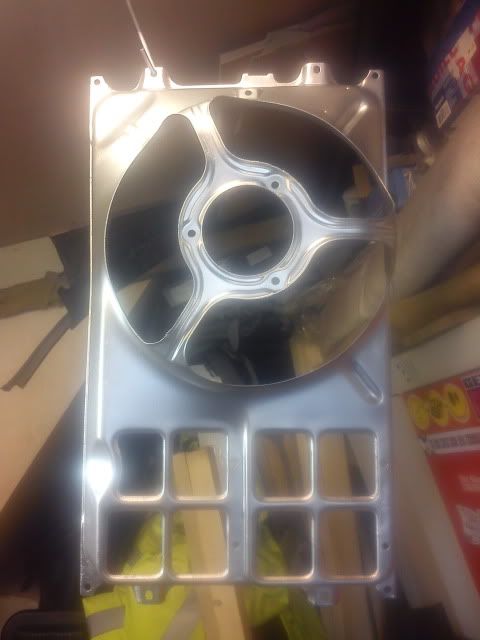
then fitted along with a new top hose; managed to split mine some how
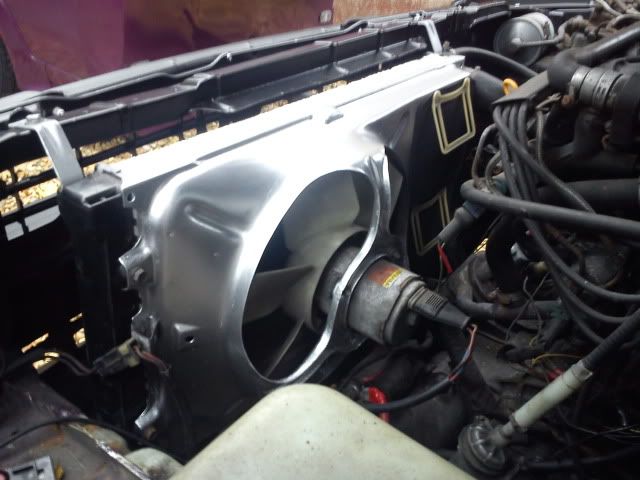
looks good against ther black so may do a few more things in the bay in the same colour!
Got the remaining arches body schutz'd
Vile stuff but works a treat
Had the replacement stickers i wanted arrive too, meant to order these after i sprayed the car purple but never quite got round to it
Finally, the last main part to replace
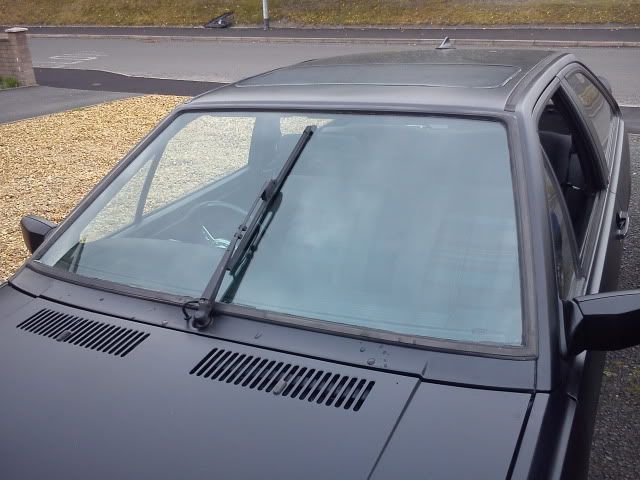
A very nice new screen
Looks so much better in black too
MOT is now booked for next Friday (30th) Just need the front tyres doing before and it will be ready!!
Got a spare rad cowling cleaned up, sprayed
then fitted along with a new top hose; managed to split mine some how
looks good against ther black so may do a few more things in the bay in the same colour!
Got the remaining arches body schutz'd
Vile stuff but works a treat
Had the replacement stickers i wanted arrive too, meant to order these after i sprayed the car purple but never quite got round to it
Finally, the last main part to replace
A very nice new screen
Looks so much better in black too
MOT is now booked for next Friday (30th) Just need the front tyres doing before and it will be ready!!
VW Scirocco 16V GTX, Kamei X1 and a half
Re: Kamei GTX - MOT Booked!!!
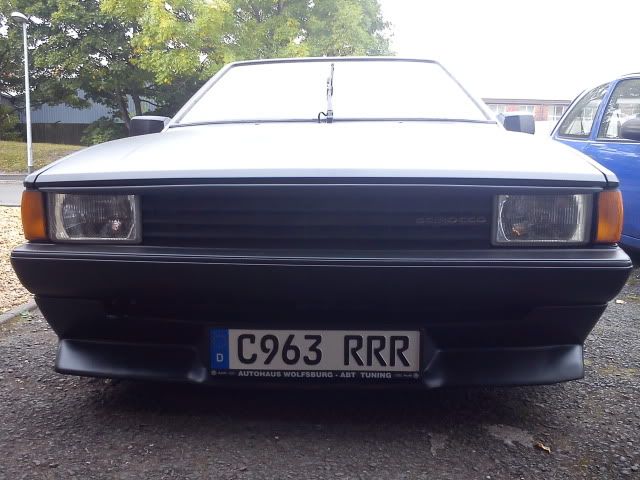
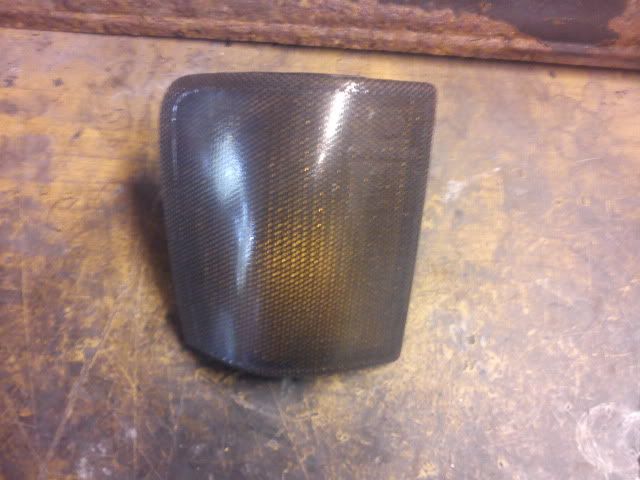
Been playing round with front indicator options. Dont like the price of smoked ones and didnt fancy spray tinting them. Read somewhere about Fly Eyes Kit so thought i'd give it a try!
The kit arrived this morning

I went for black 2 as i didnt want them too dark
Took the front lights off the car to make it easier to get at the indies to clean them up
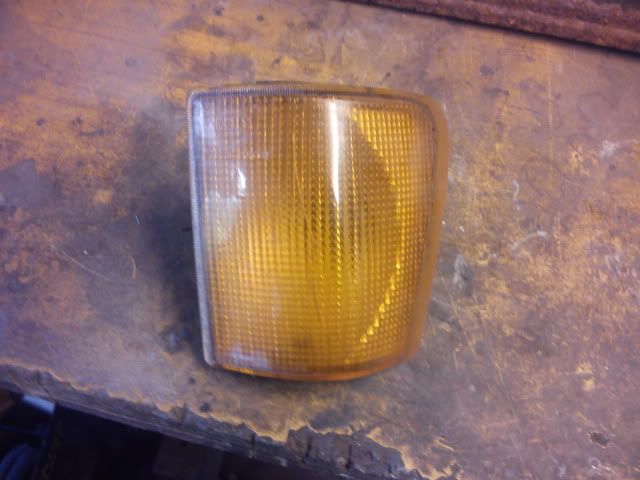
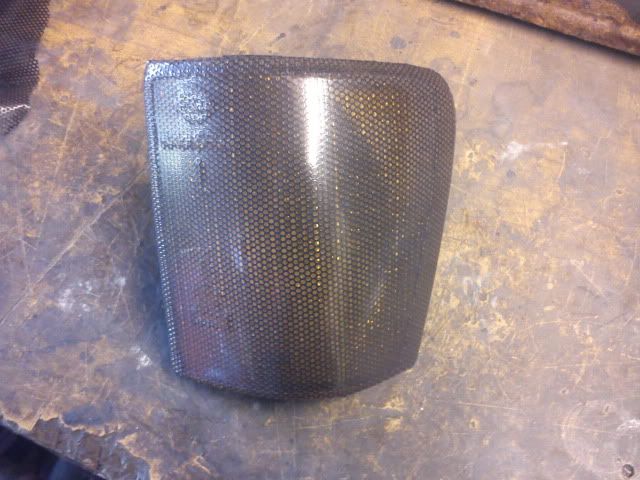
Really easy to fit, literally just pull and stretch the material round the indies so there is no creases then warm the material up (i used a heat gun but the fitting guide said hairdryer!) to activate the glue!
Back on the car
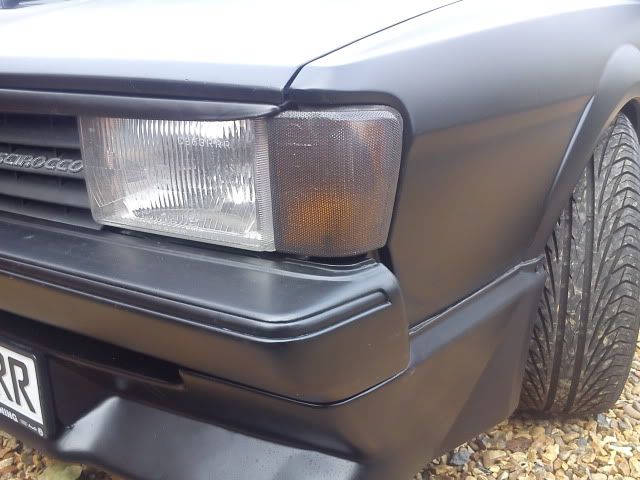
Looks loads better than standard orange, very pleased with the look
The kit arrived this morning
I went for black 2 as i didnt want them too dark
Took the front lights off the car to make it easier to get at the indies to clean them up
Really easy to fit, literally just pull and stretch the material round the indies so there is no creases then warm the material up (i used a heat gun but the fitting guide said hairdryer!) to activate the glue!
Back on the car
Looks loads better than standard orange, very pleased with the look
VW Scirocco 16V GTX, Kamei X1 and a half
Re: Kamei GTX - MOT Passed!!
Been a while since i've posted any updates, not done too much with the car since it was MOT'd.
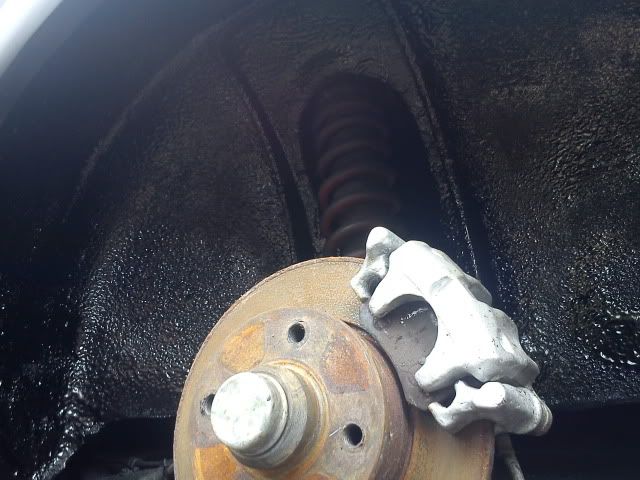
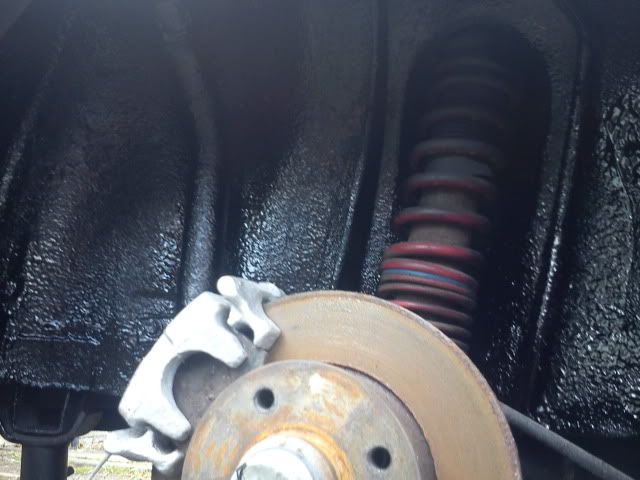
The downpipe developed an annoying rattle as the springs(?) up by the minifold have lost a bit of tension and the exhaust gas was making is rattle!
So, off the damned thing came so i could heat wrap it
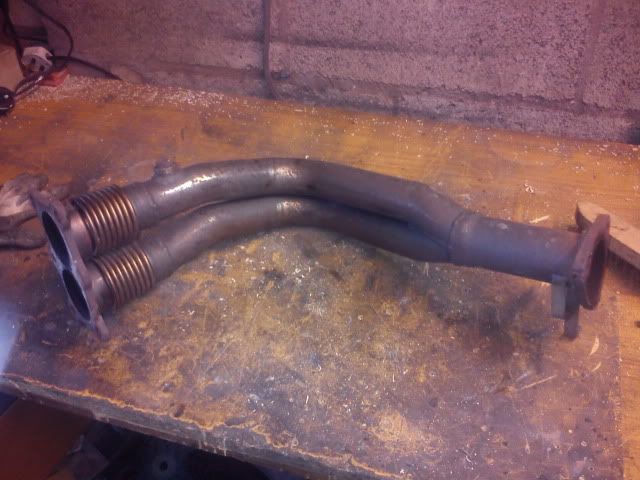
Never actually got any pics of it being wrapped when it was off the car, looks good tho :)
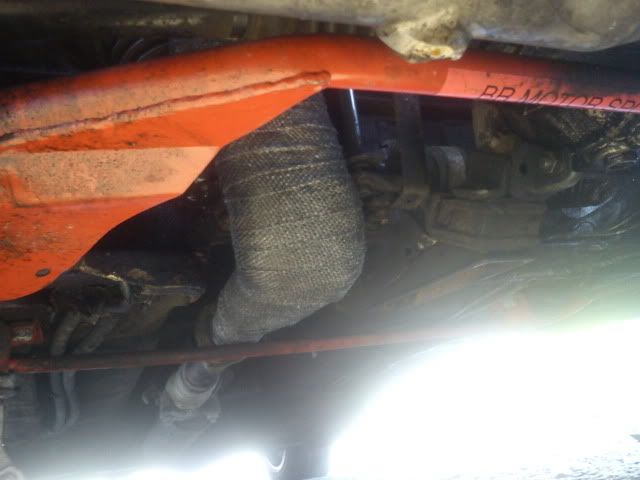
The net result is the rattle has gone and inside the car and engine bay are running alot cooler! Can't reccomend wrapping the downpipe enough
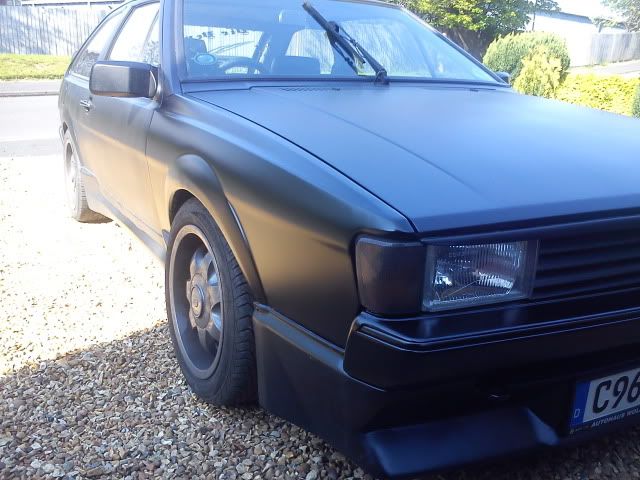
The main bit of remedial work I've had to do was on the front wing - some rust bubbles had decided to appear under the paintwork
The dark spots on the top and side of the wing are where the rust was drilled out and then filled with liquid metal
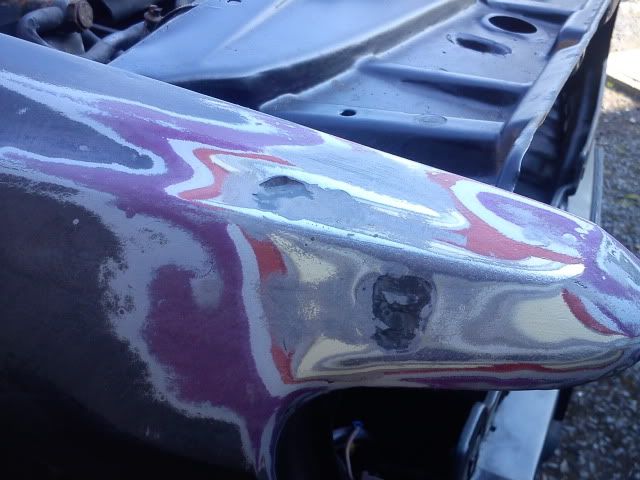
If I knew the wing was this rotten I would of changed it last year for a better one!
Once it had been filled and shaped properly it was a simple case of masking the car out and re painting everything
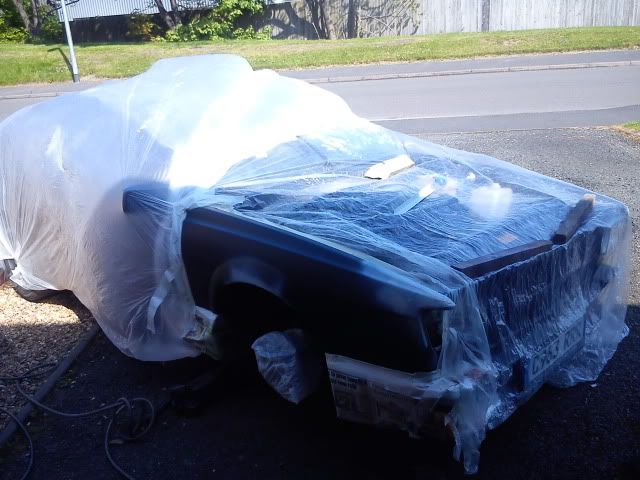
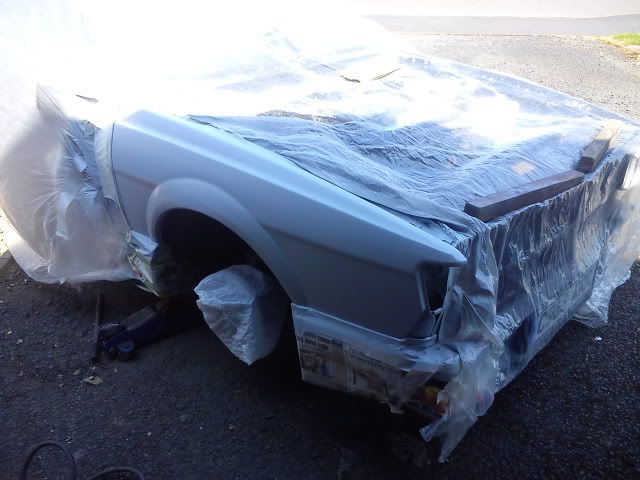
Also re-sprayed the front bumper - I managed to knock it off its stand when i was sorting the wing out and scratched shit out of it
Looks better back in one peice tho
Since last year I've also fitted a HID kit, as i'm running the single headlight i had to go for the hi/lo H4 kit; not the cheapest of kits but makes a massive difference!
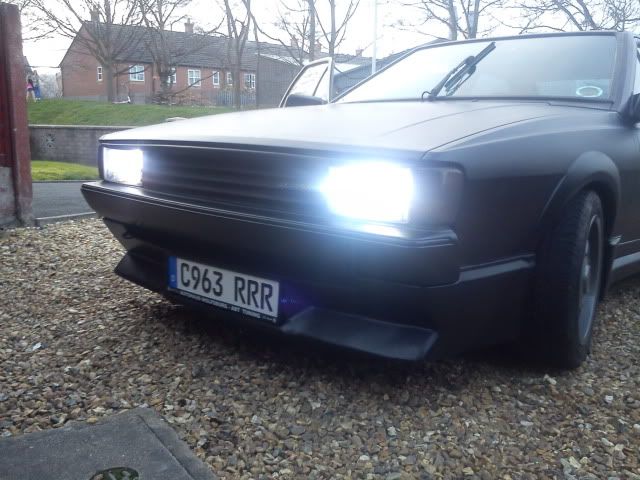
Can actually see where im going at night now
Finally, I managed to get round to spraying the engine bay to match the new paintwork!
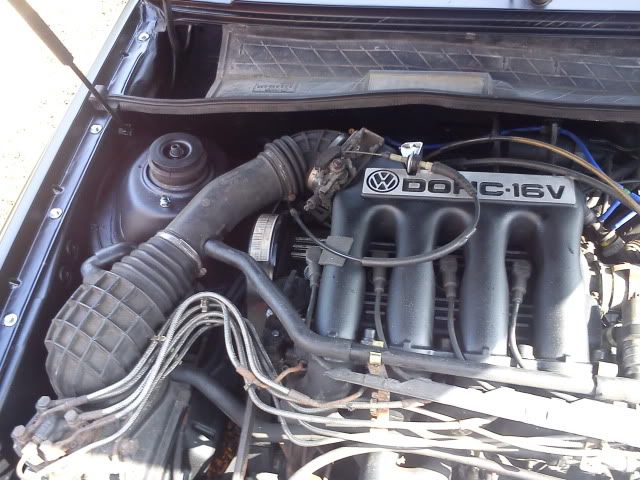
Pain in the arse to do with the engine in the way but it looks the part now!
Think the car's done now
The downpipe developed an annoying rattle as the springs(?) up by the minifold have lost a bit of tension and the exhaust gas was making is rattle!
So, off the damned thing came so i could heat wrap it
Never actually got any pics of it being wrapped when it was off the car, looks good tho :)
The net result is the rattle has gone and inside the car and engine bay are running alot cooler! Can't reccomend wrapping the downpipe enough
The main bit of remedial work I've had to do was on the front wing - some rust bubbles had decided to appear under the paintwork
The dark spots on the top and side of the wing are where the rust was drilled out and then filled with liquid metal
If I knew the wing was this rotten I would of changed it last year for a better one!
Once it had been filled and shaped properly it was a simple case of masking the car out and re painting everything
Also re-sprayed the front bumper - I managed to knock it off its stand when i was sorting the wing out and scratched shit out of it
Looks better back in one peice tho
Since last year I've also fitted a HID kit, as i'm running the single headlight i had to go for the hi/lo H4 kit; not the cheapest of kits but makes a massive difference!
Can actually see where im going at night now
Finally, I managed to get round to spraying the engine bay to match the new paintwork!
Pain in the arse to do with the engine in the way but it looks the part now!
Think the car's done now
VW Scirocco 16V GTX, Kamei X1 and a half