Project RED GTX

Scirocco Register members projects
Forum rules
Section for all vehicle and related projects. Please keep responses pertinent to thread.
markh
Posts: 718
Joined: Wed Apr 01, 2009 2:14 pm
fill in the right answer: 15
Location: Newcastle, Staffordshire.

Re: Project RED GTX

Post by markh »

DT1 wrote:Where did you get the poly paint from, every search I do comes up with garage floor paint. :hehe:

Sigh...makes me wish I'd held out for a garage when buying a house.

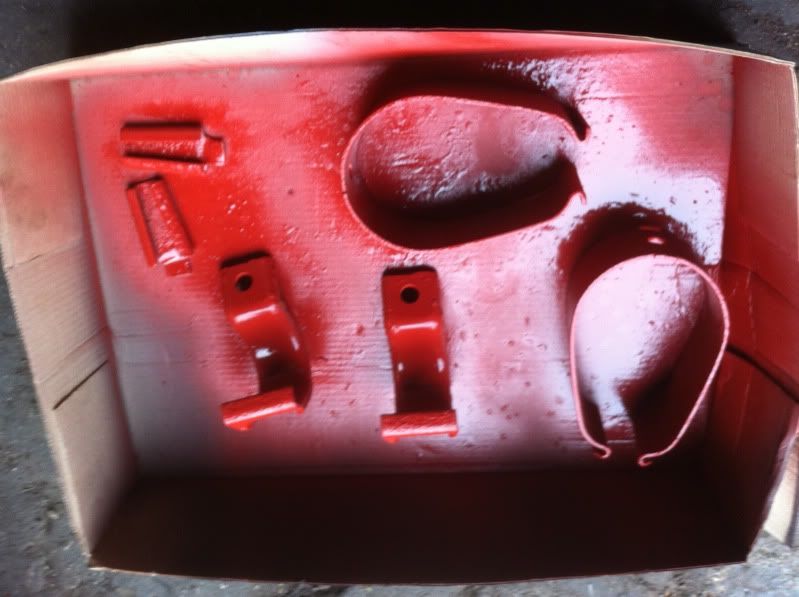
My mistake Colin, its acrylic not urethane :blush: This is the stuff...

Image

Comes in a range of colours with gloss or matt finish and can be used on plastic (without plastic primer) or metal ( again doesnt need primer) the matt stuff is fantastic for black Rocco bumpers !! its about £2.50 a tin. Oh and it also prevents rust.


Don't ask me....it was like that when i got here !
Image
markh
Posts: 718
Joined: Wed Apr 01, 2009 2:14 pm
fill in the right answer: 15
Location: Newcastle, Staffordshire.

Re: Project RED GTX

Post by markh »

A couple of hours free this morning see`s the freshly painted beam get partially rebuilt, i didnt get time to fit the anti roll bar, as the paint on the brackets was still wet.
Image

I need to get a pair of wheel cylinders and a o/s handbrake cable too.

I wire brushed the rear anti roll bar brackets and gave then a few coats of red oxide primer.

Image

And cleaned up and painted the rear anti roll bar.

Image

I bought new front wishbones a few weeks back, i gave these a wipe down with some white spirit and then a couple of coats of black spray and then fitted the new ball joints.
Image

So thats pretty much it until im off work next tuesday now. :good:


Don't ask me....it was like that when i got here !
Image
User avatar
Cpt Custom
Posts: 761
Joined: Mon Jul 19, 2010 1:46 pm
fill in the right answer: 15
Location: Northallerton

Re: Project RED GTX

Post by Cpt Custom »

Looking good Mark.

Nice to see so many photos showing the various stages you're going through.

As for the wishbones I'm a little curious about why you've painted them as opposed to putting them straight on. I ask because I've got a new set for Poppy and am now wondering if I should paint them too before they get fitted? If so, have you used that acrylic spray on them?

Thanks (says the stupid noob)! :dunno:

:beers:


Image 1987 Alpine White Mk2 GT Lily
markh
Posts: 718
Joined: Wed Apr 01, 2009 2:14 pm
fill in the right answer: 15
Location: Newcastle, Staffordshire.

Re: Project RED GTX

Post by markh »

The wishbones come ready painted Paul, so can be fitted straight away. But from experience, I know that the rust soon starts to show through on them, so I just give them a bit more protection. Yes I did use the acrylic paint on them, I usually brush paint them with Hammerite, but this gives a nice finish. :yup:


Don't ask me....it was like that when i got here !
Image
User avatar
eefy
Posts: 999
Joined: Fri Apr 10, 2009 7:32 pm
fill in the right answer: 10
Location: Manchester

Re: Project RED GTX

Post by eefy »

loving all the pics mate :) looks like your getting proper stuck in


Image
markh
Posts: 718
Joined: Wed Apr 01, 2009 2:14 pm
fill in the right answer: 15
Location: Newcastle, Staffordshire.

Re: Project RED GTX

Post by markh »

Finished the beam today, new handbrake cables, new shoes, cleaned and regreased the wheel bearings, refitted the anti roll bar and painted the brake drums. Hopefully it can be fitted in the car tomorrow or thursday, i still need to drop the old fuel tank, underseal everything and then fit a nearly new tank.

Image

Also just had time to strip out the knackered suspension from the drivers side front.

Image

Some more new parts arrived today, front anti-roll bar bushes, a track rod end and some service parts.

More updates tommorrow. :good:


Don't ask me....it was like that when i got here !
Image
Bill
Posts: 271
Joined: Wed Apr 01, 2009 7:31 pm
fill in the right answer: 10
Location: Birmingham

Re: Project RED GTX

Post by Bill »

Yet again some super work Mark, any chance of a pic of where you have supported the rear, been saying i'll refurb my beam for five years now. :chortle:


Image
markh
Posts: 718
Joined: Wed Apr 01, 2009 2:14 pm
fill in the right answer: 15
Location: Newcastle, Staffordshire.

Re: Project RED GTX

Post by markh »

Sure Bill, il take a pic tomorrow mate. :good:


Don't ask me....it was like that when i got here !
Image
markh
Posts: 718
Joined: Wed Apr 01, 2009 2:14 pm
fill in the right answer: 15
Location: Newcastle, Staffordshire.

Re: Project RED GTX

Post by markh »

Here you go Bill, hope it helps.
Image

Image


Don't ask me....it was like that when i got here !
Image
markh
Posts: 718
Joined: Wed Apr 01, 2009 2:14 pm
fill in the right answer: 15
Location: Newcastle, Staffordshire.

Re: Project RED GTX

Post by markh »

Todays efforts see the old fuel tank taken out. Everything underneath is in great condition, no rot just some surface rust around the beam mounts, so this was wire brushed, rust proofed and sprayed with red oxide primer.
Image

Image

Looking good under the arches, not rot under the bodykit, which is always good !!!

Image

And on the drivers side.

Image

Image

Painted and refitted the replacement fuel tank, then refitted the refurbed rear beam, with new BOGE gas shocks and 40mm drop springs and with new bolts and washers on everything.

Image


Image

I still need to make new metal brake pipes from the master cylinder to the rear flexi hoses, but im pleased with the progress so far. :vcool:


Don't ask me....it was like that when i got here !
Image
User avatar
Risocco
Posts: 1374
Joined: Wed Apr 01, 2009 1:09 am
fill in the right answer: 10
Location: Costa-Del-Kidderminster

Re: Project RED GTX

Post by Risocco »

Excellent as always mate, love the attention to detail you give to the rear beam. With Bill on this one, I really wanna refurb mine too!

Good luck dude, looking forward to more updates!

Alex


1983 GL
1986 GT
1994 Corrado VR6
markh
Posts: 718
Joined: Wed Apr 01, 2009 2:14 pm
fill in the right answer: 15
Location: Newcastle, Staffordshire.

Re: Project RED GTX

Post by markh »

Cheers Alex :beers:

Not a huge lot done today, just cleaned up the front calipers and carriers and gave them a coat of black paint. Also stripped down the front struts, ready to clean up, paint and reassemble with lowered springs and new top mounts. :good:


Don't ask me....it was like that when i got here !
Image
Bill
Posts: 271
Joined: Wed Apr 01, 2009 7:31 pm
fill in the right answer: 10
Location: Birmingham

Re: Project RED GTX

Post by Bill »

Thanks Mark, all i need now is some time. :hi:


Image
User avatar
Risocco
Posts: 1374
Joined: Wed Apr 01, 2009 1:09 am
fill in the right answer: 10
Location: Costa-Del-Kidderminster

Re: Project RED GTX

Post by Risocco »

No worries mate, best of luck :good:
Bill wrote:Thanks Mark, all i need now is some time. :hi:
You can do mine at the same time mate! :yup:

Alex


1983 GL
1986 GT
1994 Corrado VR6
DT1
Posts: 709
Joined: Tue Dec 08, 2009 10:07 pm
fill in the right answer: 10
Location: Aberdeenshire

Re: Project RED GTX

Post by DT1 »

No problem with the paint.

It's coming along pretty quickly. :good:


Post Reply