HERMAN THE GERMAN! '91 Scala 20vt
Forum rules
Section for all vehicle and related projects. Please keep responses pertinent to thread.
Section for all vehicle and related projects. Please keep responses pertinent to thread.
-
isaidthephil
- Posts: 235
- Joined: Sun Aug 28, 2011 11:11 am
- fill in the right answer: 10
- Location: Northwich, Cheshire
Re: HERMAN THE GERMAN! '91 Scala 20vt
How are the seats bud? I am toying with the idea of putting something different in mine but not sure what yet. I am like you though, I want something that works well but is comfortable too.
-
treefingers
- Posts: 400
- Joined: Wed Aug 14, 2013 1:04 pm
- fill in the right answer: 15
Re: HERMAN THE GERMAN! '91 Scala 20vt
they're good man, I'd recommend finding something lower than the stock seats. these are a good compromise between comfort and something that holds you in, I think long journeys will be fine in these. if you can find some corrado seats minus the ridiculous scene tax they have on the bay they'll be a good route. I have to raise the cobras up a little at the back though as I'm a little bent double and the steering wheel is a bit high. tweaks now!
-
treefingers
- Posts: 400
- Joined: Wed Aug 14, 2013 1:04 pm
- fill in the right answer: 15
Re: HERMAN THE GERMAN! '91 Scala 20vt
So I'm off work now till January which is sweet as hell and it's raining outside so I thought I'd do a bit of updating on here!
I've been driving Herman round for two and a half weeks, and without doing any work on him I've just been noting squeaks rattles and tweaks needed.. Yesterday I started my holiday, and naturally I was at work in the workshop working on Herman all day! Funny how the day flies by when you're doing stuff you really love. 5pm came in no time and everyone went home, I was there for a good while after fuelled by mince pies and cloudy lemonade.. nom.
Bloody rattles all over the place in this car. The boot lid banged over every bump due to the rock hard chassis and the bonnet grumbled on idle! Adjusted the boot latch striker plate so the boot is good now. Need some new gas struts for the boot as both have packed up. Couldn't work out what to do about the bonnet, then I realised the little rubber bungs are there for a purpose! Wound them out and bonnet rattle gone :). I also bent a bit of stainless steel rod for a bonnet stay, drilled a tiny hole in one end for a split pin so it will stay in place.. I'd like gas struts for the bonnet eventually, need to research how to do this though, which struts to use and how to mount them.
He got driven in the rain for the first time last night, and this morning I found a little puddle in the boot. Need to sort this before I start attracting ducks.
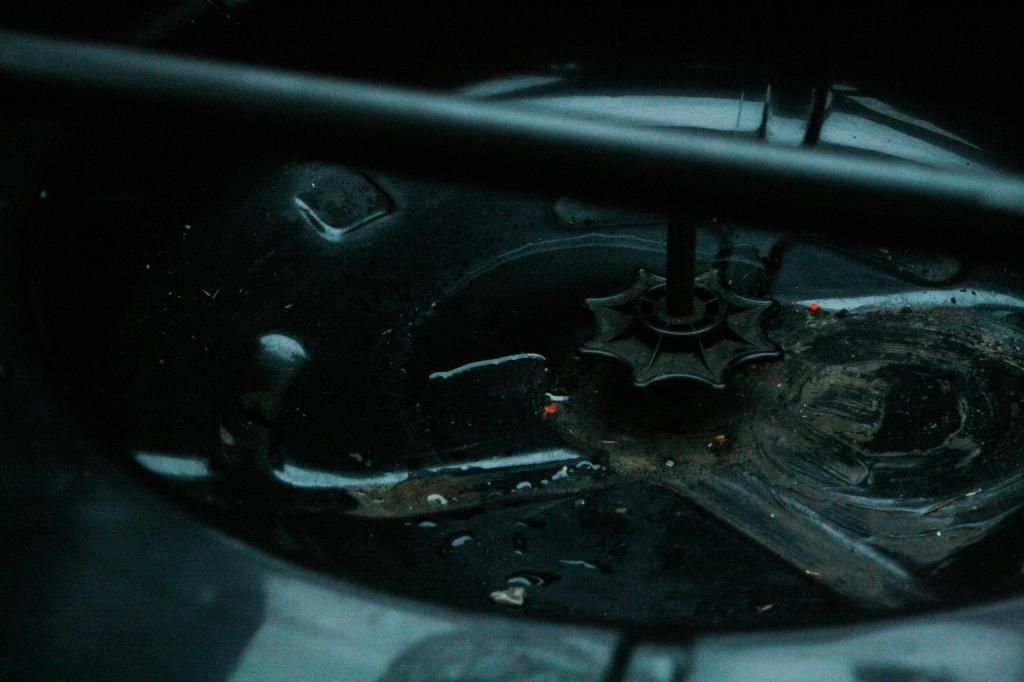
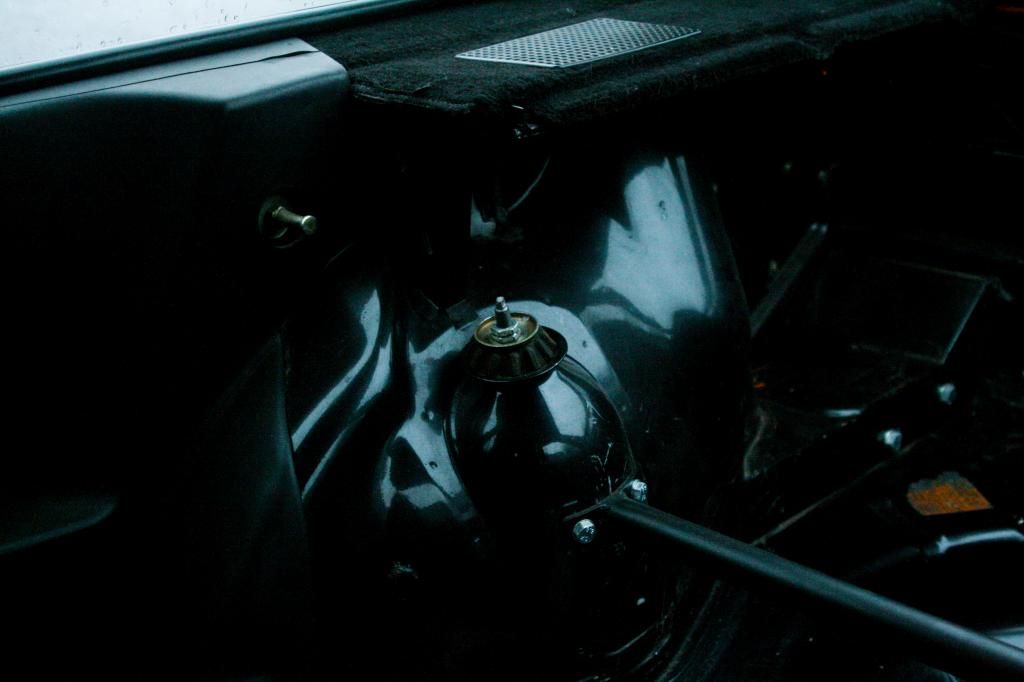
With every bush minus the front top mounts being made from polyurethane the ride was pretty bumpy. The first step was the swap the rear poly top mounts for the original rubbers. Rummaged in the scrap bin and the old bushes were still there, on the original shocks, a year later! Much more comfortable ride now. Think the car would have handled lovely on a track but not for every day driving. Paint work in the back of the car isn't 100%, I'm thinking of putting a half cage in the rear and spraying the insides.. Does need some sound deadening/carpeting at some point too.
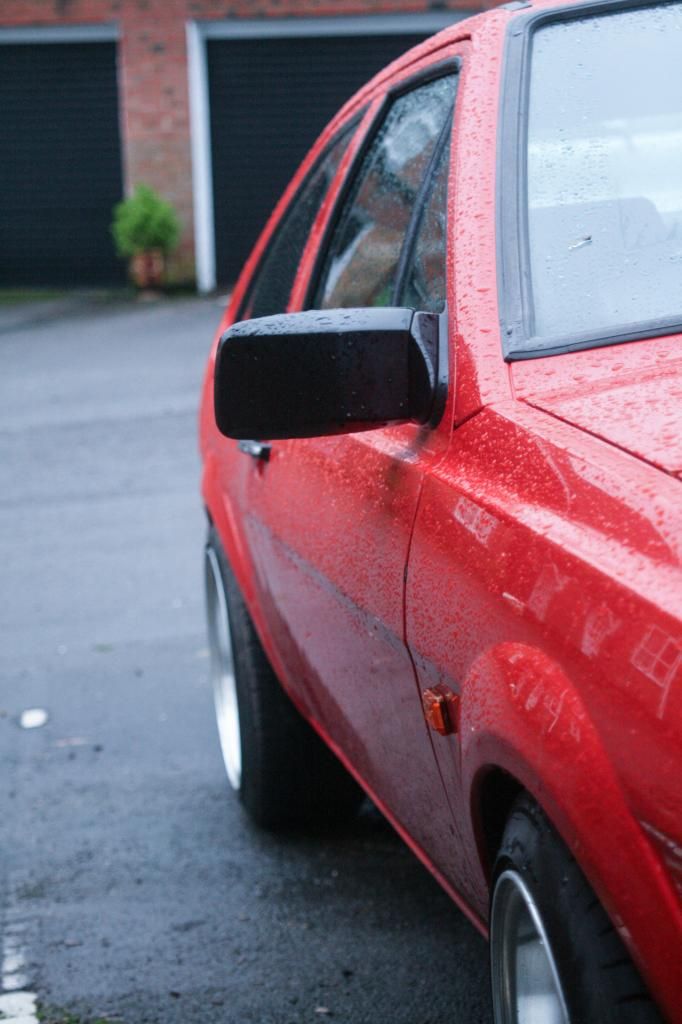
New side repeaters, £2.50 from VW Heritage!
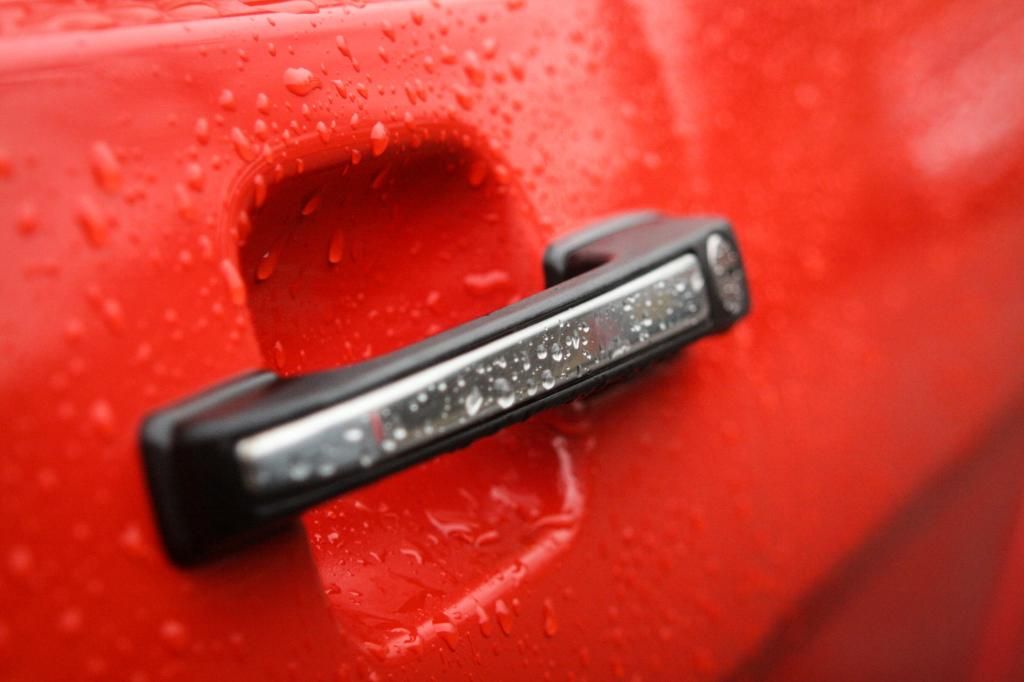
Chrome door trims robbed from a rotting scrapyard MK2 Golf
Pinstriping on the grill, love how this adds a bit of sportiness to the car. Not sure how sticky the tape is though and how long it'll last as the first one I did came off a day later :/ Maybe I'll mask it off and spray the stripes on.

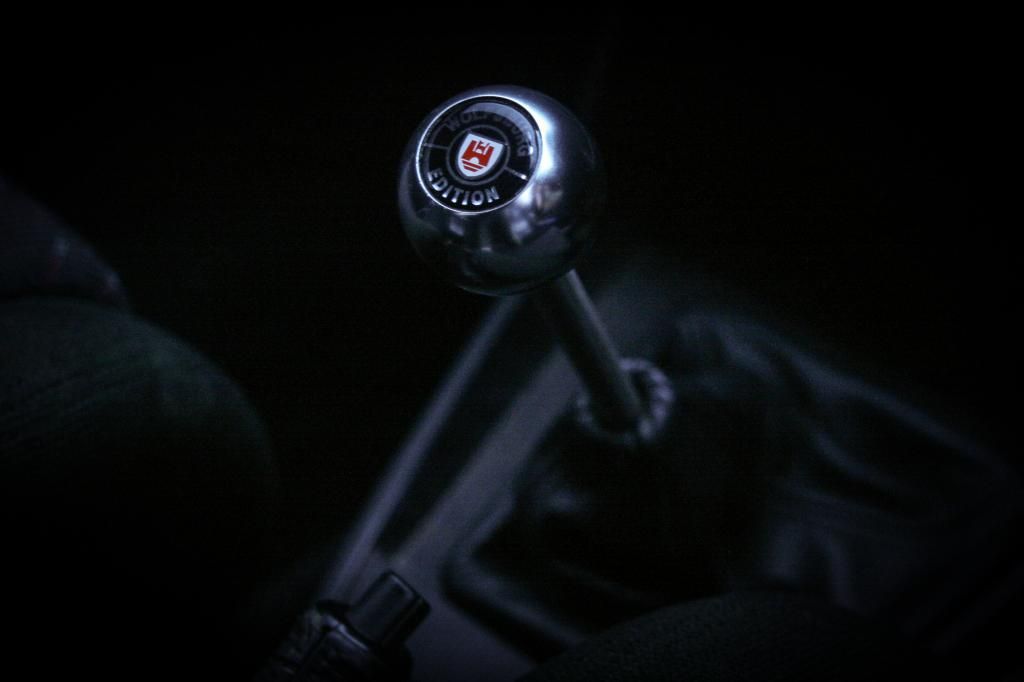
It was time to loose the weird bendy Rocco gear stick! I only kept it there 'cos the original plan was to have a really standard looking interior. I had welded it to the front of the TT shifter too so the shifting felt strange, especially pushing down for reverse. Yesterday I cut it off and got a bit of straight stainless steel round bar for my new gear stick with a nice aluminium Wolfsburg gear knob. To get the perfect position I put the car into neutral , sat in the driver's seat and then lightly welded the stick in place where it felt good. Took ages to get it right, a lot of breaking it off and re-tacking but eventually I found the perfect place for it.. 1st gear is a slight stretch on my arm but between 2nd, 3rd and 4th is just awesome, feels so good. I'll be in those gears most of the time anyway! Though there's a short shifter on the gearbox the throw is pretty long but it feels good. Eventually I'd like a Dieselgeeks short shift kit for the 02J shift tower like this:

As always it'd be more fun to make my own though! Here's the new shifter
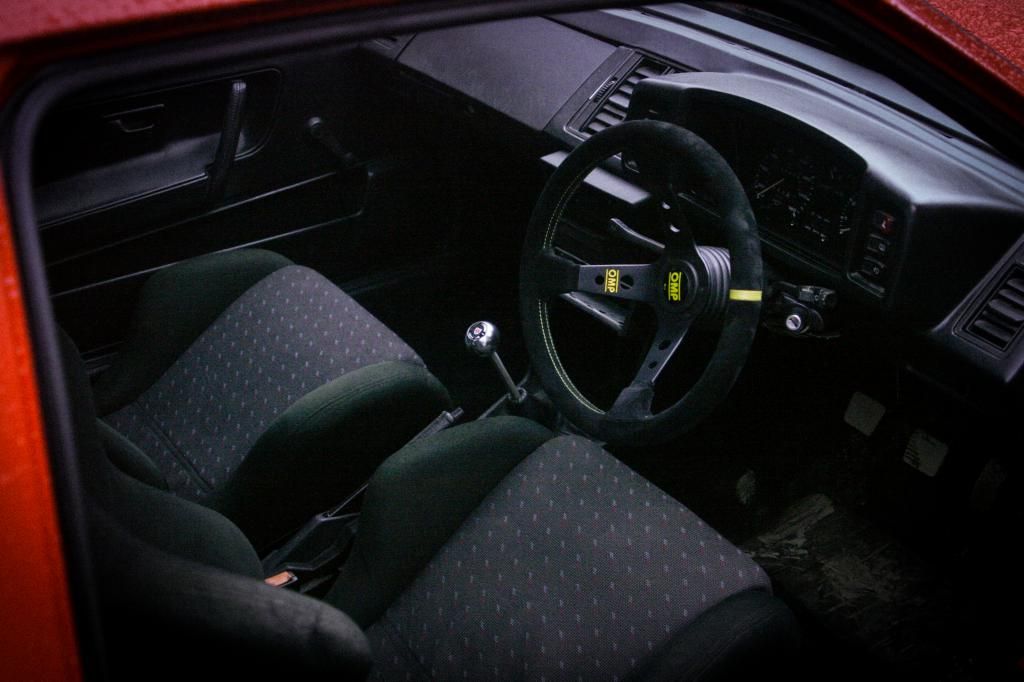
Might keep the seating position now the shifter position is so tuned! This car is so set up for my body geometry! Fork loads of head room anyway.
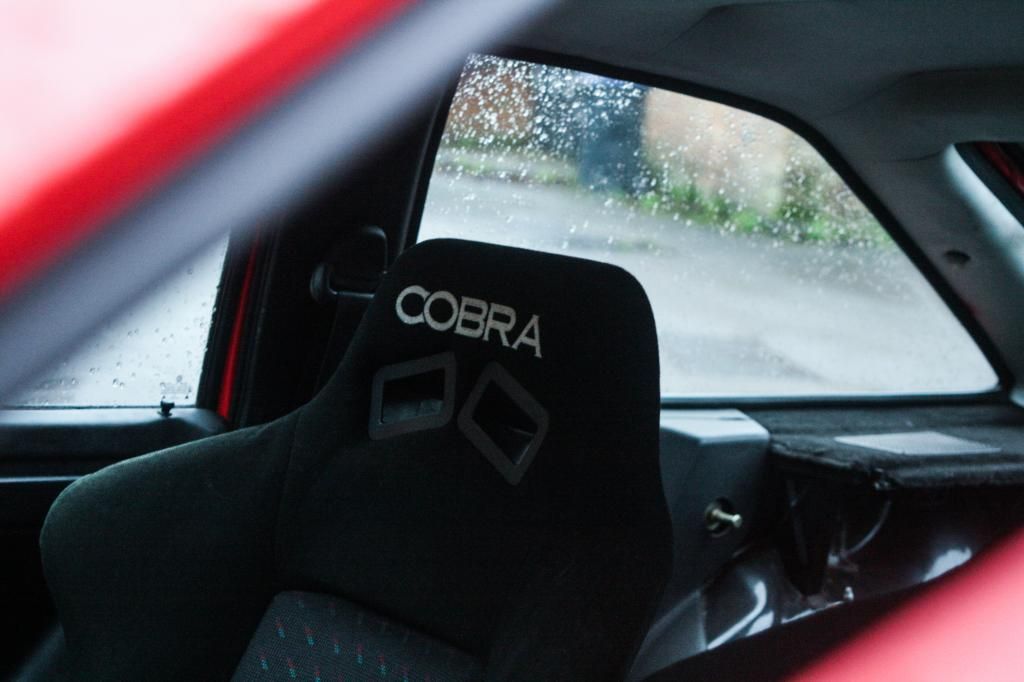
Loads more to do. I'm kind of glad there is or I'd be darn well out of a hobby!
I've been driving Herman round for two and a half weeks, and without doing any work on him I've just been noting squeaks rattles and tweaks needed.. Yesterday I started my holiday, and naturally I was at work in the workshop working on Herman all day! Funny how the day flies by when you're doing stuff you really love. 5pm came in no time and everyone went home, I was there for a good while after fuelled by mince pies and cloudy lemonade.. nom.
Bloody rattles all over the place in this car. The boot lid banged over every bump due to the rock hard chassis and the bonnet grumbled on idle! Adjusted the boot latch striker plate so the boot is good now. Need some new gas struts for the boot as both have packed up. Couldn't work out what to do about the bonnet, then I realised the little rubber bungs are there for a purpose! Wound them out and bonnet rattle gone :). I also bent a bit of stainless steel rod for a bonnet stay, drilled a tiny hole in one end for a split pin so it will stay in place.. I'd like gas struts for the bonnet eventually, need to research how to do this though, which struts to use and how to mount them.
He got driven in the rain for the first time last night, and this morning I found a little puddle in the boot. Need to sort this before I start attracting ducks.

With every bush minus the front top mounts being made from polyurethane the ride was pretty bumpy. The first step was the swap the rear poly top mounts for the original rubbers. Rummaged in the scrap bin and the old bushes were still there, on the original shocks, a year later! Much more comfortable ride now. Think the car would have handled lovely on a track but not for every day driving. Paint work in the back of the car isn't 100%, I'm thinking of putting a half cage in the rear and spraying the insides.. Does need some sound deadening/carpeting at some point too.

New side repeaters, £2.50 from VW Heritage!

Chrome door trims robbed from a rotting scrapyard MK2 Golf

Pinstriping on the grill, love how this adds a bit of sportiness to the car. Not sure how sticky the tape is though and how long it'll last as the first one I did came off a day later :/ Maybe I'll mask it off and spray the stripes on.

It was time to loose the weird bendy Rocco gear stick! I only kept it there 'cos the original plan was to have a really standard looking interior. I had welded it to the front of the TT shifter too so the shifting felt strange, especially pushing down for reverse. Yesterday I cut it off and got a bit of straight stainless steel round bar for my new gear stick with a nice aluminium Wolfsburg gear knob. To get the perfect position I put the car into neutral , sat in the driver's seat and then lightly welded the stick in place where it felt good. Took ages to get it right, a lot of breaking it off and re-tacking but eventually I found the perfect place for it.. 1st gear is a slight stretch on my arm but between 2nd, 3rd and 4th is just awesome, feels so good. I'll be in those gears most of the time anyway! Though there's a short shifter on the gearbox the throw is pretty long but it feels good. Eventually I'd like a Dieselgeeks short shift kit for the 02J shift tower like this:

As always it'd be more fun to make my own though! Here's the new shifter


Might keep the seating position now the shifter position is so tuned! This car is so set up for my body geometry! Fork loads of head room anyway.

Loads more to do. I'm kind of glad there is or I'd be darn well out of a hobby!
-
treefingers
- Posts: 400
- Joined: Wed Aug 14, 2013 1:04 pm
- fill in the right answer: 15
Re: HERMAN THE GERMAN! '91 Scala 20vt
Cheers Sean.
Arse arse and more arse. Feeling pretty narked right now to say the least.. Been screwed by the guy I bought the engine from. It was advertised as a full AUQ engine and loom setup, the one I researched and the setup I needed with wideband O2 and KO3s turbo. NOT what I got. Turns out i have a KO3 turbo, NOT the more powerful KO3s. The loom he sold me is actually an APP loom, and the ECU is APP. So I've got narrowband O2, and no control of the VVT on the engine.
What this means is
-I can't control the VVT
-The ECU is mapped for a KO3s, not a KO3
-I've got the basic narrowband O2 sensor
-The ECU/loom isn't matched to the engine
I spent so long researching and working out the right parts I needed, the seller has messed me up a treat!
The result of this is either changing the head to a non VVT one such as APP or AGU, or changing the loom, ECU and turbo to AUQ versions which means more mapping/deimmobilising. The worst thing is with the KO3 turbo I've got I'm going to be well down on power :/
No wonder I haven't been able to get it to run properly, it's been running with all the wrong flipping parts!! Can't even find the seller's contact number. Livid. Ahhh...
-
treefingers
- Posts: 400
- Joined: Wed Aug 14, 2013 1:04 pm
- fill in the right answer: 15
Re: HERMAN THE GERMAN! '91 Scala 20vt
Found the guy's number and gave him a call.. turns out he was sold the engine/loom etc by someone else and had it running but never drove it. Think he genuinely didn't know what he sold me. Such a pain though. The never ending project continues to never end..
-
Roxylife
- Posts: 176
- Joined: Sun Mar 13, 2011 7:11 pm
- fill in the right answer: 10
- Location: On the limits of adhesion
Re: HERMAN THE GERMAN! '91 Scala 20vt
Andi,
VVT is only really for emissions and warm up cycle..
I'd try and find an AGU head, which is better anyway. And stick with your K03 turbo, look and ECU combo..
Believe me when I say the K03 is more than enough power for the road.. Don't chase the figures!
VVT is only really for emissions and warm up cycle..
I'd try and find an AGU head, which is better anyway. And stick with your K03 turbo, look and ECU combo..
Believe me when I say the K03 is more than enough power for the road.. Don't chase the figures!
Motorsport is my passion.
-
treefingers
- Posts: 400
- Joined: Wed Aug 14, 2013 1:04 pm
- fill in the right answer: 15
Re: HERMAN THE GERMAN! '91 Scala 20vt
It's all good now, think I have things sorted out. Trip to the Phirm in a couple of weeks should smooth out the power. The good news is it looks like I can keep all existing parts too.
Today I did perhaps one of the best bits of work on the car, one of the biggest gains.. heat!!! When I got the car the heater only worked on the '3' setting, and since the rebuild it'd totally seized up. I was given a motor from a MK1 caddy (I really don't know why people would want to build a car with no windscreen heating..?) and set about getting the old one out. I really didn't want to take out the dash, I'd read that this job can be really fiddly and was dreading it a little.. in reality it was all done in about half an hour! Nice and easy. Here's what I did..
1. Remove wiper mechanism
2. Disconnect motor wiring and unscrew resistor
3. Jiggle motor about and remove along the driver's side of the scuttle - tight but with some jiggling and force it was out:
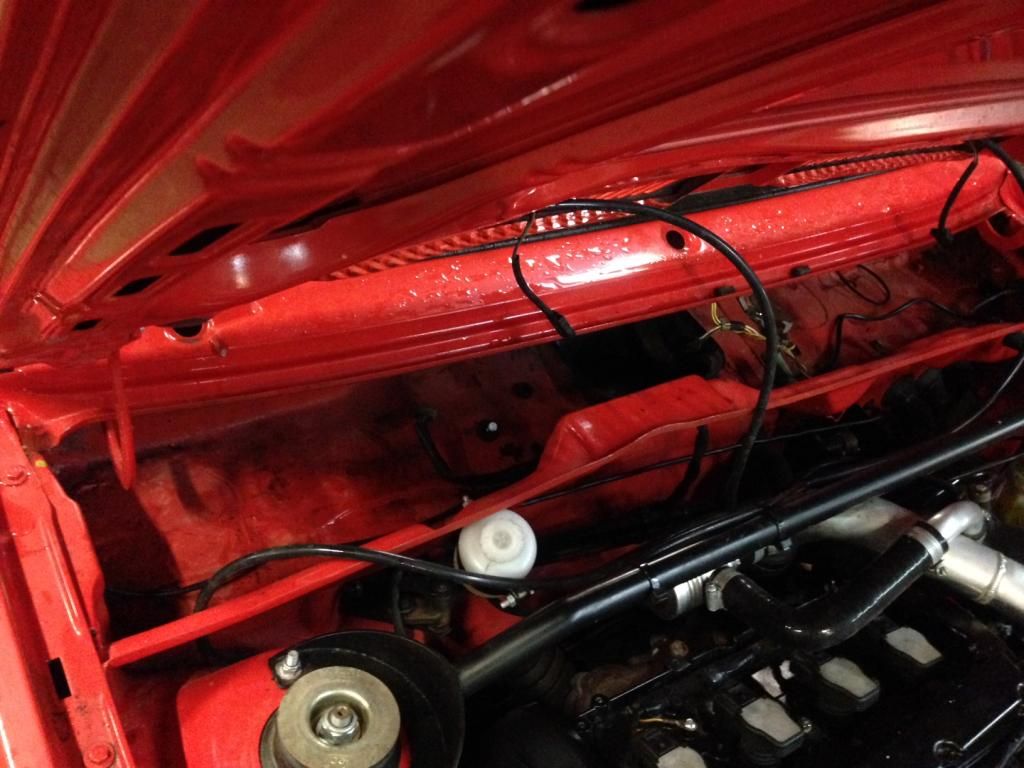
Car needs a good clean! You can see the motor exit path along the scuttle here.
4. Carefully split the new motor in two, taking care not to break off the tabs..
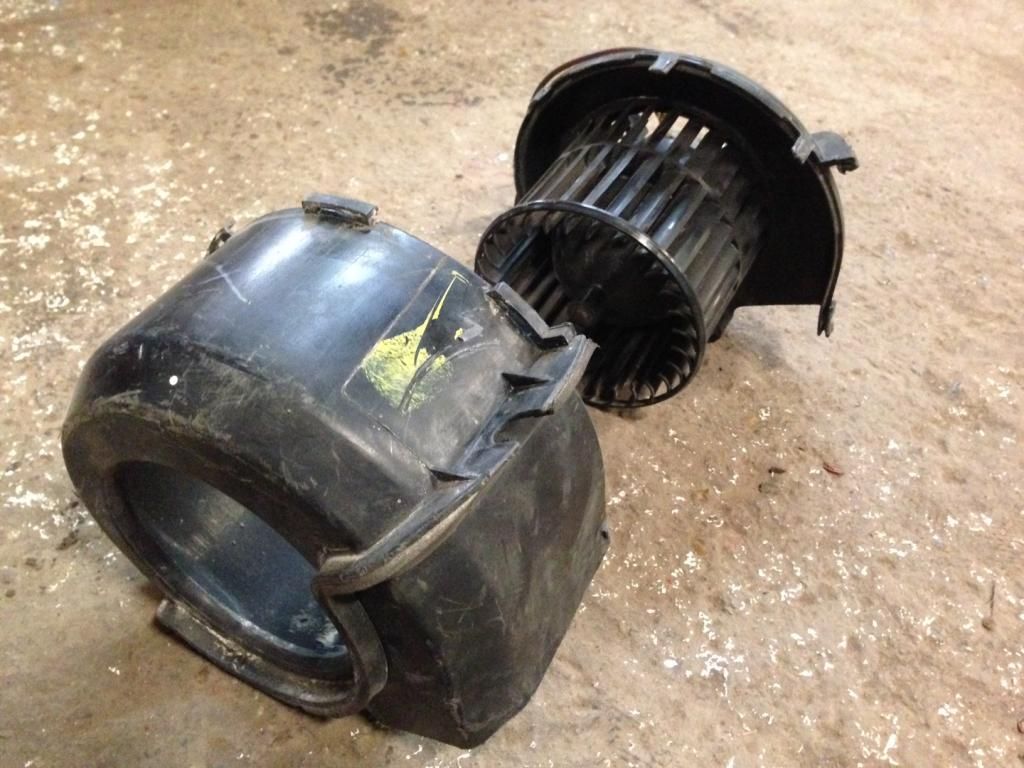
5. Installed new motor in two sections and joined together in mounting location, re connect wires, job's a goodun!
Heat is so amazing. Well, blowing heat! No more waiting to clear a foggy windscreen! The new motor only works on speeds 2 and 3, either due to resistance in the fan or a dud resistor, will have to investigate. Either way, pleasantly surprised at how easy it went.
Immediate plans for the car now are:
Sort out power delivery at the Phirm
Get car RR'd and mapped
Fit a mk4 golf reverse light plug onto the Roc loom
Flip the track rods upside down and sort some ball joint extenders
Get some rear gas struts!
Get some fast road pads
Re-route the crankcase ventilation to the turbo inlet pipe
Some sort of sound deadening/carpeting in the rear
Get all the interior dash switch lighting working!
Today I did perhaps one of the best bits of work on the car, one of the biggest gains.. heat!!! When I got the car the heater only worked on the '3' setting, and since the rebuild it'd totally seized up. I was given a motor from a MK1 caddy (I really don't know why people would want to build a car with no windscreen heating..?) and set about getting the old one out. I really didn't want to take out the dash, I'd read that this job can be really fiddly and was dreading it a little.. in reality it was all done in about half an hour! Nice and easy. Here's what I did..
1. Remove wiper mechanism
2. Disconnect motor wiring and unscrew resistor
3. Jiggle motor about and remove along the driver's side of the scuttle - tight but with some jiggling and force it was out:

Car needs a good clean! You can see the motor exit path along the scuttle here.
4. Carefully split the new motor in two, taking care not to break off the tabs..

5. Installed new motor in two sections and joined together in mounting location, re connect wires, job's a goodun!
Heat is so amazing. Well, blowing heat! No more waiting to clear a foggy windscreen! The new motor only works on speeds 2 and 3, either due to resistance in the fan or a dud resistor, will have to investigate. Either way, pleasantly surprised at how easy it went.
Immediate plans for the car now are:
Sort out power delivery at the Phirm
Get car RR'd and mapped
Fit a mk4 golf reverse light plug onto the Roc loom
Flip the track rods upside down and sort some ball joint extenders
Get some rear gas struts!
Get some fast road pads
Re-route the crankcase ventilation to the turbo inlet pipe
Some sort of sound deadening/carpeting in the rear
Get all the interior dash switch lighting working!
Re: HERMAN THE GERMAN! '91 Scala 20vt
Can't..........wait........to............see..............this..............beast.
Serial Rocco-ist.........
-
treefingers
- Posts: 400
- Joined: Wed Aug 14, 2013 1:04 pm
- fill in the right answer: 15
Re: HERMAN THE GERMAN! '91 Scala 20vt
:) Soon hopefully!
Well Herman's trip to the Phirm in a couple of days time will have to be moved back after a spanner fell into the works. Did I say spanner? I meant rock! I did some slow and gentle 'off roading 'so I could get some nice new angles with my camera. The shots were nice but came at a cost.. a sumpy sacrifice!
Managed to drive for about 6 miles before I realised I had a hole.. thought the burning rubber smell was the shift cables on the exhaust. A fair amount of black smoke billowing from the engine bay and a nice little black puddle confirmed three things.
1. This would have been a beautiful time to have breakdown cover.
2. This would have been a beautiful time to have breakdown cover.
3. This would have been a beautiful time to have breakdown cover.
One muddy Herman :)
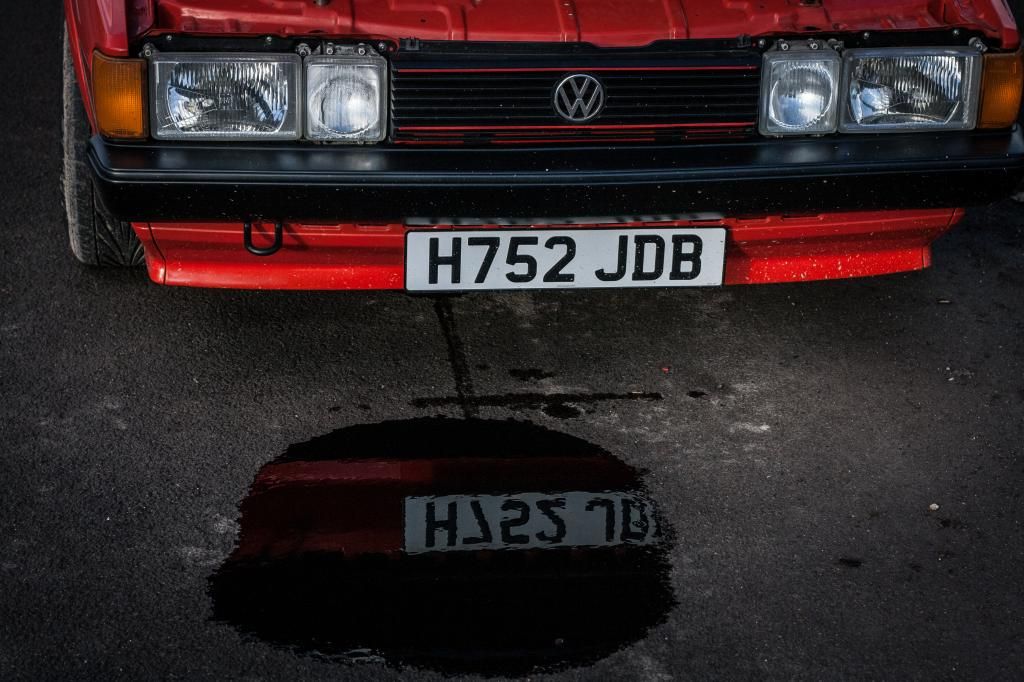
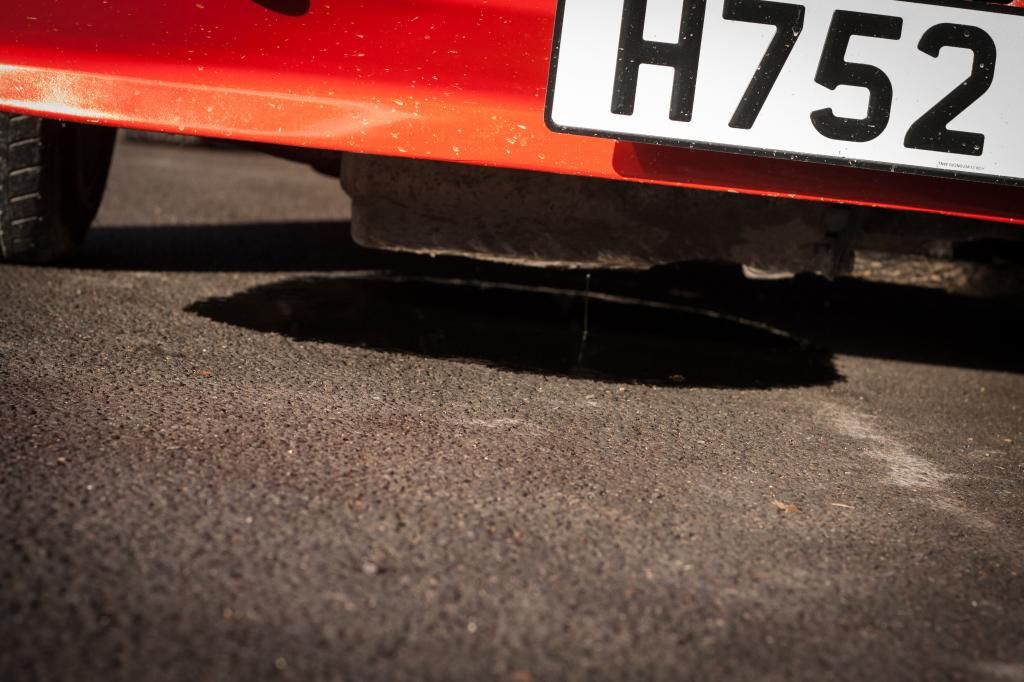
Loads of people stopped to ask if I needed help which was nice. Managed to get the beast towed back to the workshop the next day.
My plan was to jack the car, remove the sump and get my mate to TIG the hole. New oil, new gasket, done in a couple of hours. Not so easy! Strangely it's a lot harder removing a sump when it's under the car, and with a flywheel and gearbox bolted to the engine! The last two sump bolts up between the sump and the flywheel are awkward little buggers to say the least. The stock MK4 flywheel has a couple of slots in it so you can crank the engine and get a socket up in there. Problem is my ABF flywheel doesn't have these slots so a socket won't fit, and a ball ended allen key rounded the bolts. Unless I can find a suitable wobble bar or make a shortened UJ socket it looks like it's be gearbox out, clutch off, flywheel off, all to change the sump! Hey ho. I'm not going through that twice. Shallow sump in the post! May weld some more metal plate to it for added strength and an end to all this nonsense!
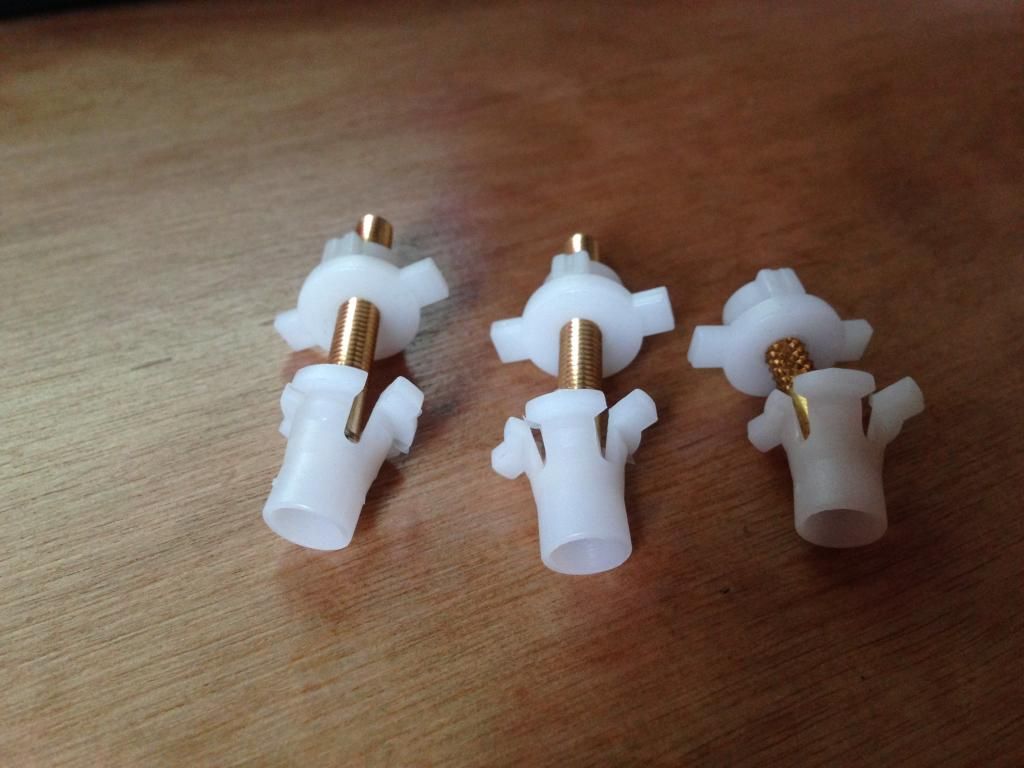
Got these to fit too so I can stop getting flashed for blinding other drivers. Sorry!
Well Herman's trip to the Phirm in a couple of days time will have to be moved back after a spanner fell into the works. Did I say spanner? I meant rock! I did some slow and gentle 'off roading 'so I could get some nice new angles with my camera. The shots were nice but came at a cost.. a sumpy sacrifice!
Managed to drive for about 6 miles before I realised I had a hole.. thought the burning rubber smell was the shift cables on the exhaust. A fair amount of black smoke billowing from the engine bay and a nice little black puddle confirmed three things.
1. This would have been a beautiful time to have breakdown cover.
2. This would have been a beautiful time to have breakdown cover.
3. This would have been a beautiful time to have breakdown cover.
One muddy Herman :)


Loads of people stopped to ask if I needed help which was nice. Managed to get the beast towed back to the workshop the next day.
My plan was to jack the car, remove the sump and get my mate to TIG the hole. New oil, new gasket, done in a couple of hours. Not so easy! Strangely it's a lot harder removing a sump when it's under the car, and with a flywheel and gearbox bolted to the engine! The last two sump bolts up between the sump and the flywheel are awkward little buggers to say the least. The stock MK4 flywheel has a couple of slots in it so you can crank the engine and get a socket up in there. Problem is my ABF flywheel doesn't have these slots so a socket won't fit, and a ball ended allen key rounded the bolts. Unless I can find a suitable wobble bar or make a shortened UJ socket it looks like it's be gearbox out, clutch off, flywheel off, all to change the sump! Hey ho. I'm not going through that twice. Shallow sump in the post! May weld some more metal plate to it for added strength and an end to all this nonsense!
Got these to fit too so I can stop getting flashed for blinding other drivers. Sorry!

- bengould
- Posts: 805
- Joined: Fri Jul 09, 2010 1:25 pm
- fill in the right answer: 10
- Location: Renfrew.
Re: HERMAN THE GERMAN! '91 Scala 20vt
Gutted. Not having much luck with this.
I ended up raising my suspension for this exact reason though. Had mine wound right down but caught on EVERYTHING. I couldn't even drive over a plastic drink bottle without it getting stuck and dragged down the road with me.
Eventually the old man in me took over and I lifted it a bit.
Ben.
I ended up raising my suspension for this exact reason though. Had mine wound right down but caught on EVERYTHING. I couldn't even drive over a plastic drink bottle without it getting stuck and dragged down the road with me.
Eventually the old man in me took over and I lifted it a bit.
Ben.
-
treefingers
- Posts: 400
- Joined: Wed Aug 14, 2013 1:04 pm
- fill in the right answer: 15
Re: HERMAN THE GERMAN! '91 Scala 20vt
Yeah already done the raising thing too! It makes sense if it's a daily. I just mounted my engine a tad too low.. Roccos look so bloody good all decked out.
-
treefingers
- Posts: 400
- Joined: Wed Aug 14, 2013 1:04 pm
- fill in the right answer: 15
Re: HERMAN THE GERMAN! '91 Scala 20vt
Well the good news is I got the sump off, and I didn't need to touch the gearbox. After some head scratching I came up with this little tool.. a shortened 10mm socket welded to a shortened UJ socket. Who needs snapon when you've got a grinder and a MIG!
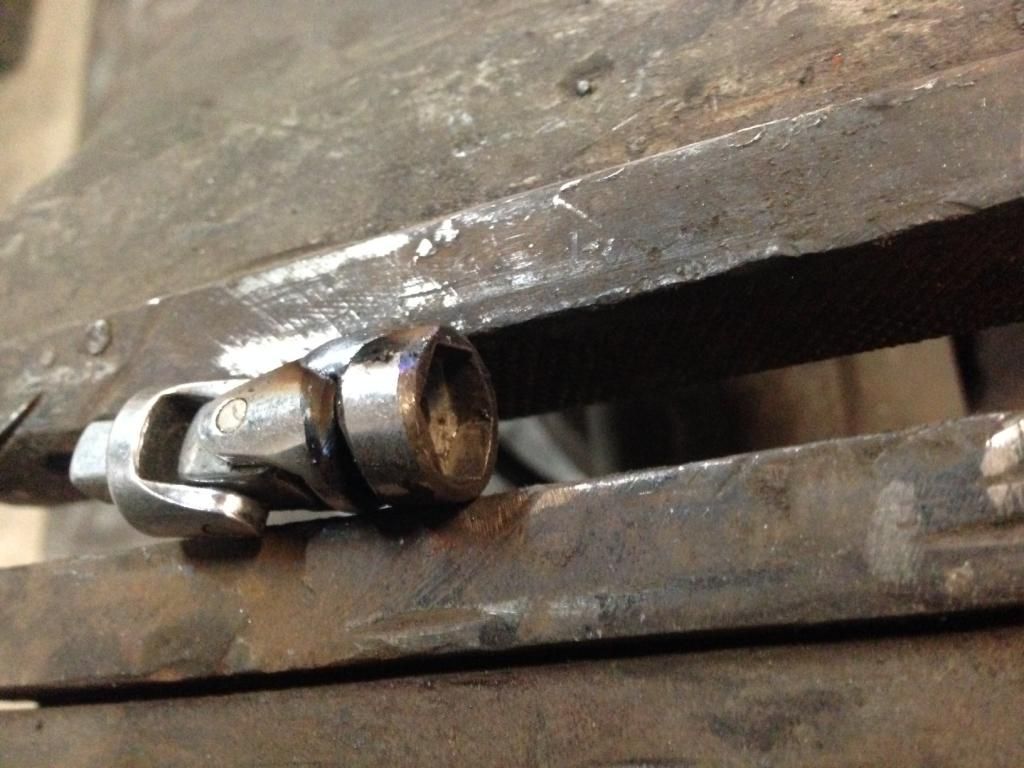
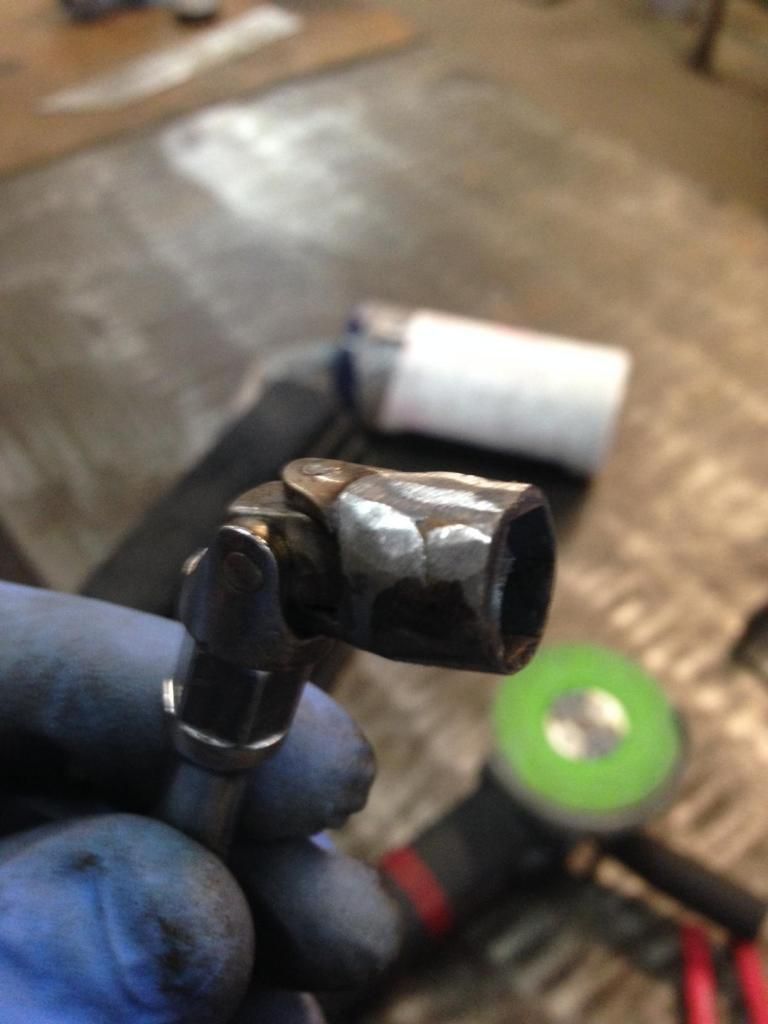
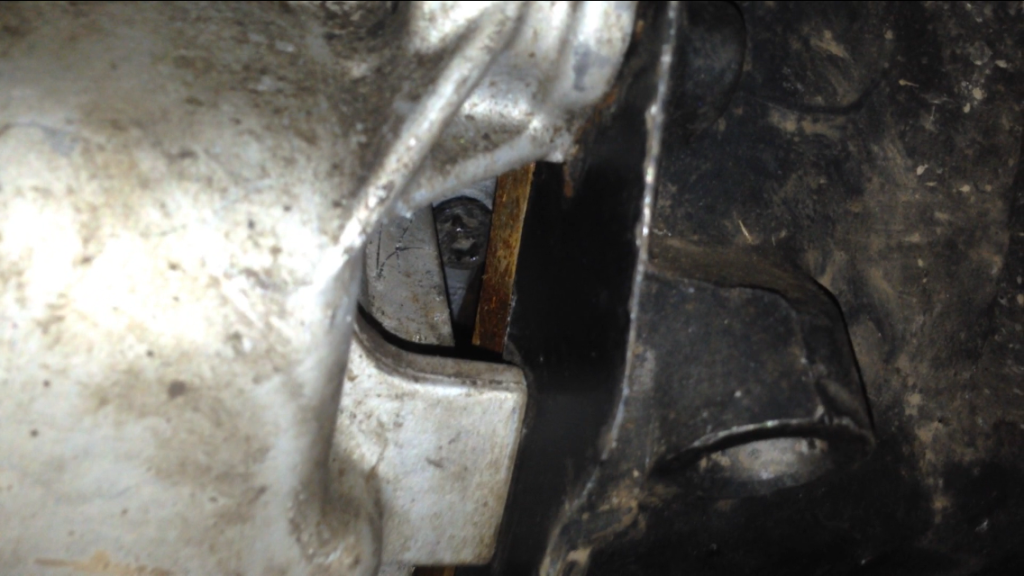
Here was one of the awkward fellas. I reckon I actually felt happier overcoming the struggle of removing the bolts than I would have done if the sump had come off right away. Much gay dancing around the workshop followed. It was a good moment.
So here was my solution.. a hybrid shallow sump. A VW factory part, apparently they put these on the Beetle in Mexico to overcome the harsh roads there.
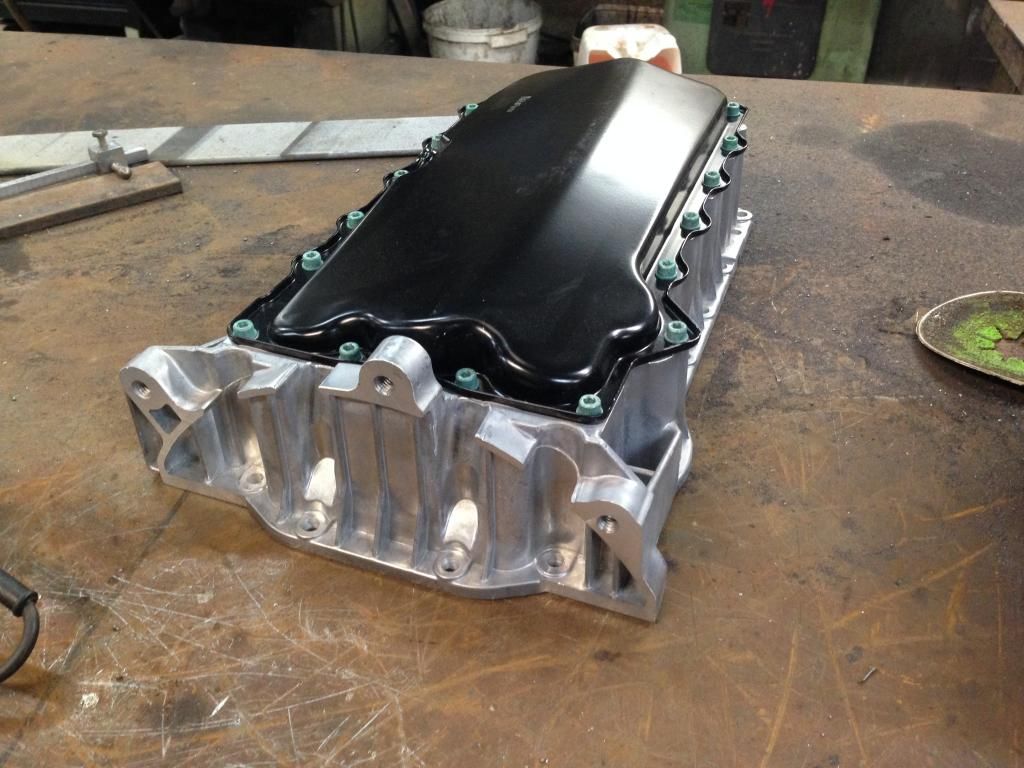
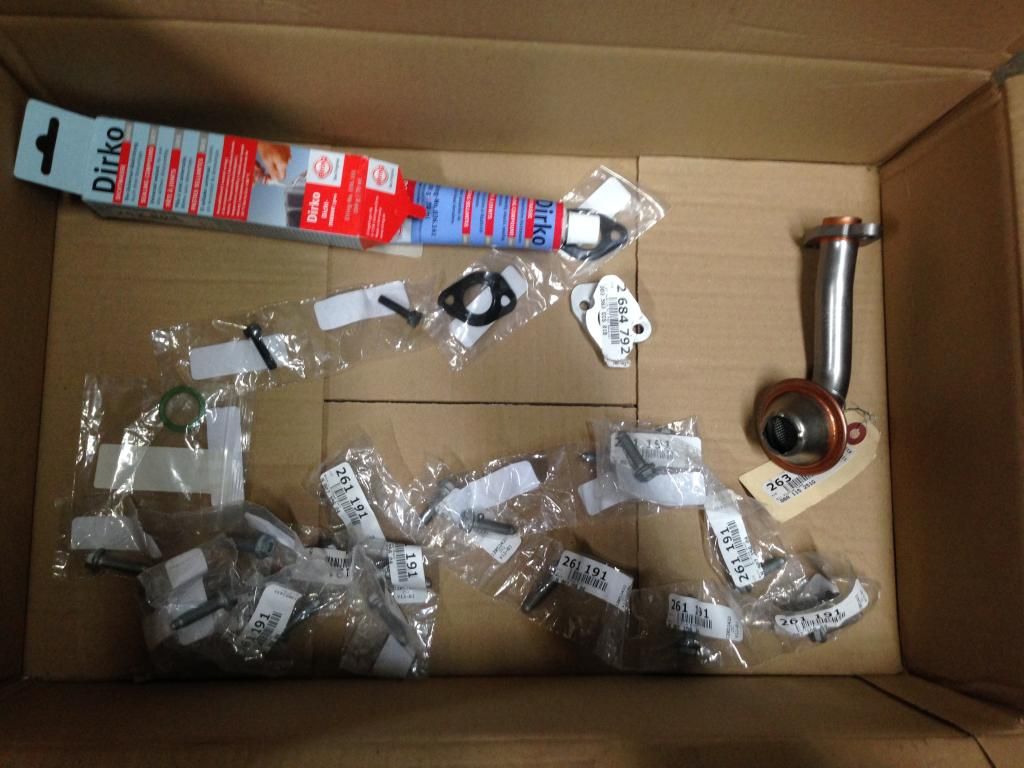
You get a shorter pickup pipe and all hardware needed for the swap including an adaptor for the turbo oil feed
I wanted this to be a job I didn't ever have to do again though, so some beefing up was in order! Cue 3mm mild steel reinforcement..
Cut to shape and bent
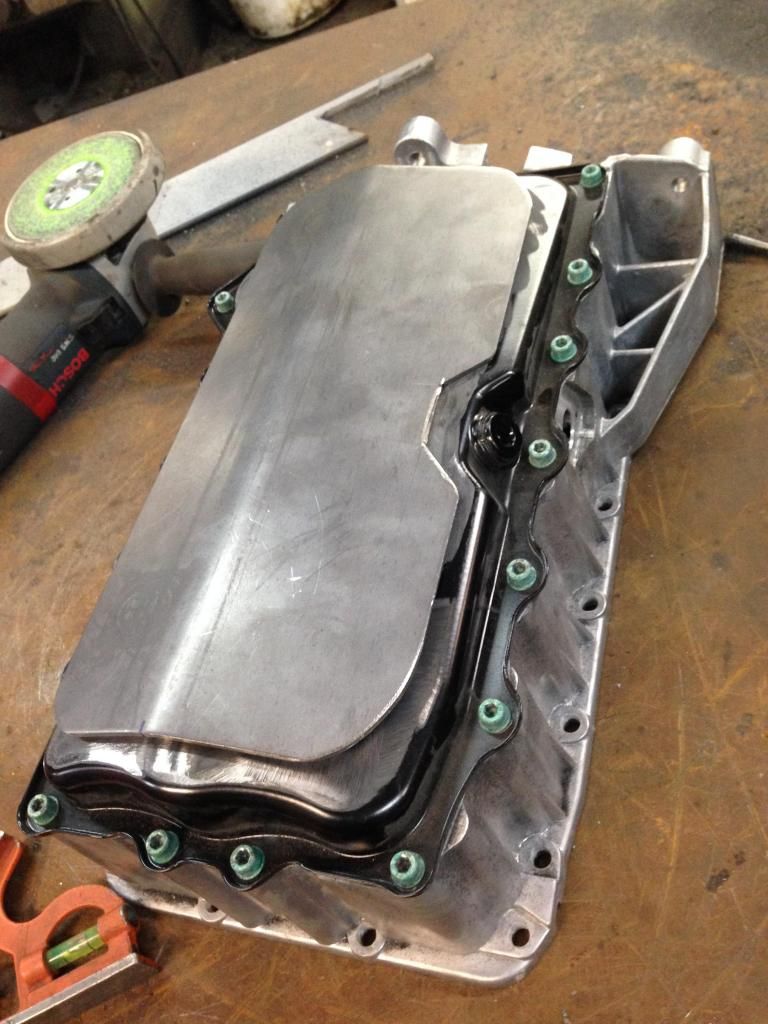
Clamped and tacked
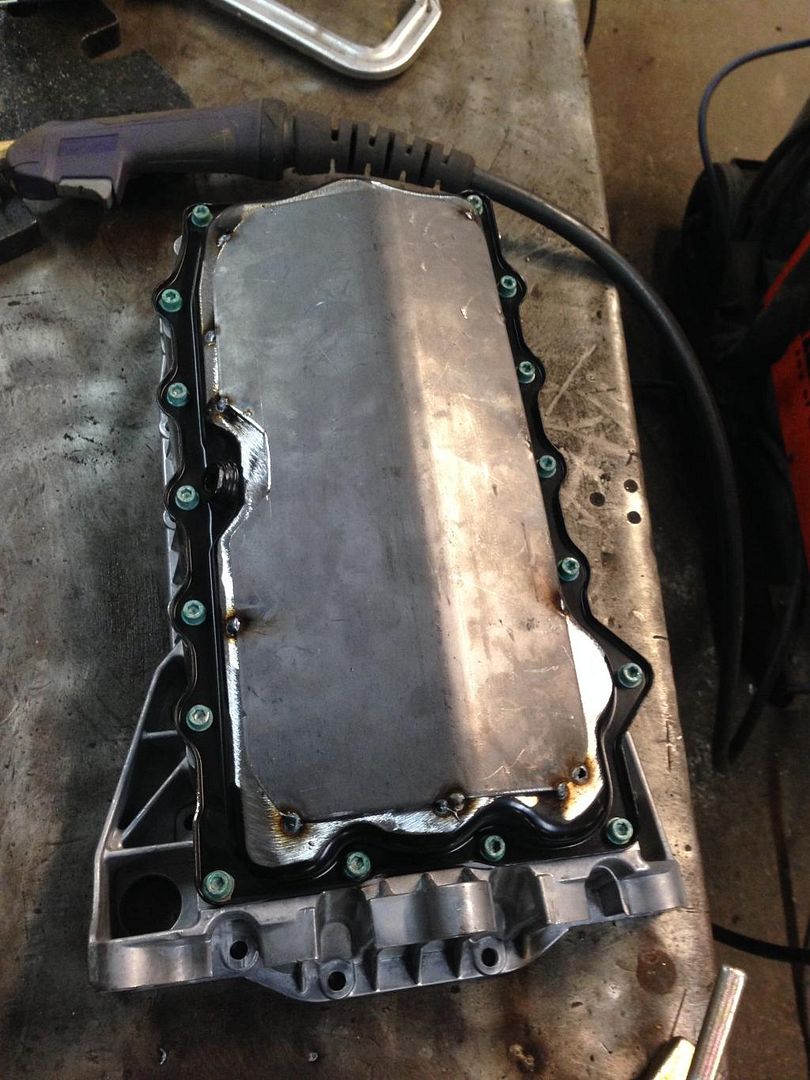
Welded. I had to keep the heat low as the sump was really thin metal, only around 1mm thick
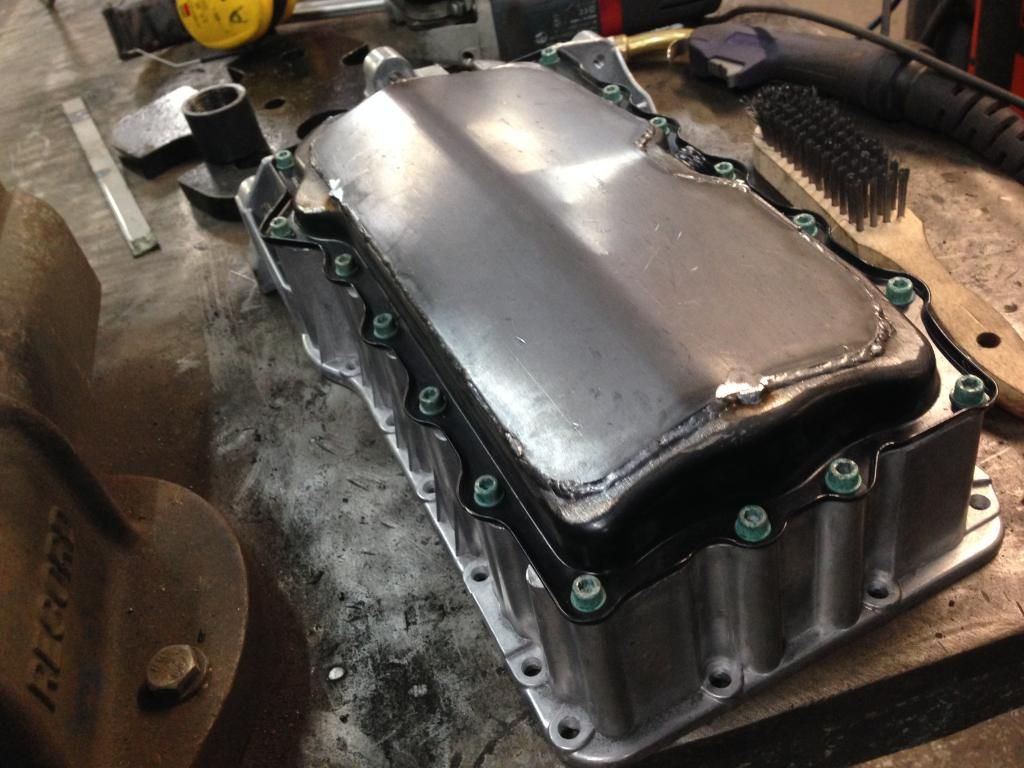
Primed
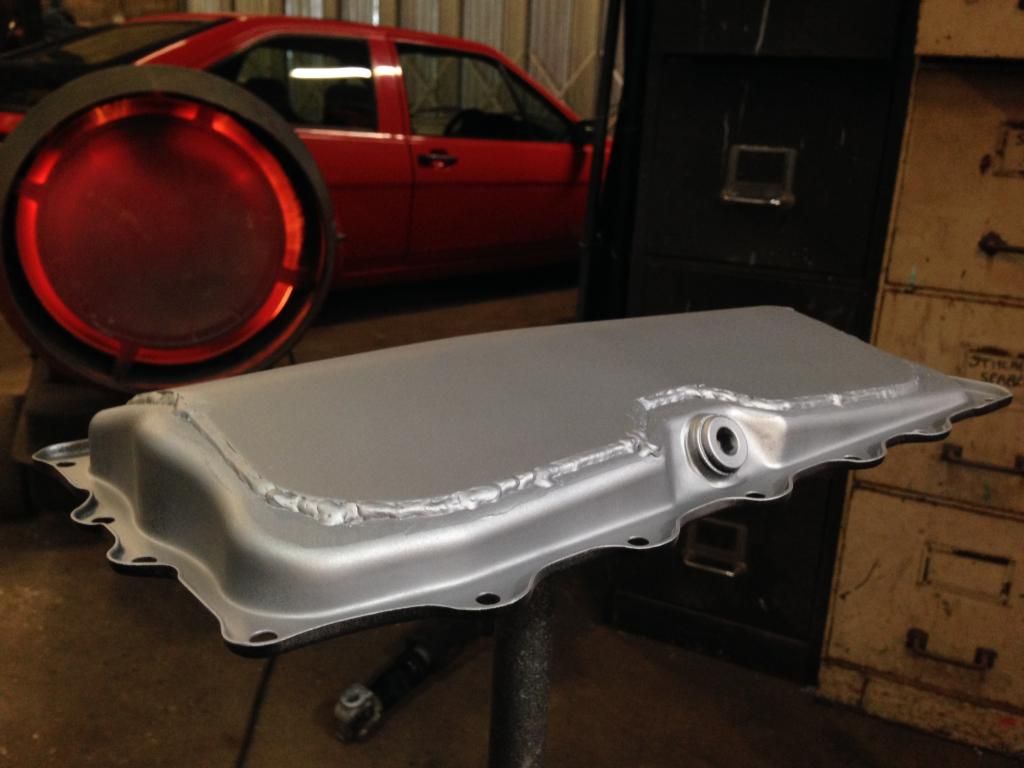
Painted
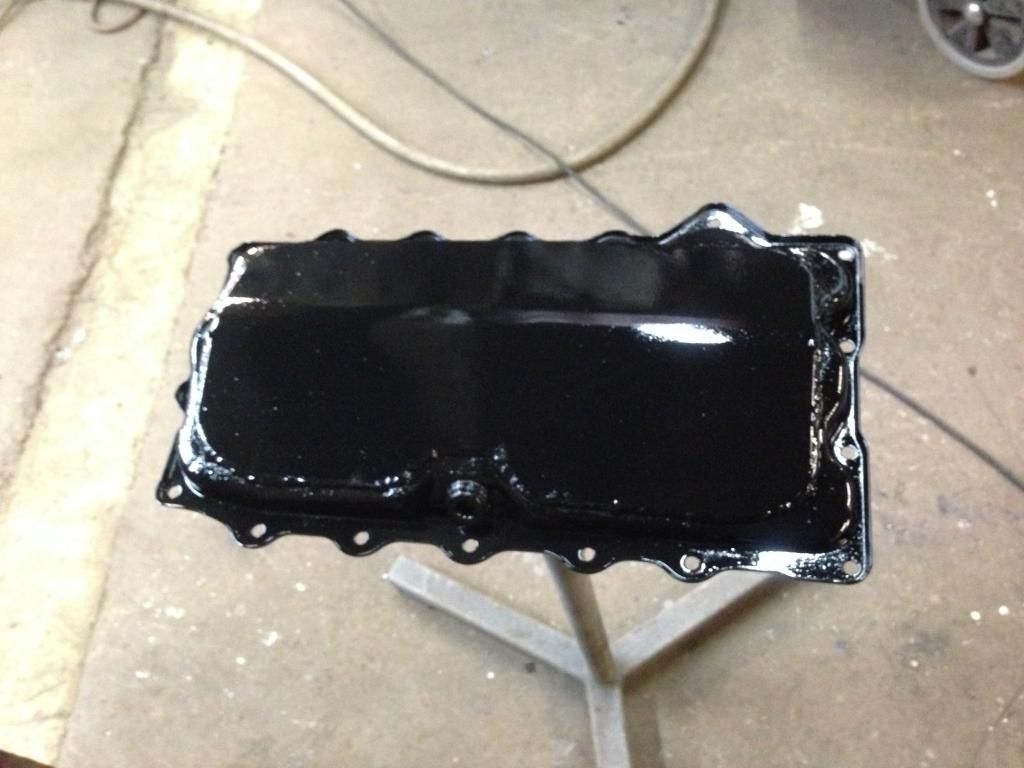
New Dirko sealant was used and I'm happy to say it's all back together now. It's not massively higher than it was but it's the little bit that makes a difference. Anyway it's much beefier now, one less thing to worry about! :)
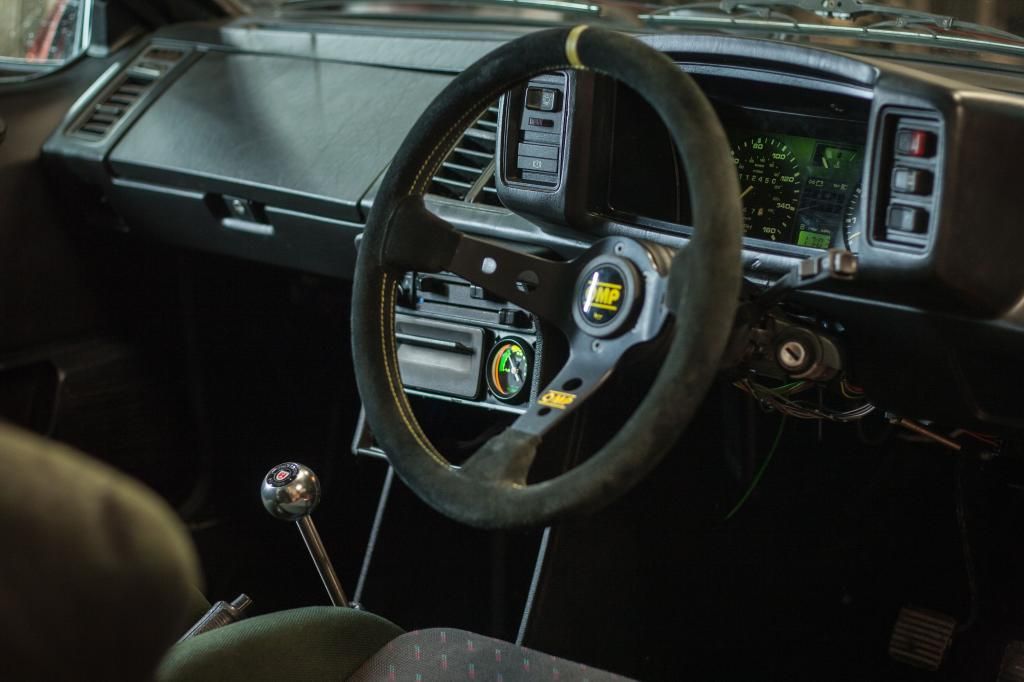
I also recently fitted a boost gauge but hadn't put a photo up.. It's a TIM mechanical one, I wired the backlight into the headlight switch, an advanced bit of electrics for me! I really like the retro look of it, a modern gauge wouldn't have suited I think. It needs a shroud/dash trim around it; I've misplaced the little black blank that was there before. I also would like to get all my dash switches lighting up.. not sure which ones did originally? I've got no backlight for the headlight switch or any lighting behind the heater controls..


Here was one of the awkward fellas. I reckon I actually felt happier overcoming the struggle of removing the bolts than I would have done if the sump had come off right away. Much gay dancing around the workshop followed. It was a good moment.

So here was my solution.. a hybrid shallow sump. A VW factory part, apparently they put these on the Beetle in Mexico to overcome the harsh roads there.

You get a shorter pickup pipe and all hardware needed for the swap including an adaptor for the turbo oil feed

I wanted this to be a job I didn't ever have to do again though, so some beefing up was in order! Cue 3mm mild steel reinforcement..
Cut to shape and bent

Clamped and tacked

Welded. I had to keep the heat low as the sump was really thin metal, only around 1mm thick

Primed

Painted

New Dirko sealant was used and I'm happy to say it's all back together now. It's not massively higher than it was but it's the little bit that makes a difference. Anyway it's much beefier now, one less thing to worry about! :)
I also recently fitted a boost gauge but hadn't put a photo up.. It's a TIM mechanical one, I wired the backlight into the headlight switch, an advanced bit of electrics for me! I really like the retro look of it, a modern gauge wouldn't have suited I think. It needs a shroud/dash trim around it; I've misplaced the little black blank that was there before. I also would like to get all my dash switches lighting up.. not sure which ones did originally? I've got no backlight for the headlight switch or any lighting behind the heater controls..

- unknownmale
- Posts: 991
- Joined: Tue Jul 23, 2013 2:34 pm
- fill in the right answer: 15
- Location: London
Re: HERMAN THE GERMAN! '91 Scala 20vt
For the gauge backlight i used the the blue stereo wire as it also works on the dimmer...There's also one from the bulb in the ashtray.
- David
-
treefingers
- Posts: 400
- Joined: Wed Aug 14, 2013 1:04 pm
- fill in the right answer: 15
Re: HERMAN THE GERMAN! '91 Scala 20vt
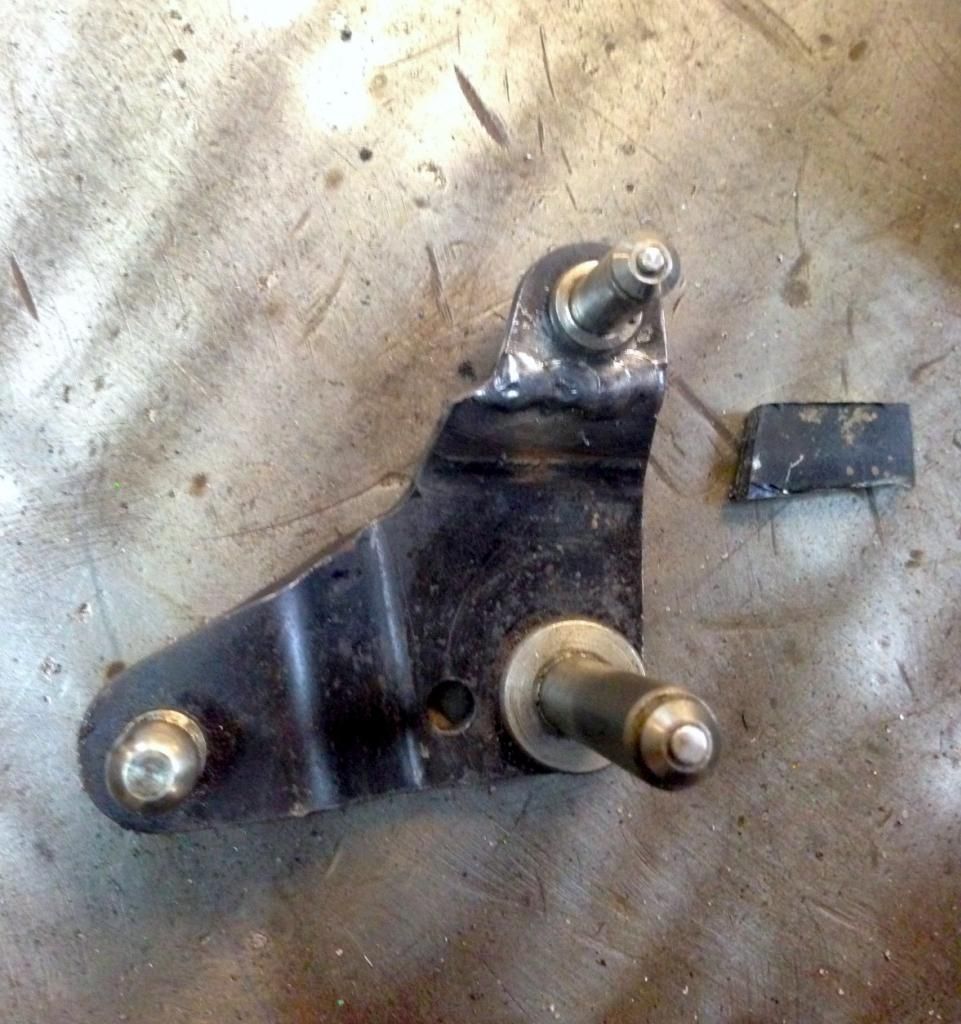
The Audi TT short shift mech shortened the gear shifting from front to back, but side to side shifting was a bit wild, especially as I'd lengthened the gear stick from OEM.
To toe this in I shortened the leverage of the up/down movement on the gearbox shifter tower by removing a piece of metal in the mechanism. After some testing I think I'm going to remove a little more to make the shifting even shorter..
A much better and cheaper way of achieving a shorter shift without shelling out for an expensive kit :) Hopefully this picture makes some sense! The shaft on the bottom right is the fulcrum; the top shaft is where the shift cable attaches.


