Eefy's White Scala

Scirocco Register members projects
Forum rules
Section for all vehicle and related projects. Please keep responses pertinent to thread.
User avatar
eefy
Posts: 999
Joined: Fri Apr 10, 2009 7:32 pm
fill in the right answer: 10
Location: Manchester

Re: Eefy's White Scala

Post by eefy »

After a few years of looking at the front of the rocco and noticing the rust peeping through the front body kit it was time to sort it out. Now this was never going to be complete grind down and fill but more prevention and holding back any further damage while making it look better. So after removing the bumper and lower kit, a job that only needed a few screws drilling out, and taking out the grill this is what I was left with-

Image

Image

So what did I find, well more serious rust than I expected-

Image

Image

Image

So first job was to attack it with my multi tool with a grinding disc attached-

Image

Image

Image

Lets just say there were areas of rust which were all the way through which means unfortunately the front will really need to be replaced at some point, but for now it was just to hold back the rust, so first up-

Image

3-4 coats later-

Image

Next was some 3-4 coats of stonechip, which as it worked out was virtually Alpine White, seriously it was that close-

Image

Image

Finally 2-3 coats of alpine white-

Image

Image

Image

Now while the grill and eyebrow I just had to give a few coats of satin black-

Image

And all back together-

Image

Image

Only real problem was when I masked it all up for spraying I forgot to do the bonnet catch, which is now white and stands out behind the grill, so it will be getting a few coats of satin black before the national meet ;)


Image
User avatar
wreckgar
Posts: 38
Joined: Thu Mar 04, 2010 2:21 pm
fill in the right answer: 10

Re: Eefy's White Scala

Post by wreckgar »

Hey just wanted to say thanks for this post, I swapped my motor over today and found this guide really useful. The motor I bought off eBay had different power connectors so I had to do some faffing but otherwise pretty straightforward. Thanks!
eefy wrote:After buying a new blower motor of ebay a few weeks ago it was time to fit it, and thanks to some advice of Old Mac Rocco and Scumpyone though I’d show how I did it. Now for those who will need to do this the Haynes manual would have you strip out the centre console, empty out the coolant before removing the heater module before removing the motor from above. This is a faff and to be honest not needed so heres how to do it the easy way.

First off the blower motor is located below the very delicate raintray (take you time removing this VW made it so flimsy and brittle it can crack very easily) this is what you’ll see-

Image

To get it out you’ll need to remove the wiper motor/mechanism located on the drivers side completely-

Image

Image

The you’ll need to remove the resistor pack that on the front of the blower motor assemble, this is just held in place by some tangs on the metal bracket and disconnect the 2 wires (obviously disconnect the battery first)-

Image

Image

The screw that holds the bracket in is also the only screw that holds the blower motor in place to simply remove it and the blower will be free to move.

Now comes the fun bit, to get it out you’ll need to split the casing into 2 parts, there are about 5 clips all the way round as well as some rubber holders to the back. The picture below is the new one to give you an idea-

Image

Once its split it two and with some jiggling you should be able to withdraw it from the drivers side, hence why the wiper motor was completely removed-

Image

Image

As that say, refitting is the opposite of removal, but saying that I took a lot more car in splitting the new one in halve than ripping out the old one!!!!!

Image

Also one thing to not is that once the new motor is in place and put back together make sure its “hooked” into the heater module at the back. If it’s not you won’t be able to refit the wiper mechanism.

Image


User avatar
eefy
Posts: 999
Joined: Fri Apr 10, 2009 7:32 pm
fill in the right answer: 10
Location: Manchester

Re: Eefy's White Scala

Post by eefy »

Glad it was helpful :)

hmmm might have to include it in the next edition of the Skyrocket magazine :)


Image
User avatar
eefy
Posts: 999
Joined: Fri Apr 10, 2009 7:32 pm
fill in the right answer: 10
Location: Manchester

Re: Eefy's White Scala

Post by eefy »

Right best dust this off!!!!!

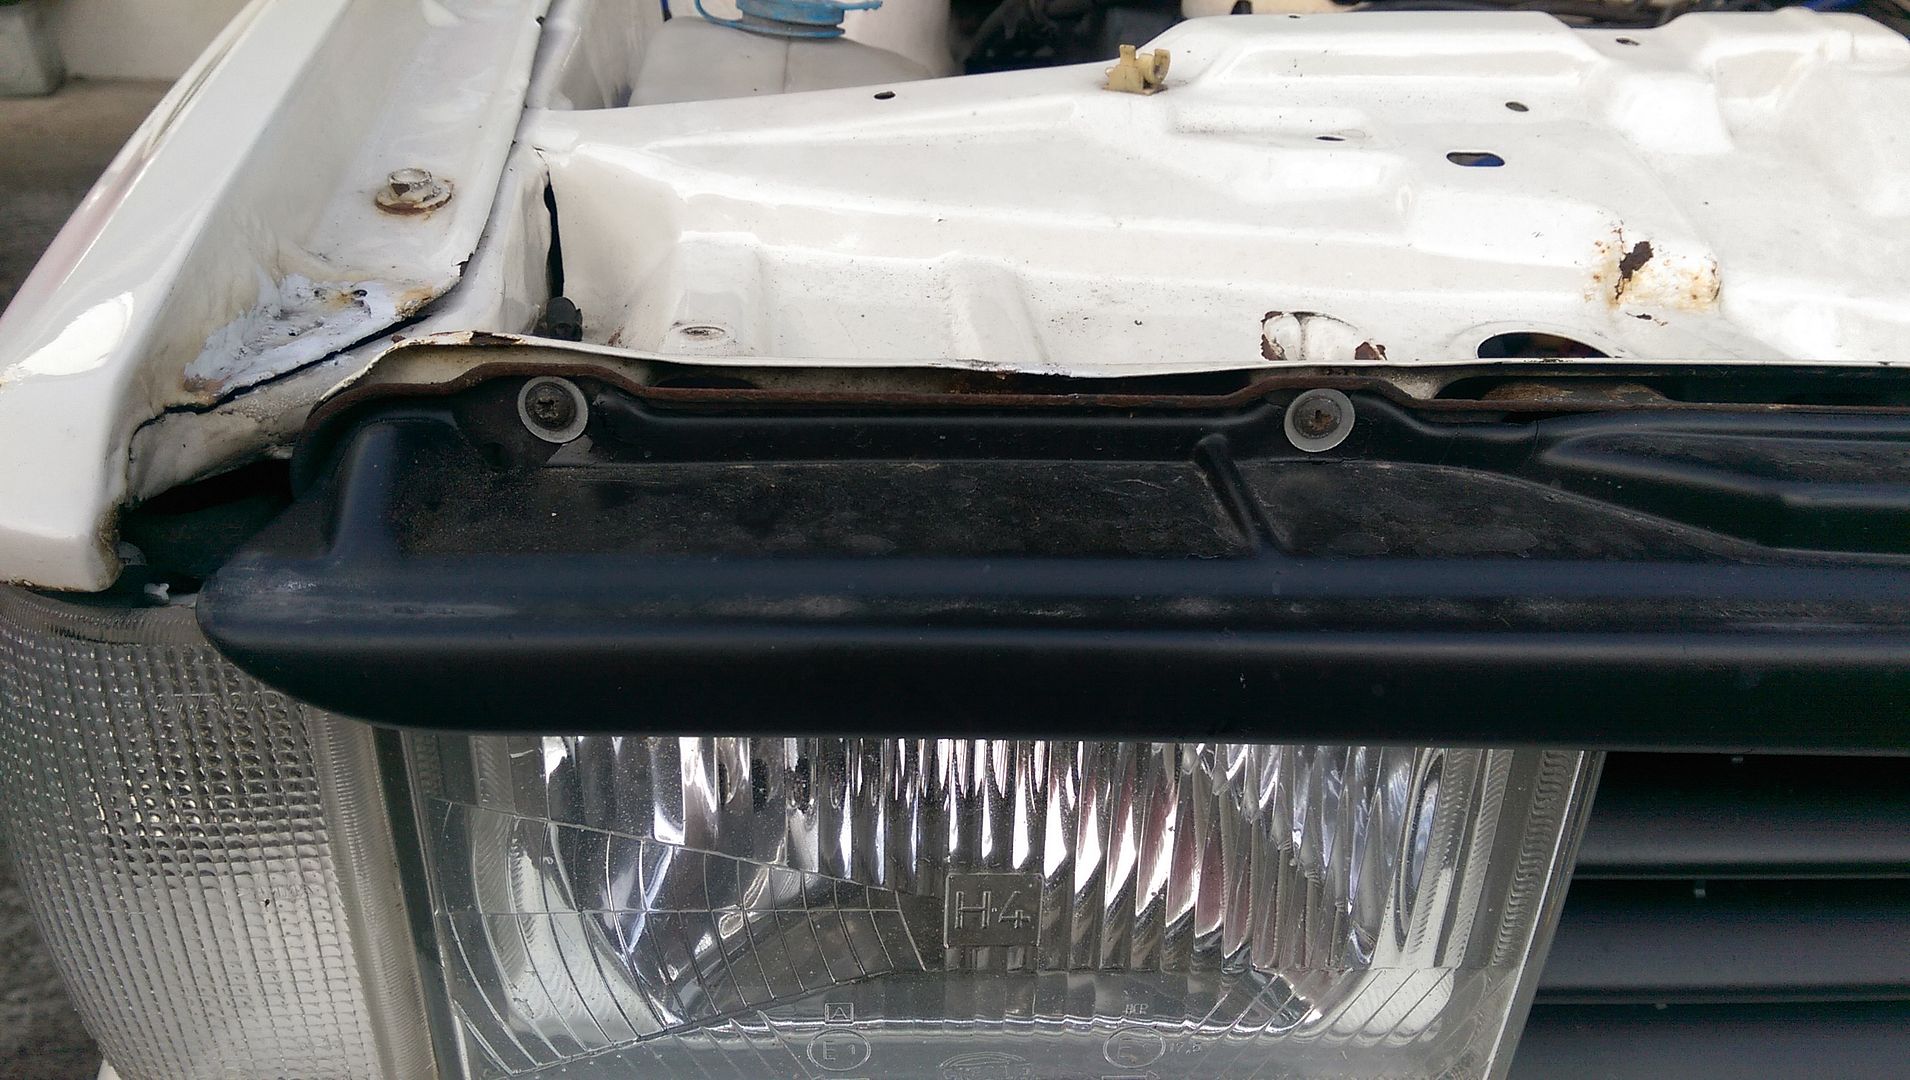
After a long winter my rocco is in need of some TLC. The recent run down to Stafford (130 round trip) highlighted a few problems, first were the water leak was coming from. This was via it shedding 1.5ltr of water on the way to the Really Retro Show. It was temporarily fixed by trimming the 2 affected hoses, so that’s the first job to be fixed. Also on the run it was evident that the metallic sound that I’ve heard was once again the front nearside wheelbearing after it had progressed to a grinding sound. Next to happen was my front eyebrow snapped its mount as well. The day was great though.

So had spent an hour checking over the car tonight first to confirm it was the wheel bearing, sure this will be the 3rd one in 7 years for that side!!!!! I also did a temporary fix on the eyebrow-

Image

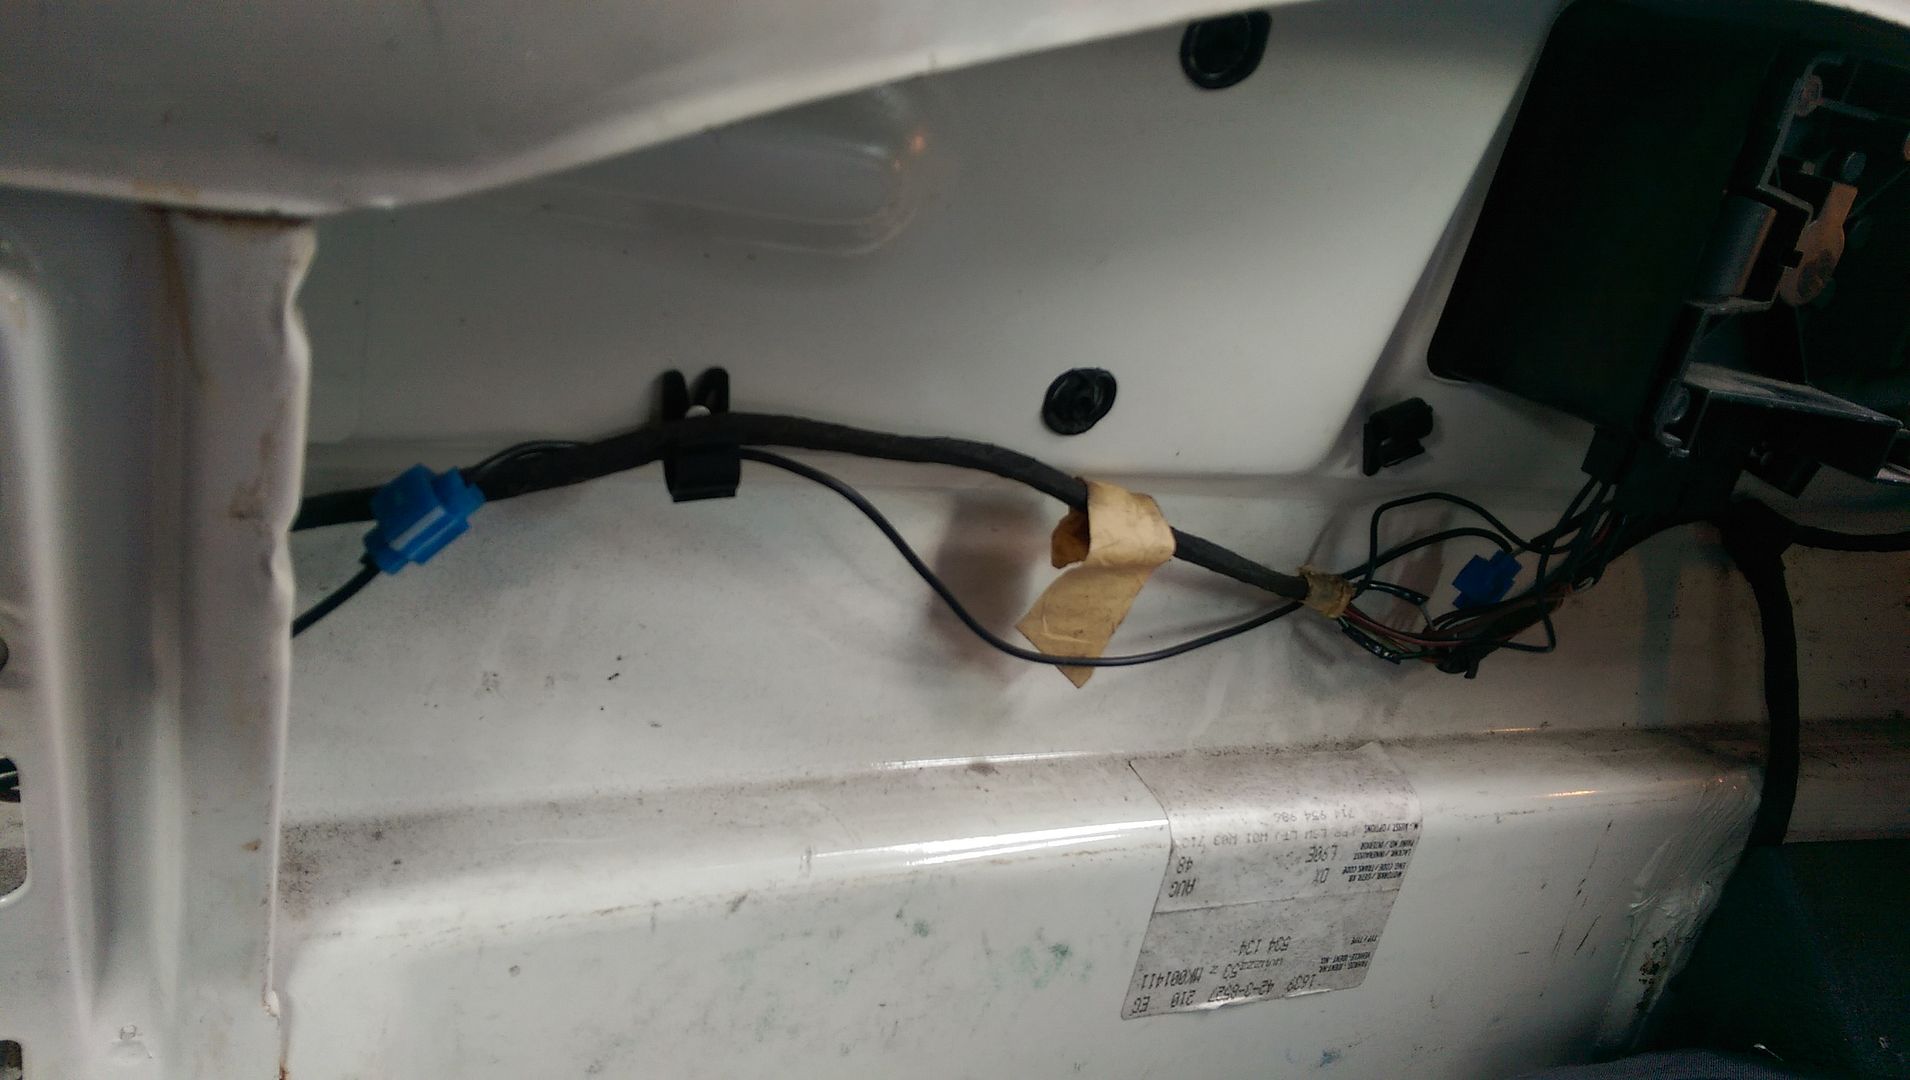
Next up I decided to look closer at a “job” that’s been on the cards since I got the car 7 years ago, namely the “modified” 90’s style rear light wiring, or rather the one on the nearside-

Image

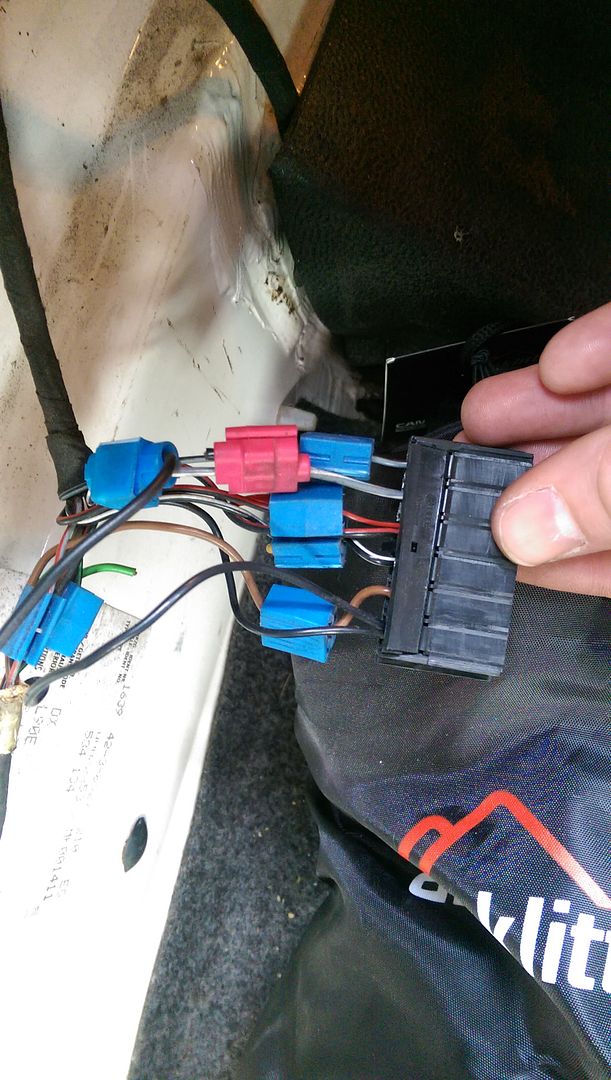
I had always assumed that for some reason the loom had been cut and then some quality splicing had taken place. To be honest this wiring job was never done due to “if it aint broke don’t fix it” kind of approach. However on closer inspection it turns out the wiring into the light has been spliced too and this had then been cut back and left!!!!

Image

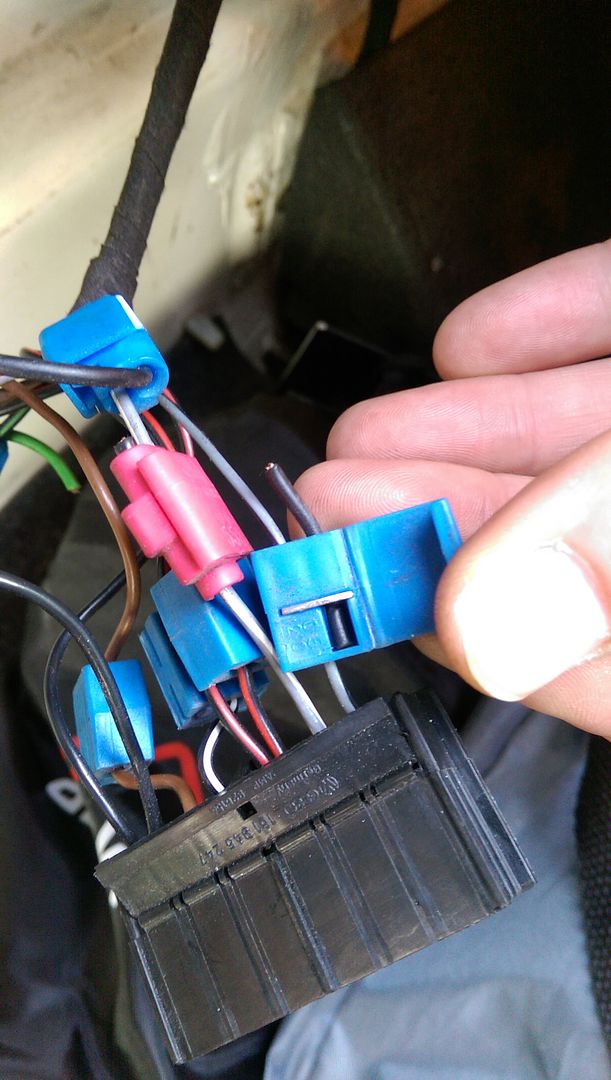
shows how much “additional” wire was left-

Image

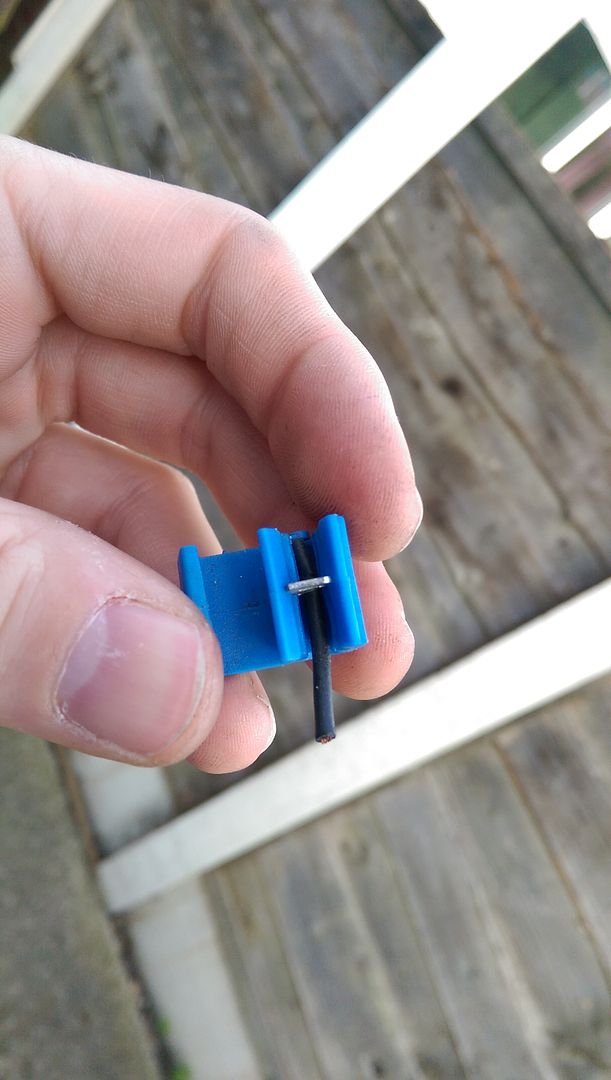
So with the original loom all in one piece I removed all the splicing blocks (I know there’s plenty more to sort out behind the dash wiring the stereo, and I can’t complain too much as I’m as guilty as most to using these back in the day) and taped up the exposed wires, much better-

Image

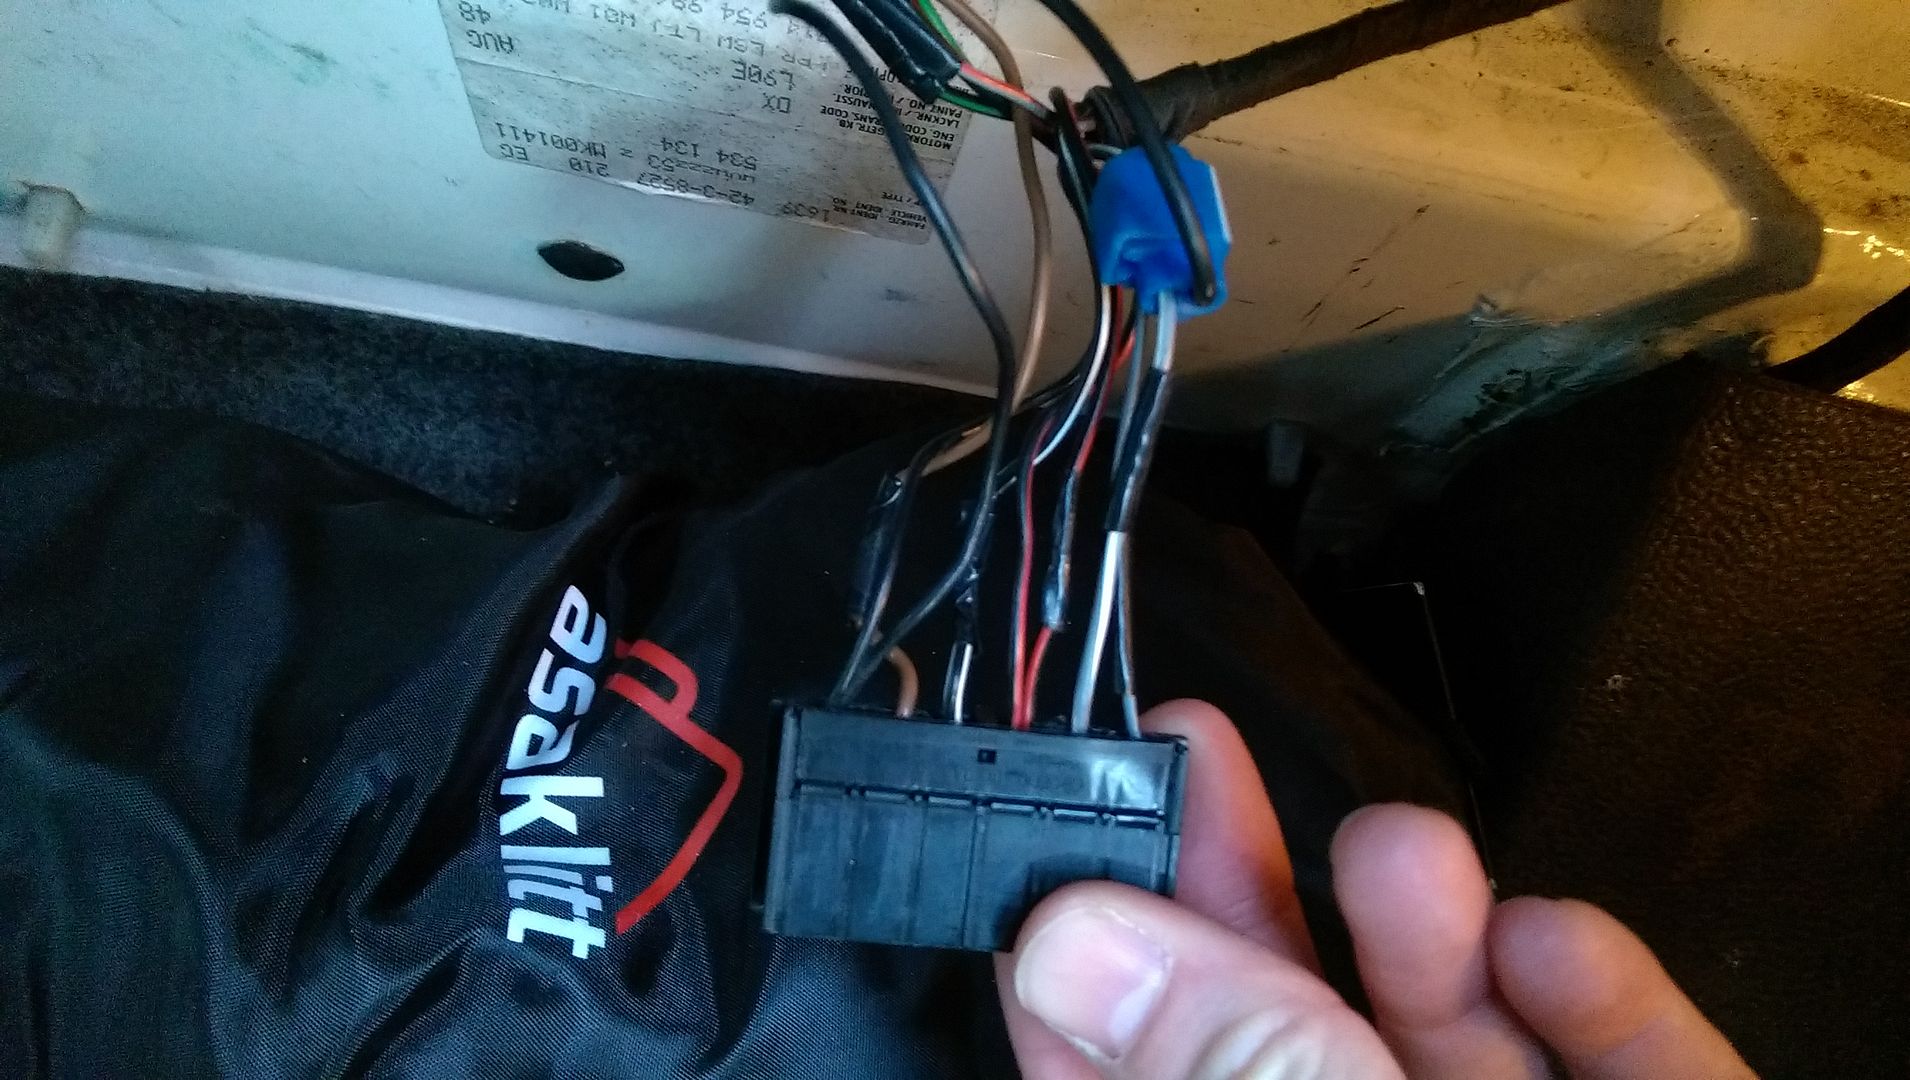
Now you may have noticed that I’ve left one in place, now this runs across the back of the car between the rear lights, with a quality job, obviously didn’t have a long enough piece of wire so joined 2 together in the middle-

Image

After checking the Hayes wiring diagram and then checking out the connections and adding an additional bulb it turns out what’s been wired in this this one is a second rear fog light. That’s right I have 2, and I like the idea so I might properly wire it in at some point.

The one thing I can’t work out if why the rest of the lighting loom was spliced into, it seems it could be for a towbar, but there’s no evidence of one ever being fitter or a hole in the boot floor to drop the cable out, suppose it will be just one of those things.
Another few jobs that also cropped up are the need to replace the top strut brace, the current one required me to drop the coolant header tank, the problem with this is the top hose now sits on top of the fuel injection lines. I’m nervous that the vibration of the engine will eventually wear through this return pipe. Next the HT leads will be replaced, just by chance I knocked one only to find out it was not only loose but when I lifted it off the dizzy it lost a small piece of metal!!!!

So jobs to be done-

Replace the cut down coolant hose
New HT
Redo fog light wiring
New upper strut brace
Replace front wheel bearings
New eyebrow
Rear modification (more on this in a few weeks)
Rear end rebuild (rear valance is missing behind the bodykit, thankfully have a replacement)


Image
GTXTRA
Posts: 3392
Joined: Mon Mar 02, 2009 9:38 pm
fill in the right answer: 10
Location: London

Re: Eefy's White Scala

Post by GTXTRA »

Hi Heath - re the rear valance there is a cut and weld option re the lower section only that Ant did on my car last year.

Before - Image

After - Image

Depends on how rotten it is under the Kit but worth checking.


Serial Rocco-ist.........
Mark H
Posts: 404
Joined: Sat Oct 11, 2014 8:55 am
fill in the right answer: 15
Location: Bolton

Re: Eefy's White Scala

Post by Mark H »

Heath

I fitted the OMP front upper strut brace, no issues at all, have a look at the next retrobeutes meeting.

mark


Mark

Alpine White
VW Scirocco GT2 (1991)
Membership Number 1296
User avatar
eefy
Posts: 999
Joined: Fri Apr 10, 2009 7:32 pm
fill in the right answer: 10
Location: Manchester

Re: Eefy's White Scala

Post by eefy »

Sean, yeah think its only the lower few inches that's gone, have a complete rear panel that can used for the bit :)

Mark, remember seeing it at the last meet you were at, will be getting one ordered this week :)


Image
User avatar
james butler
Posts: 2966
Joined: Fri Apr 24, 2009 1:54 pm
fill in the right answer: 10
Location: birmingham

Re: Eefy's White Scala

Post by james butler »

Your doin a great job so far eefy,my Rocco was goin rusty on the rear valance so I ground out the rot and primed then fibre glassed the shape back in, my thinking was its a common rust trap so fill it with something that won't rot!
You are so lucky stone chip paint is such a close Match for colour! Mines dragon green and a total mare to match up.

Keep up the good work though and totally agree on prevention bring better than having to resto the aftermath of rot.


I dont mind project cars but I HATE SANDING!!!
Mark H
Posts: 404
Joined: Sat Oct 11, 2014 8:55 am
fill in the right answer: 15
Location: Bolton

Re: Eefy's White Scala

Post by Mark H »

Heath
Got mine off ebay, complete package for all 3. Think the seller is called Strutbracer. The pack i ordered were for VW Golf Mk1.
In the USA working at present but could check at weekend when i return.

Mark


Mark

Alpine White
VW Scirocco GT2 (1991)
Membership Number 1296
User avatar
eefy
Posts: 999
Joined: Fri Apr 10, 2009 7:32 pm
fill in the right answer: 10
Location: Manchester

Re: Eefy's White Scala

Post by eefy »

Mark one already ordered and due today from them :)


Image
Mark H
Posts: 404
Joined: Sat Oct 11, 2014 8:55 am
fill in the right answer: 15
Location: Bolton

Re: Eefy's White Scala

Post by Mark H »

Nice one mate, need to fit the covers for thetop mount nuts..


Mark

Alpine White
VW Scirocco GT2 (1991)
Membership Number 1296
User avatar
eefy
Posts: 999
Joined: Fri Apr 10, 2009 7:32 pm
fill in the right answer: 10
Location: Manchester

Re: Eefy's White Scala

Post by eefy »

Okay a few updates, a few months ago I headed down to the Really Retro Show in Stafford only to get there and find I was losing coolant quickly!!!! A quick fix was done to get me home and with the need to replace a coolant hose I also decided to replace the expansion tank with a new one that Mark H had kindly given me. However this lead to the need to replace the top strut brace for a better fitting one that allowed the expansion tank to sit in its usual position and help lift the return pipe off the injection lines (the original one had been modified to sit lower under the modified strut brace). I also fitted new HT leads when one fell apart!!!!!

Before-
Image

After-
Image
Image


Image
User avatar
eefy
Posts: 999
Joined: Fri Apr 10, 2009 7:32 pm
fill in the right answer: 10
Location: Manchester

Re: Eefy's White Scala

Post by eefy »

More up to date now, I had been toying with a change to the rear of my Rocco (currently have something else mocked up as well) when Little-bro at the Really Retro Show offered me this little beauty-

Image

So I ordered some lights, strip ones of LED’s in order to reduce the power draw on the rear lights when hooked up-

Image

These were masked and roughed up ready for painting-

Image

They were painted along with a front number plate panel-

Image

Image

After plenty of measuring I finally picked up the drill and mounted the number plate panel with self-taping screw.

Image

As for wiring, that was easier than I thought it would be. There is already a hole with a grommet in it slightly to the nearside centre of the rear panel. I had already linked up the two light strips and taped the wires together before pulling them through-

Image

As for connecting them up, on my Rocco there is already and earthing point on the rear centre panel, the other “live” end was linked in to the nearside light cluster. One thing to note, first LED only work with the current running one way, this took some head scratching to say the least lol one other thing I also had to make up and extension piece for the wiring-

Image

As for attaching the strip lights, well this was simple, they came with double sided tape-

Image

Image

Due to my rear lights being tinted the rear panel was a little too red to say the least and not wanting to damage it I decided to use window tinting film so it could be easily removed. I took 4 attempt to get it to go correctly and lots of soapy water. Which transformed it to this-

Image

At last it was once again time for lots of measuring before I drill the rear of the car to fit it, and would you believe it was also in the 2 rounded indents making it even more difficult!!!!!

Once mounted the one thing I didn’t like was how much smaller it seemed to the lights, particularly with all the white body work being visible around it, I finally decided to mount it on top of the black plastic panel that old number plate sat on.

Image

I still wasn’t happy as it sat to far infront of the lights, so I marked up the plastic panel and cut out 2 slots for the panels brackets to sit through-

Image

All mounted up and much happier-

Image

I’ll be adding a strip along the top edge of the panel to seal it to the car a little better at some point but happy with it for now.


Image
G Beats
Posts: 1066
Joined: Sun Jun 21, 2009 12:19 am
fill in the right answer: 10
Contact:

Re: Eefy's White Scala

Post by G Beats »

Looking fresh as usual my brother.Peace Gee Beats.


G Beats.Been into MK 2 V.W Sciroccos since 98.Now on my fourth MK 2 Scirocco. R.I.P two MK 2 Scala DX Engine's.Sold GT 2. No longer have a mk 2 v.w Scirocco as it was stolen back in February 2020 .Or another one know have a 1980s BMW.
Post Reply